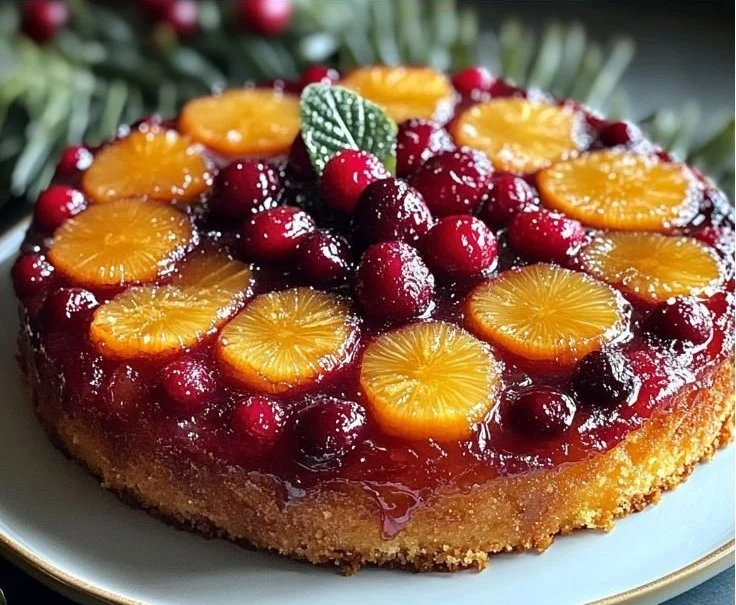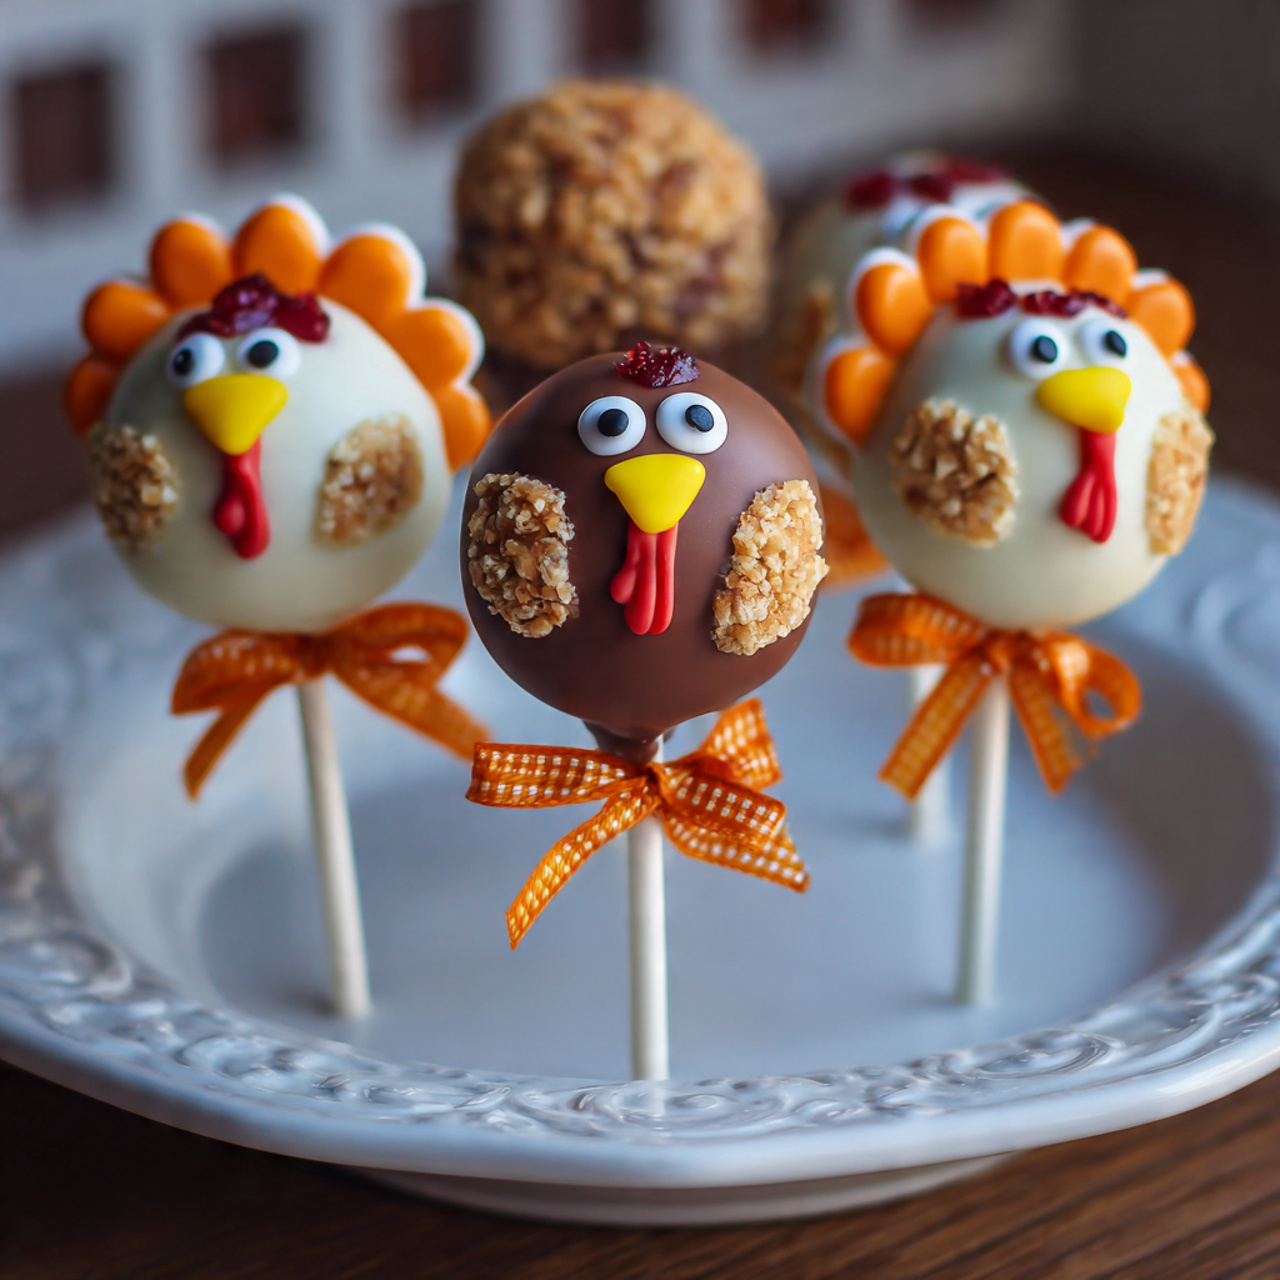
The Ultimate Turkey Cake Pops (Easy Thanksgiving Treat!)
Imagine a whole flock of the most adorable, delicious little turkeys, ready to parade across your Thanksgiving dessert table. That, my friends, is the absolute, pure-fun magic of these Thanksgiving Turkey Cake Pops. This isn’t just a dessert; it’s an edible craft project, a show-stopping centerpiece, and a guaranteed way to make every single person…
Imagine a whole flock of the most adorable, delicious little turkeys, ready to parade across your Thanksgiving dessert table. That, my friends, is the absolute, pure-fun magic of these Thanksgiving Turkey Cake Pops. This isn’t just a dessert; it’s an edible craft project, a show-stopping centerpiece, and a guaranteed way to make every single person at your gathering smile. We’re talking about a rich, moist chocolate cake truffle, dipped in a smooth chocolate shell, and decorated to festive perfection.
I promise you, there is no greater joy than presenting a platter of these charming little characters. From their crunchy pretzel tail feathers to their sweet cookie dough bite heads, every part is a delicious surprise. It’s the perfect project for a chilly afternoon, and the final result is a treat that’s as fun to look at as it is to eat.
Get ready to create the most memorable, talked-about dessert of the holiday. This is a recipe for making sweet, happy memories.

Why These Turkey Cake Pops Will Steal the Show!
You are going to have an absolute blast creating these little Thanksgiving mascots. They are a holiday must-make for so many good reasons:
- The Ultimate No-Bake Project: Keep your oven free for the main event! Once the cake is baked, the rest of this fun project is all about no-bake assembly and decorating.
- Incredibly Fun and Kid-Friendly: This is the perfect activity to get the kids involved. They can help crumble the cake, roll the balls, and assemble the adorable turkey faces and tails.
- Deliciously Rich and Fudgy: Using a moist chocolate cake and frosting as the base creates a decadent, truffle-like texture that is completely irresistible.
- Perfect for Making Ahead: You can make these cake pops a day or two in advance, making your Thanksgiving Day prep so much easier and less stressful.
Recipe Snapshot
| Prep Time | 45 minutes |
| Cook Time | 30 minutes (for cake) |
| Chilling Time | 1 hour 15 minutes |
| Total Time | 2 hours 30 minutes |
| Servings | 12 cake pops |
| Calories | ~480 kcal per pop |
| Course | Dessert |
| Cuisine | American |
| Difficulty/Method | Intermediate / Decorating |
Your Shopping List for This Festive Flock
This recipe uses a simple cake pop base and a fun assortment of candies for decoration.

→ For the Chocolate Cake Pop Base
- 1 box chocolate cake mix → Plus ingredients on the box to prepare it (usually oil, water, and eggs).
- ¼ cup chocolate frosting → Just enough to bind the cake crumbs together into a delicious, dough-like consistency.
- 4-5 squares Chocolate Almond Bark → Or other chocolate candy coating, for dipping.
- 12 cake pop sticks → Essential for making them into pops!
→ For the Turkey Decorations
- 36 mini pretzels → These make the perfect fanned-out tail feathers.
- Orange candy melts → For decorating the pretzel tails.
- 12 Cookie Dough Bites → The perfect shape and size for the turkey heads!
- Confetti sprinkles → You’ll need 24 white (for eyes) and 12 orange (for beaks).
- Daisy sprinkles → You’ll need 24 orange (for feet) and 12 pink (for wattles).
- Black icing gel → For dotting the eyes.
Let’s Make Turkeys! Your Step-by-Step Guide
Ready to create the cutest dessert of the season? Let’s break it down into fun, easy steps.
Part 1: The Cake Pop “Dough”
- Bake and Cool the Cake: First, bake the chocolate cake mix in a 9×13 pan according to the package directions. Let it cool completely. This is a crucial step!
- Crumble the Cake: Once cool, use your hands to crumble the cake into fine crumbs in a large bowl. It’s best to avoid the drier edges of the cake for the most moist texture.
- Mix the “Dough”: Add the ¼ cup of chocolate frosting to the cake crumbs. Mix with your hands or a spatula until the mixture is all moist and has the consistency of a soft dough that holds together when squeezed.
- Roll and Chill: Roll the mixture into 12 evenly-sized balls (about the size of a golf ball). Place them on a baking sheet lined with wax paper, cover, and refrigerate for at least an hour or freeze for 15 minutes. You want them firm, but not frozen solid.
Part 2: Prepare the Turkey Parts
- Make the Tail Feathers: While the cake balls chill, lay out the mini pretzels on a sheet of wax paper. Melt about ½ cup of the orange candy melts. Place the melted candy in a piping bag or a ziptop bag, snip off a small corner, and drizzle it in a zigzag motion over the pretzels to coat them well. Set aside to harden.
- Create the Turkey Heads: Melt your Chocolate Almond Bark in a deep, microwave-safe bowl according to package directions. Take a Cookie Dough Bite and dip one flat end into the melted chocolate. Immediately attach an orange confetti sprinkle for the beak, a pink daisy sprinkle for the wattle, and two white confetti sprinkles for the eyes. Use a toothpick to dot the eyes with black icing gel. Set these adorable heads aside.

Part 3: Assemble Your Flock!
- Insert the Sticks: Remove the chilled cake balls from the fridge. Dip about ½ inch of the tip of a cake pop stick into the melted almond bark, then insert it about halfway into a cake ball. This “glues” the stick in place. Let them set for a few minutes.
- Dip the Bodies: Holding the stick, dip each cake pop into the melted almond bark, ensuring it’s fully covered. Gently tap and swirl the pop to let the excess coating drip off smoothly. Place it back on the lined baking sheet (stick up) to set.
- Assemble the Turkeys: Before the coating on a pop fully hardens, it’s time to assemble! Dip the bottom edges of three decorated pretzels into the coating and attach them to the back of the cake pop in a fanned-out tail shape. Hold for a second to set.
- Attach the Head and Feet: Dip the back of a finished turkey head into the coating and press it onto the front of the cake pop. Finally, dip the edges of two orange daisy sprinkles into the coating and attach them at the bottom for feet. Repeat for all 12 pops!
Thanksgiving Turkey Cake Pops
Ingredients
Equipment
Method
- Crumble the cooled chocolate cake into fine crumbs in a large bowl, avoiding the dry edges. Mix in the frosting until the mixture has the consistency of dough.
- Roll the mixture into 12 golf ball-sized balls. Place on a lined baking sheet, cover, and refrigerate for 1 hour or freeze for 15 minutes until firm.
- Lay out pretzels on wax paper. Melt orange candy melts and drizzle in a zigzag motion over the pretzels. Let set.
- Melt the Almond Bark. For each head, dip a Cookie Dough Bite into the melted bark. Attach an orange confetti sprinkle for a beak, a pink daisy sprinkle for a wattle, and two white confetti sprinkles for eyes. Dot the eyes with black icing gel.
- Dip the tip of a cake pop stick into the melted bark and insert it halfway into a chilled cake ball. Let set.
- Dip each cake pop into the melted bark until fully covered. Let the excess drip off and place on the lined baking sheet.
- Before the coating sets, attach three pretzel ‘feathers’ to the back of the pop using a little extra coating as glue. Attach a finished ‘head’ to the front and two orange daisy ‘feet’ at the bottom. Repeat for all pops.
Notes
WiseRecipes’ Top Tips for Turkey Pop Success
These simple secrets will ensure your festive creations are foolproof and adorable.
- The Right Cake Consistency. The goal for your cake pop “dough” is a texture like play-doh—moist enough to hold together, but not wet or greasy. Start with a small amount of frosting and add more only if needed.
- Chilling is Not Optional! Chilling the cake balls until they are firm is the most important step for success. A warm, soft cake ball will fall apart the moment it hits the warm chocolate coating.
- Have Your “Mise en Place” Ready. This means having everything prepped! Before you start dipping, make sure your turkey heads are made, your tail feathers are ready, and your sprinkles are open. You have to work quickly before the chocolate sets.
- “Glue” Everything with Chocolate. The melted candy coating is your best friend. Use it as an edible glue to attach the sticks, the tails, the heads, and the feet. A little dab is all you need.
- Don’t Overheat Your Coating. Melt your almond bark or candy melts in short bursts in the microwave, stirring well in between. If it gets too hot, it can become thick and clumpy, making it impossible to get a smooth coat on your pops.
Keep Them Fresh! Storing Your Turkey Flock
These cake pops are a perfect make-ahead treat! Here’s how to store them.
- Refrigerator: Your finished turkey cake pops must be stored in the refrigerator. Place them in a tall, airtight container (if standing up) or carefully lay them down in a container with wax paper between layers. They will stay fresh for up to a week.
- Freezing: These freeze beautifully! Once the chocolate is fully set, you can place them in a freezer-safe airtight container for up to 2 months. Let them thaw in the refrigerator before serving.
FAQs: Your Turkey Cake Pop Questions, Answered!
Why did my cake pops fall off the stick?
This is a classic cake pop problem! It’s usually because the crucial first step was missed: dipping the tip of the stick in melted chocolate before inserting it into the cake ball. This creates a strong “glue” that holds it all together.
My chocolate coating is cracking. What can I do?
Cracks happen when the temperature difference between your cake ball and your coating is too extreme. If your cake balls are frozen solid, the coating will crack as it sets. That’s why the recipe recommends chilling until firm, but not frozen. Let them sit at room temp for 5 minutes before dipping if they seem too cold.
I can’t find Cookie Dough Bites. What’s a substitute?
No problem! A large gumdrop, a caramel candy, a small peanut butter cup, or even a small, round truffle would all work well as a substitute for the head.
This seems like a lot of work. Are there any shortcuts?
The main shortcut is already built in by using a cake mix! To save more time, you can simplify the decorations. Instead of the full turkey head, you could just use candy eyes and a candy corn beak directly on the cake pop. The pretzel tail is what really sells the “turkey” look!
Final Thoughts: Your Most Charming Thanksgiving Treat
There is nothing more fun than an edible craft that brings so much personality to the dessert table. These Turkey Cake Pops are a celebration of creativity, a little bit of patience, and the pure joy of making something that makes people happy. I hope this project brings a lot of fun and deliciousness to your Thanksgiving celebration. Happy Gobble-Gobble!