The Ultimate Cake Eyeballs (A Spooky & Easy Halloween Treat!)
Imagine setting down a platter at your Halloween party, and instead of a normal dessert, your guests are greeted by a wild, colorful collection of spooky, edible eyeballs staring back at them. That, my friends, is the pure, unadulterated fun of these incredibly easy and delicious Cake Eyeballs. They are the perfect creepy-crawly treat that’s…
Imagine setting down a platter at your Halloween party, and instead of a normal dessert, your guests are greeted by a wild, colorful collection of spooky, edible eyeballs staring back at them. That, my friends, is the pure, unadulterated fun of these incredibly easy and delicious Cake Eyeballs. They are the perfect creepy-crawly treat that’s more fun than frightening.
Here’s my hot take: the best holiday treats are the ones that are also an activity. This recipe is my absolute go-to for Halloween because it’s less about perfect, precise baking and more about getting a little messy and creative. It’s my secret to keeping the kids entertained for an afternoon, and the result is the coolest, most talked-about dessert on the block.
I promise you, this is one of the most forgiving and fun recipes you’ll ever make. We’re using a brilliant cake mix and frosting shortcut, which means you can focus on the best part: dipping and decorating! It’s the perfect project for bakers of all skill levels, and there’s no way to mess it up—the weirder they look, the better!
Get ready to unleash your inner mad scientist and create a platter of spooky, vibrant, and delicious cake balls that will be the undisputed star of any Halloween celebration.

Why These Cake Eyeballs Are the Perfect Halloween Treat!
You are going to have an absolute blast making these, I guarantee it. They are a Halloween tradition in my house for so many good reasons. Here’s why you’ll love them:
- Super Fun to Decorate: This is where the magic happens! You can create spooky bloodshot eyes, silly monster eyes, or creepy alien eyes. It’s an edible art project for the whole family.
- Brilliantly Easy Shortcut: We’re using a box of cake mix and a tub of pre-made frosting. This keeps things simple and lets you focus on the fun decorating part, not the baking.
- The Perfect Party Centerpiece: A platter of these colorful, spooky eyeballs is a guaranteed show-stopper and conversation starter at any Halloween party.
- No Special Skills Required: If you can crumble cake and roll a ball, you can make these. Imperfection is part of their charm, so there’s no pressure!
- Great for Making Ahead: You can make the cake balls ahead of time and keep them chilled, so all you have to do on party day is the fun dipping and decorating.
Recipe Snapshot
| Prep Time | 1 hour |
| Cook Time | 35 minutes |
| Chilling Time | 2+ hours |
| Total Time | Approx. 3 hours 35 minutes |
| Servings | 24 cake balls |
| Calories | 182 kcal per ball |
| Course | Dessert, Snack |
| Cuisine | American |
| Difficulty/Method | Easy / Baking & Decorating |
Your Shopping List for This Spooky Project
This is less of a strict shopping list and more of a creative mission! Here are the basics you’ll need to get started.
→ For the Cake Ball “Eyeball” Base
- 1 package cake mix of your choice → White, yellow, or even red velvet for a spooky surprise inside!
- 1 cup prepared frosting of your choice → A classic vanilla or cream cheese frosting works perfectly.
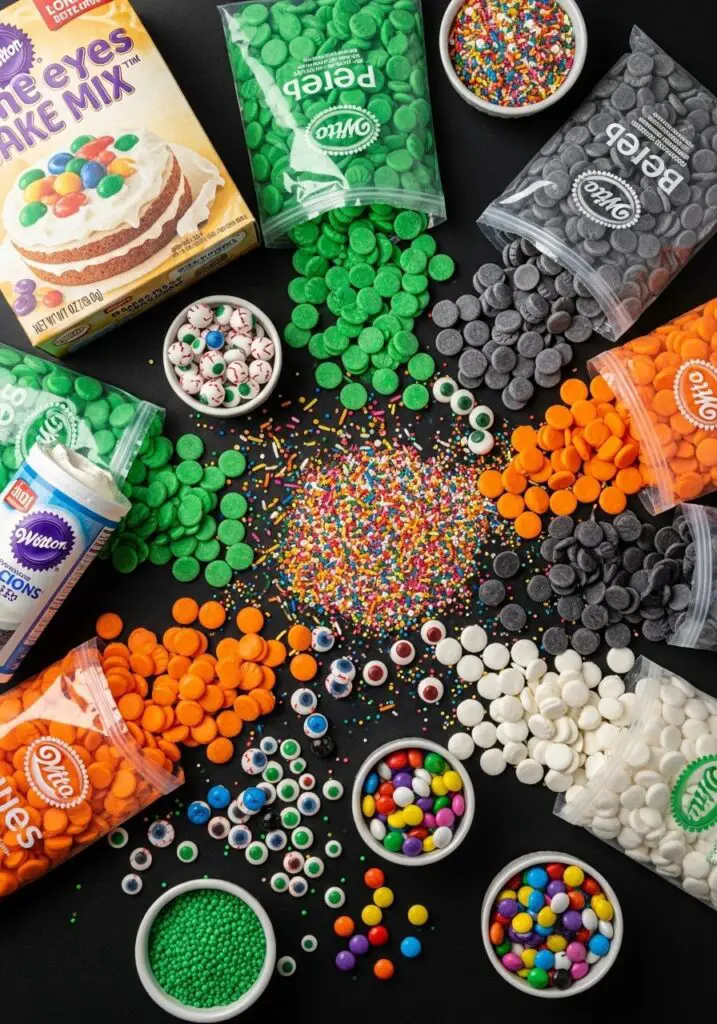
→ For the Spooky Decorations
- 1 package (12 oz) each of various candy melts → The more colors, the better! Think orange, pink, blue, green, black, and white. Wilton is a great brand.
- Your choice of decorations: This is where you can go wild!
- Candy eyeballs (a must!)
- Red candy writer or red sprinkles for “bloodshot” veins
- Colorful sprinkles, nonpareils, and colored sugar
- Candy-coated sunflower kernels or jumbo sprinkles for pupils
Let’s Get a Little Mad Scientist! Your Step-by-Step Guide
Ready to create some spooky, delicious magic? Let’s break this down into three fun and easy phases.
Part 1: The Cake Ball Foundation
- Bake the Cake: First, just prepare and bake your cake mix according to the package directions in a greased 13×9-inch pan. Let it cool COMPLETELY on a wire rack. Don’t rush this! A warm cake will make a greasy mess.
- Crumble and Mix: Once the cake is totally cool, crumble it up into a large bowl. You want fine, even crumbs. Now, add the frosting and mix it all together with a spatula or your hands until it’s a thick, dough-like consistency.
- Roll ‘Em Up: Scoop out the mixture and roll it between your palms into 1.5-inch balls. Place them on a parchment-lined baking sheet.
Part 2: The Crucial Chill
- Freeze or Refrigerate: This step is NON-NEGOTIABLE! Place the baking sheet of cake balls in the freezer for at least 2 hours or in the refrigerator for at least 3 hours. They need to be very firm and cold. If they’re soft, they will fall apart when you try to dip them in the warm candy coating. Trust me on this one.
Part 3: The Spooky Transformation!
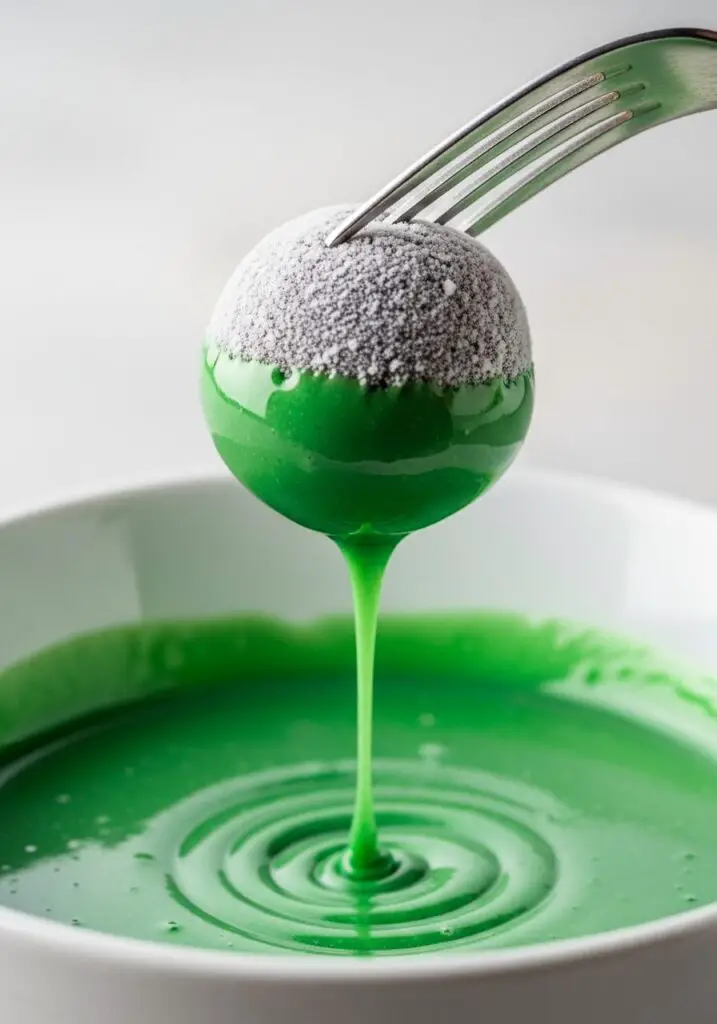
- Melt the Candy: In separate, microwave-safe bowls, melt your candy melts according to their package directions. Usually, this means microwaving in short 30-second bursts and stirring well in between to prevent overheating.
- Dip the Eyeballs: Drop one of your chilled cake balls into a bowl of melted candy. Use a fork to gently roll it around until it’s fully coated. Lift it out with the fork and tap the fork gently on the side of the bowl to let any excess coating drip off.
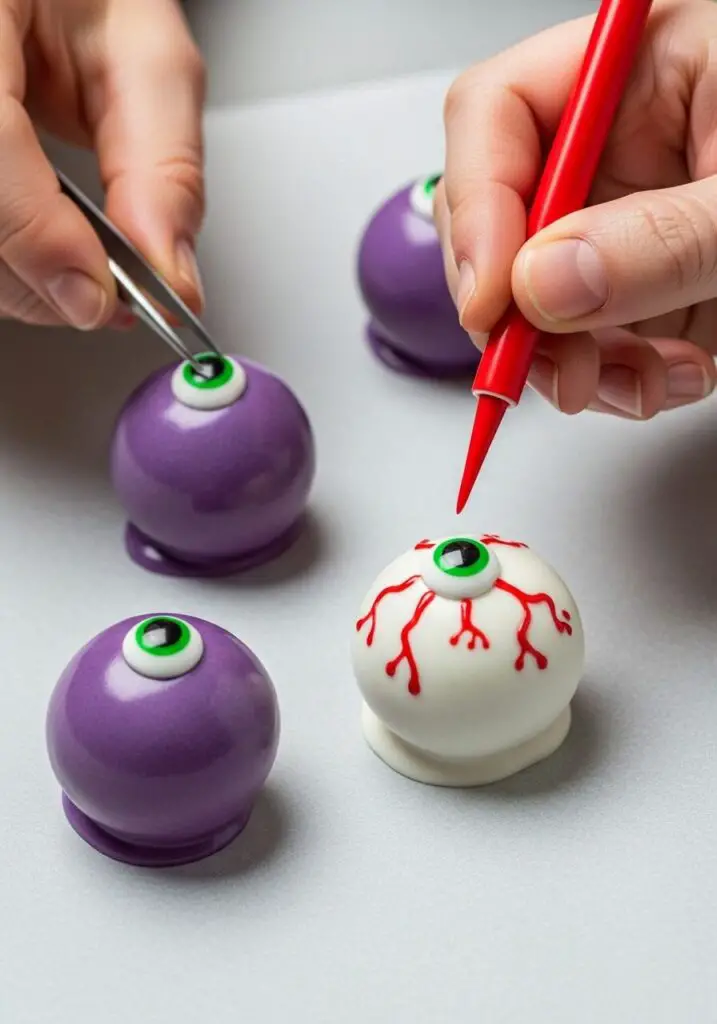
- Decorate and Set: Carefully slide the coated cake ball off the fork and onto your parchment-lined baking sheet. Now, while the coating is still wet, add your decorations! Press on a candy eyeball for the pupil, draw on some red veins, or add some crazy sprinkles. Let them stand at room temperature until the candy coating is completely firm.
WiseRecipes’ Top Tips for Perfect Cake Eyeballs
I’ve made hundreds of these little guys for parties. Here are my essential secrets for success.
- The Chill is Everything. I’m saying it again because it’s that important. Cold, firm cake balls are the key to a smooth dipping process. If your cake balls start to soften while you’re working, pop them back in the freezer for 15 minutes.
- Be Gentle with Your Candy Melts. The biggest mistake is overheating them, which makes them thick and clumpy. Microwave in short intervals and stir, stir, stir. If your melts are still too thick, you can stir in a TINY bit (like 1/2 teaspoon) of vegetable shortening or coconut oil to smooth them out.
- Master the Two-Fork Trick. Use one fork to drop and roll the cake ball in the coating. Use that same fork to lift it out. Then, use a second clean fork or a toothpick to gently push the coated ball off the first fork and onto your parchment paper. This prevents a huge, messy “foot” of extra coating at the base.
- Set Up a Decoration Station. Before you melt a single candy wafer, get all your decorations ready. Open your sprinkles and put them in little bowls. Have your candy eyeballs out and ready to go. You have to work quickly before the coating sets!
- Embrace the Weird! This is Halloween! Don’t stress about making them look perfect. Lopsided pupils, weirdly shaped eyeballs, and crazy color combos just make them look spookier and more fun.
Creative Twists: Spooky Eyeball Ideas!
Here’s the best part! Use these ideas as a starting point for your own creepy creations:
- Classic Bloodshot Eyes: Dip in white candy melts. Once set, use a red food-safe marker or a toothpick dipped in red candy melts to draw squiggly vein lines.
- Monster Mash Eyeballs: Dip in a bright color like green or purple. While the coating is wet, stick on 2 or 3 candy eyeballs instead of just one.
- Zombie Eyes: Create a spooky grey by mixing a little black candy melt into the white. Add some red “veins” and a slightly off-center black pupil.
- Cat Eyes: Dip in yellow or green melts. Use a black candy melt or a piece of a black sprinkle to create a thin, vertical slit for the pupil.
- Galaxy Eyeballs: Drizzle a few lines of a contrasting color (like blue and purple) over your melted white candy. Gently swirl once with a toothpick, then dip your cake ball to create a marbled, galaxy effect.
- Gory Eyeballs: Use red velvet cake for a bloody surprise inside when you bite into them!
- Spiderweb Eyes: Dip in orange melts. Use a black candy writer to draw a spiral, then drag a toothpick from the center outwards to create a spiderweb.
- Sprinkle Monster Eyes: Dip the cake ball in your chosen color, then immediately roll the entire thing in colorful nonpareils before adding a single candy eyeball in the middle.
Keep Them Spooky! Storing Your Cake Eyeballs
These are a fantastic make-ahead treat. Here’s how to store them to keep them looking their best.
- Refrigerator: This is the best place for them. Store the finished cake eyeballs in a single layer in an airtight container in the refrigerator. They will stay fresh and delicious for up to a week.
- Freezing: You can freeze them at two stages! Freeze the undecorated, chilled cake balls in a freezer-safe bag for up to 3 months. Then, just thaw and dip whenever you’re ready. You can also freeze the fully decorated cake eyeballs in an airtight container for up to a month.
Easy Halloween Cake Eyeballs
Ingredients
Method
- Prepare and bake cake mix according to package directions in a 13×9-in. baking pan. Allow to cool completely.
- Crumble the cooled cake into a large bowl. Add the frosting and mix well with your hands or a spatula until a thick, dough-like mixture forms.
- Shape the mixture into 1 1/2-inch balls and place them on a parchment-lined baking sheet.
- Chill the cake balls until very firm: at least 2 hours in the freezer or 3 hours in the refrigerator. This step is crucial.
- In separate microwave-safe bowls, melt the candy melts in short intervals, stirring until smooth.
- Using a fork, dip each chilled cake ball into the melted candy coating, allowing the excess to drip off.
- Place the coated ball on the parchment paper and immediately add your decorations while the coating is still wet.
- Let stand at room temperature until the candy coating is completely set.
Notes
FAQs: Your Cake Eyeball Questions, Answered!
Help! My cake balls are falling apart when I dip them!
This is the most common problem, and the answer is almost always the same: they are not cold enough! Your cake balls need to be very firm and thoroughly chilled to withstand the warm, melted candy coating. If they start to crumble, pop the whole tray back in the freezer for another 20-30 minutes before you continue.
Can I use white chocolate instead of candy melts?
You can, but you have to be careful. Candy melts are designed to melt smoothly and set up hard. Real white chocolate can be trickier to melt (it can “seize” or get clumpy) and can be softer when it sets. If you want to color white chocolate, you MUST use oil-based candy coloring, as regular water-based food coloring will cause it to seize up instantly.
Can I use a homemade cake and frosting?
Absolutely! A denser cake, like a pound cake or a sturdy butter cake, works best because it creates firmer crumbs. For the frosting, a classic American buttercream or cream cheese frosting is perfect. Avoid using light, whipped-style frostings, as they don’t have enough structure to bind the cake crumbs together properly.
How do I get the candy coating so smooth?
The secret is to not overheat it and to stir well. Microwave your candy melts in short 30-second bursts at 50% power, stirring thoroughly between each interval, even if they don’t look melted. The residual heat will melt the wafers. Tapping the fork on the side of the bowl to let the excess drip off is also crucial for a smooth, even coat.
My Final Thoughts: The Ultimate Halloween Fun
These Cake Eyeballs are more than just a dessert; they are a whole Halloween activity. They are a fun, slightly spooky, and incredibly delicious way to get creative in the kitchen with your family. I hope you have an absolute blast making (and eating!) these creepy, cool creations for your next party!