Classic Jam-Filled Thumbprint Cookies (A Holiday Baking Essential)
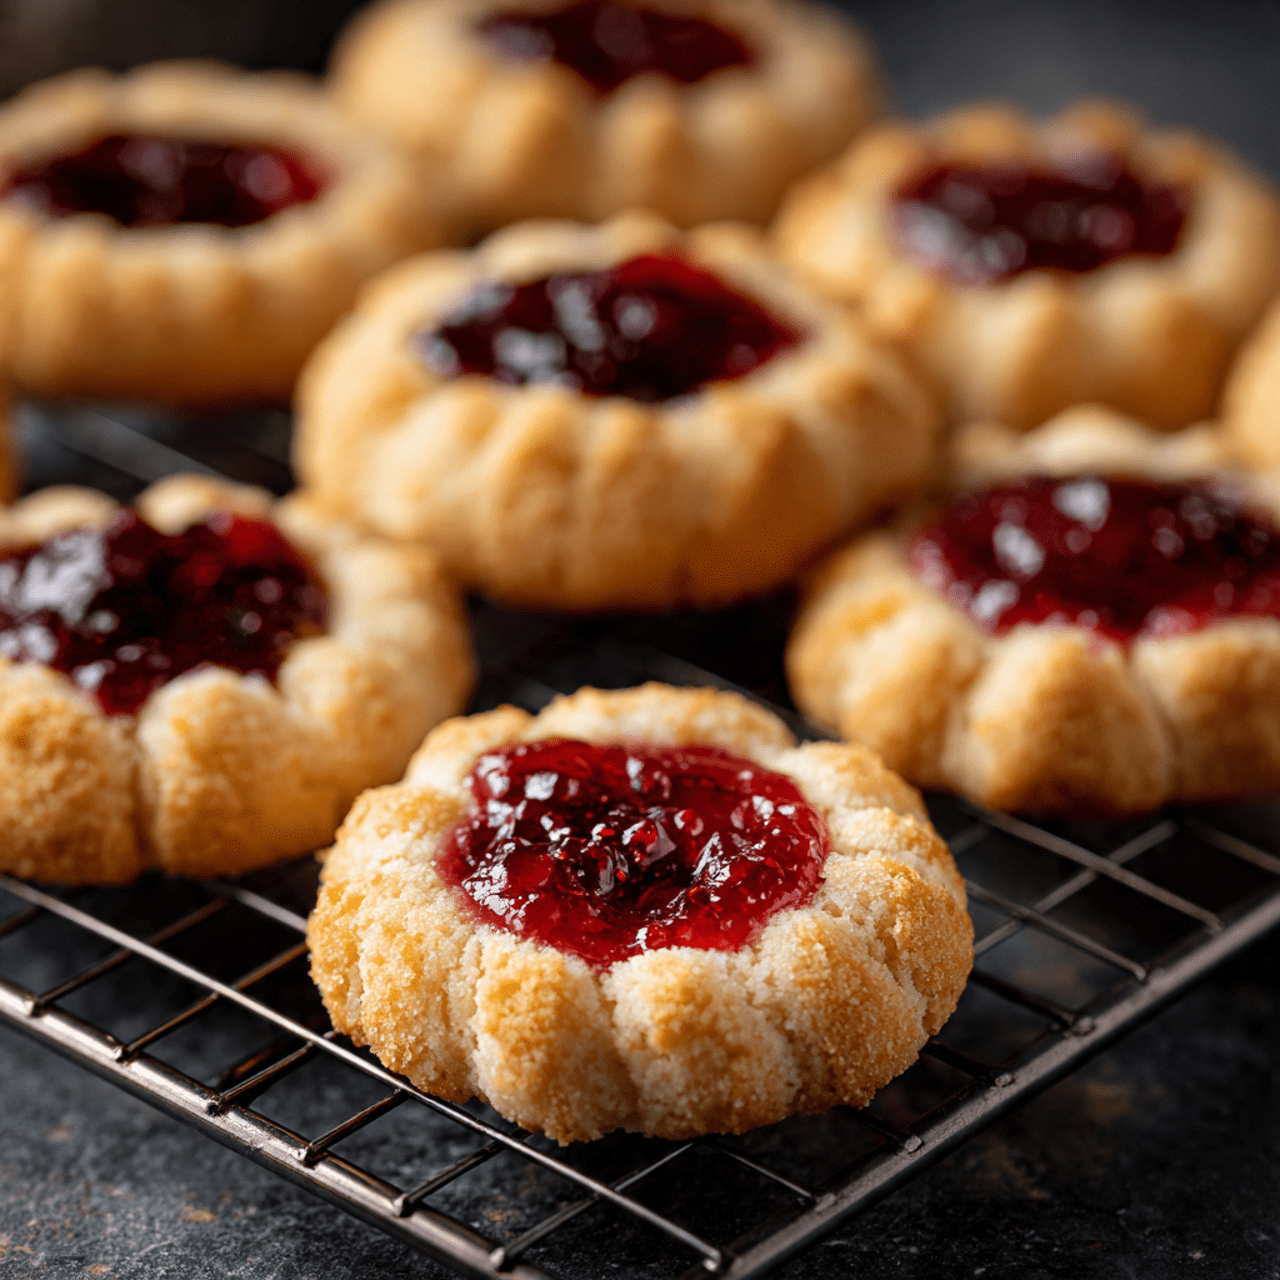
There is something undeniably magical about a tray of cookies that look like glistening jewels. These Classic Jam-Filled Thumbprint Cookies are the crown jewels of the holiday season. Imagine a rich, buttery shortbread base, rolled in crunchy, toasted nuts, and filled with a pool of bright, sweet fruit preserves. They are a study in perfect…
There is something undeniably magical about a tray of cookies that look like glistening jewels. These Classic Jam-Filled Thumbprint Cookies are the crown jewels of the holiday season. Imagine a rich, buttery shortbread base, rolled in crunchy, toasted nuts, and filled with a pool of bright, sweet fruit preserves. They are a study in perfect contrasts: the snap of the nuts against the tender crumb of the cookie, and the buttery richness cutting through the tart sweetness of the jam.
I promise you, these cookies are as satisfying to make as they are to eat. There is something wonderfully tactile and rhythmic about rolling the dough, dipping it in egg whites, and pressing your thumb into the warm centers. They are sturdy enough to ship to loved ones, beautiful enough to be the centerpiece of a cookie swap, and delicious enough that you will want to keep a secret stash just for yourself.
Get ready to bake a batch of pure nostalgia. These buttery, nutty, jammy delights are about to become your new favorite holiday tradition.

Why These Thumbprints Are the Crown Jewel of Cookie Trays
You are going to fall in love with the texture and versatility of these cookies. They stand out among other holiday treats for so many reasons:
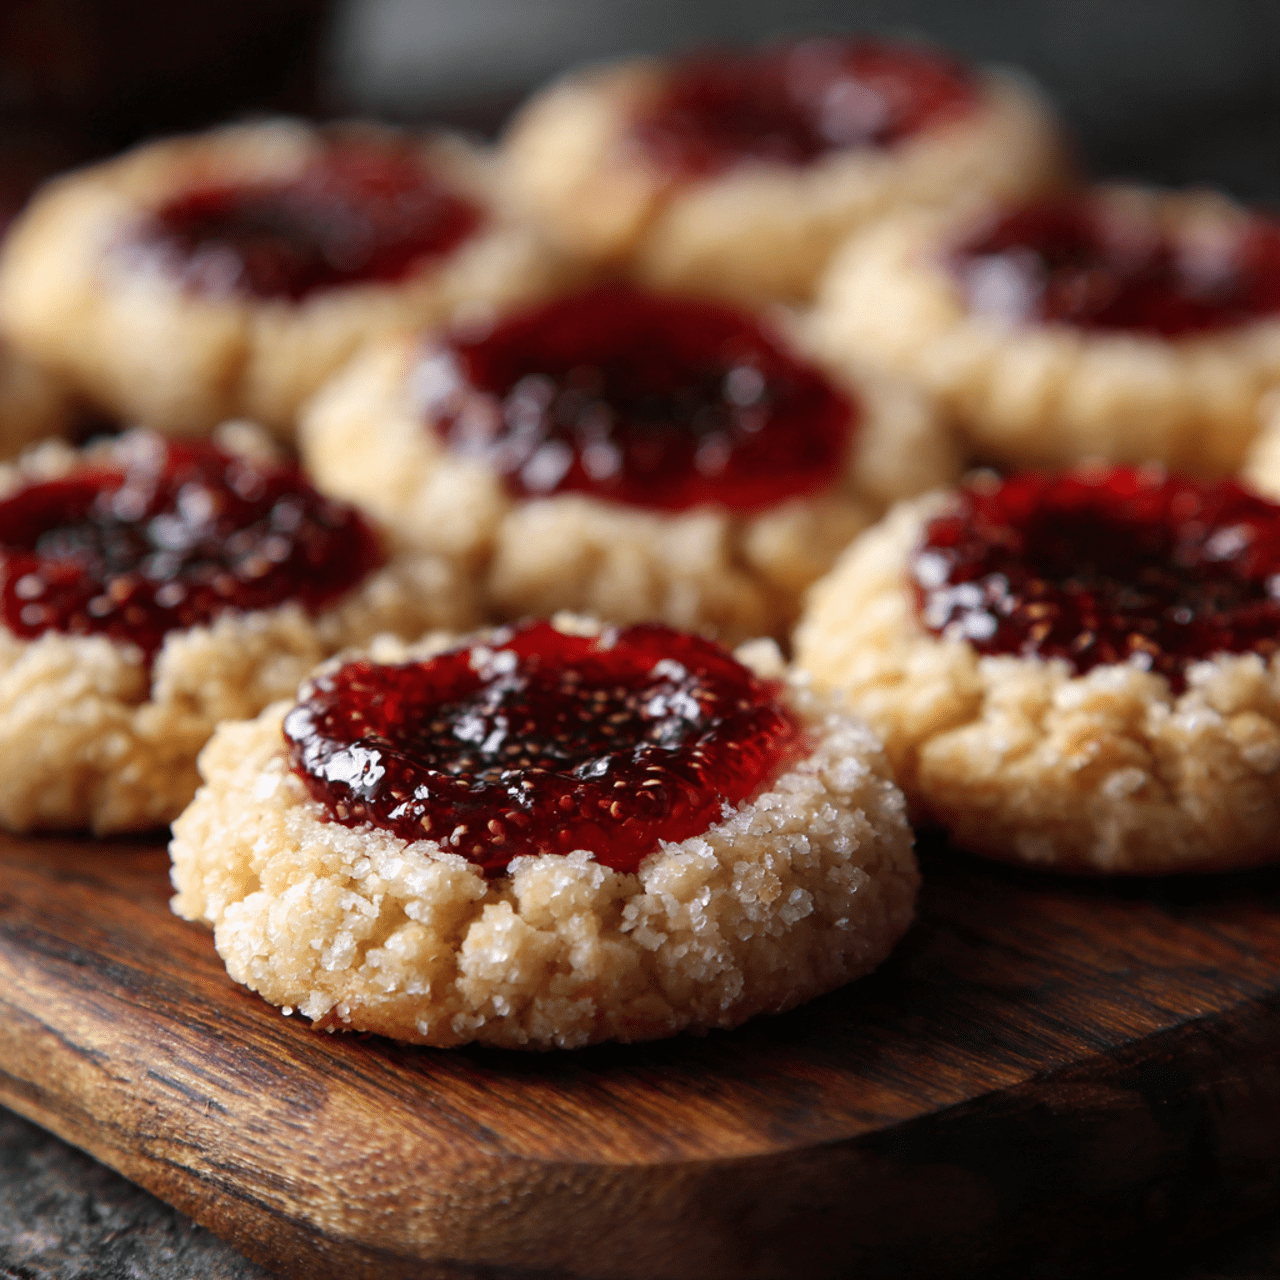
- The Perfect textural Balance: It’s a triple threat of texture: the crunchy exterior of chopped nuts, the melt-in-your-mouth buttery interior, and the sticky, sweet finish of the jam.
- A “No-Crack” Technique: Many thumbprint recipes result in cracked, sad-looking edges. This recipe uses a special technique of indenting the cookies partway through baking to ensure a perfect shape every time.
- Beautifully Customizable: While red raspberry and apricot jams are traditional for a festive look, you can fill these with anything from chocolate ganache to salted caramel or lemon curd.
- Nutty, Rich Flavor Profile: The addition of almond flour or pecan meal directly into the dough enhances the buttery flavor and gives the cookie a more sophisticated, bakery-style taste.
- Yields a Huge Batch: This recipe makes five dozen cookies! It is absolutely perfect for filling holiday tins, bringing to large parties, or freezing for later.
Recipe Snapshot
| Prep Time | 1 hour |
| Bake Time | 14 minutes |
| Total Time | 2 hours 42 minutes (includes chilling) |
| Servings | 60 cookies (5 dozen) |
| Calories | ~95 kcal per cookie* |
| Course | Dessert, Cookies |
| Cuisine | American / European |
| Difficulty/Method | Intermediate / Baking |
*Nutrition information is an estimate and should only be used as an approximation.
Your Shopping List for Buttery Perfection
This recipe relies on high-quality basics and your favorite preserves. Here is what you need:

→ For the Buttery Dough
- 16 tablespoons (2 sticks) unsalted butter → Softened to room temperature for easy creaming.
- ½ cup granulated sugar → Provides structure and a crisp edge.
- ½ cup light or dark brown sugar → Adds moisture and a depth of flavor.
- 2 large eggs, separated → You will use the yolks in the dough for richness and the whites for dipping.
- 1 teaspoon pure vanilla extract → The essential flavor booster.
- ½ teaspoon table salt → To balance the sweetness.
- ½ cup almond flour or pecan meal → This adds a wonderful nutty undertone to the dough itself.
- 2 ½ to 3 cups all-purpose flour → Start with the lesser amount and add more only if the dough is too sticky.
→ For the Coating and Filling
- ¾ to 1 cup finely diced chopped nuts → Pecans, walnuts, or almonds work beautifully. Make sure they are chopped very fine so they stick well.
- ¾ cup filling of choice → Raspberry jam, apricot preserves, or thick icing are classic choices.
Let’s Bake Cookies! Your Step-by-Step Guide
Ready to create these sparkling jewels? This process requires a little chilling time, so plan accordingly!
Part 1: Make and Chill the Dough
- Cream the Butter and Sugars: In a large bowl with an electric mixer, beat the softened butter, granulated sugar, and brown sugar until the mixture is very light, fluffy, and pale. This aerates the dough for a tender bite.
- Add Wet Ingredients: Beat in the egg yolks (save the whites for later!), vanilla extract, and salt until smooth.
- Mix Dry Ingredients: Add the nut flour (almond or pecan) and the smaller amount (2 ½ cups) of all-purpose flour. Stir until well blended.
- Check Consistency: Check the dough. It should be soft but workable. If it is extremely sticky and sticking to your fingers, add the remaining flour a tablespoon at a time until it is manageable.
- Chill: Cover the bowl tightly with plastic wrap and refrigerate for 1 hour. This solidifies the butter and makes the dough much easier to roll without melting in your hands.
Part 2: Roll, Dip, and Coat
- Prep: Preheat your oven to 350°F. Line two baking sheets with parchment paper. (Do not just grease the pans; parchment is best here).
- Prep the Coating Station: Take your egg whites (which should be at room temperature by now) and whip them in a small bowl until they are foamy. Place your finely chopped nuts in a separate shallow bowl.
- Shape the Balls: Break off pieces of the chilled dough and roll them between your palms to form 1-inch balls.
- Dip and Roll: Dip each ball into the foamy egg whites, shaking off any excess. Then, immediately roll the ball in the chopped nuts until fully coated. Place the cookies about 2 inches apart on the prepared baking sheets.

Part 3: The Two-Stage Bake
- First Bake: Bake the cookies for 8 minutes.
- The Thumbprint: Remove the baking sheet from the oven. Working quickly but carefully, use your thumb (or the back of a round teaspoon measuring spoon) to press a deep indentation into the center of each cookie. Because they are partially baked, they will hold this shape without cracking!
- Second Bake: Return the pans to the oven and bake for another 4 to 6 minutes, or until the nuts are toasted and the cookies are a light golden brown.
- Cool and Fill: Remove the cookies from the oven and transfer them to a wire rack to cool completely. Once cool, spoon about ½ teaspoon of your chosen jam or filling into the center of each cookie.
Classic Jam Thumbprint Cookies
Ingredients
Equipment
Method
- In a large bowl, beat the butter, granulated sugar, and brown sugar until very light and fluffy.
- Beat in the egg yolks (reserve whites), vanilla, and salt.
- Add the nut flour and 2 1/2 cups of the all-purpose flour, stirring until well blended. If dough is too sticky, add remaining flour sparingly.
- Cover and chill the dough for 1 hour.
- Preheat oven to 350°F. Line two baking sheets with parchment paper. Whip egg whites in a small bowl until foamy.
- Roll dough into 1-inch balls. Dip balls into egg whites, then roll in chopped nuts. Place 2 inches apart on baking sheets.
- Bake for 8 minutes. Remove from oven and quickly make a deep thumbprint indentation in the center of each cookie.
- Return to oven and bake for another 4-6 minutes until light golden brown. Cool on a wire rack.
- Once cooled, fill the center of each cookie with about 1/2 teaspoon of jam.
Notes
WiseRecipes’ Top Tips for Cookie Perfection
These simple secrets will ensure your thumbprints are bakery-quality every single time.
- Don’t Skip the Chill. This dough is rich in butter. If you skip the chilling step, the cookies will spread into flat pancakes in the oven instead of holding their round shape. The hour in the fridge is mandatory!
- Finely Chop the Nuts. If your nuts are too chunky, they won’t stick to the cookie and will fall off after baking. You want a texture almost like coarse sand or pebbles, not large chunks. A food processor is great for this—just don’t turn it into nut butter!
- The Indentation Trick. Many recipes tell you to make the thumbprint before baking. I find that baking them for 8 minutes first allows the structure to set slightly. This means when you press them down, they don’t crack or split at the edges, keeping that perfect round shape.
- Fill After Cooling. Unless you want caramelized, chewy, sticky jam (which can be tasty but messy), wait until the cookies cool to fill them. This keeps the jam bright, fresh, and glistening like a jewel.
- Use Room Temp Egg Whites. Egg whites lose their surface tension better when they are not ice cold, making it easier to get a thin, even coating on the dough balls so the nuts stick without the cookie tasting eggy.
Creative Twists: Customize Your Cookie Box
This dough is a blank canvas for your holiday creativity.
- Turtle Thumbprints: Roll the dough in chopped pecans. After baking, fill the center with caramel sauce and drizzle with melted chocolate.
- Chocolate Kiss: Instead of jam, press a chocolate kiss into the center of the cookie immediately after taking them out of the oven (after the second bake).
- Lemon Drop: Use almond flour in the dough and fill the center with bright yellow lemon curd.
Keep Them Fresh! Storing Your Jewels
These cookies are excellent for making ahead of the holiday rush.
- Room Temperature: Store the filled cookies in an airtight container at room temperature for up to 5 days. If stacking them, place wax paper between layers to keep the jam from sticking.
- Freezing (Unfilled): The baked, unfilled cookies freeze beautifully for up to 3 months. Thaw them and fill with jam just before serving.
- Freezing (Filled): You can freeze filled cookies, but the jam may become a bit tacky upon thawing. They are still delicious, but best eaten quickly after thawing.
FAQs: Your Thumbprint Cookie Questions, Answered!
Why did my cookies spread so much?
Spreading usually happens if the dough wasn’t chilled long enough or if there wasn’t enough flour. It’s also possible the butter was melted rather than softened when you started. Make sure to measure your flour carefully and keep that dough cold!
Can I make these nut-free?
Yes! You can omit the nut flour in the dough (replace it with an equal amount of all-purpose flour) and roll the outside of the cookies in granulated sugar or sprinkles instead of chopped nuts.
Can I use store-bought almond flour?
Absolutely. Store-bought almond flour works perfectly. Just make sure it is fresh, as nut flours can go rancid if stored in a warm cupboard for too long.
My jam is too runny. What can I do?
If your jam is very loose, you can boil it in a small saucepan for a few minutes to reduce the liquid before filling the cookies. Alternatively, use a high-quality preserve or thick fruit spread rather than a jelly.
Final Thoughts: A Timeless Treat
There is a reason Thumbprint Cookies appear on almost every holiday platter. They are the perfect bite—sweet, savory, crunchy, and soft. They look like little gems and taste like pure comfort. Whether you stick to classic raspberry or get creative with chocolate and caramel, this recipe will give you the perfect base for all your holiday baking adventures. Happy baking!