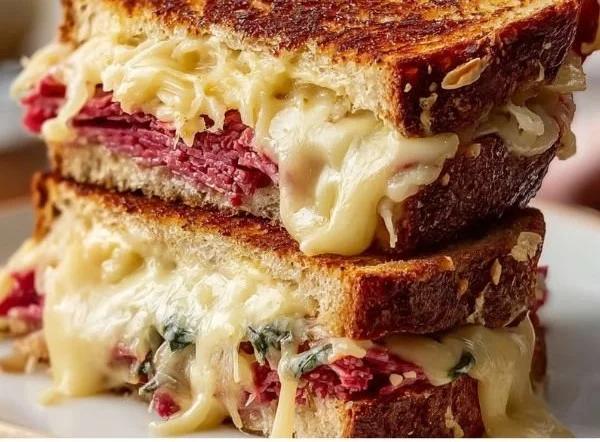
Ultimate Cheesy Ground Beef Melt
My First Time Making This The first time I made the Ultimate Cheesy Ground Beef Melt I had no idea it would become the weeknight hero it is now. I was coming home late, the kitchen smelled like onions and something comforting was simmering on the stove, and a friend asked if I could throw…
My First Time Making This
The first time I made the Ultimate Cheesy Ground Beef Melt I had no idea it would become the weeknight hero it is now. I was coming home late, the kitchen smelled like onions and something comforting was simmering on the stove, and a friend asked if I could throw together something cheesy and satisfying. It turned out all I needed was 1 lb ground beef and one chopped onion to start the flavor base. I remember the sizzle as the onion softened and the beef hit the skillet, that hot, savory hiss that announces dinner is happening. If you like recipes that turn humble pantry items into something indulgent, this one does it. For a fun spin on ground beef meals, I also keep a couple of bookmarked variations like a cheesy ground beef and potatoes recipe where the same browned beef stretches into something else entirely.
The Ingredient Lineup
I never make this without the basics: 1 lb ground beef, a single onion finely chopped so it melts into the meat, and 2 cups of shredded cheese — cheddar, mozzarella, or a blend if you want the best of both worlds. You need 4 slices of bread, whatever you prefer (I often use a sturdy sourdough), and 2 tablespoons of butter to grill the outsides to golden perfection. Salt and pepper are essential to season the beef, and I always set out optional toppings like pickles, mustard, or ketchup so people can dress their melt how they like. If you want to keep things lighter or add vegetables, this fits alongside other quick ground beef dinners such as the ultimate ground beef and zucchini skillet, which is a great midweek companion.
How I Cook It (without the drama)
I start by heating a skillet over medium heat and cooking the chopped onion until it softens and becomes translucent. The aroma is that warm, sweet onion smell that tells you dinner is coming. Then I add the ground beef, season it with salt and pepper, and cook until browned, breaking it up and letting bits caramelize on the pan for flavor. While the beef is doing its thing I butter one side of each slice of bread; this is a small move that makes a big difference because it guarantees that crisp, golden exterior.
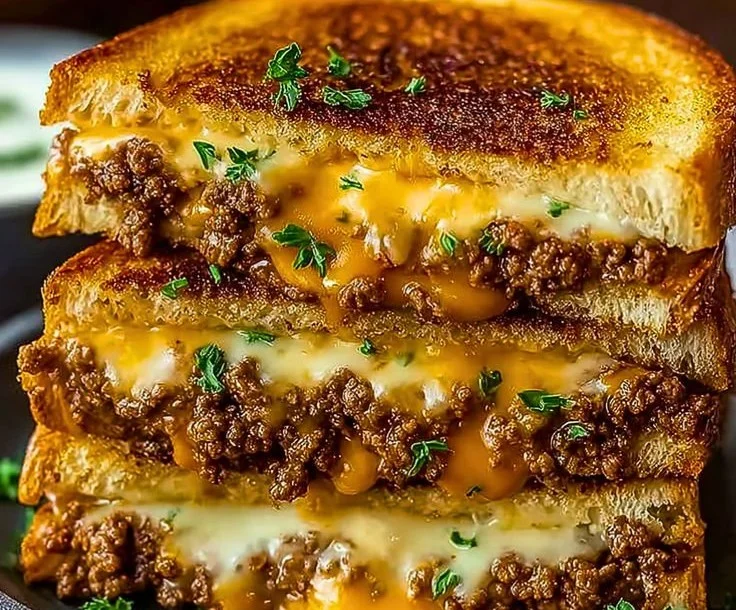
When the beef is done — when there is no pink left and the juices have reduced a little — I assemble the sandwiches directly on the counter. On the non-buttered side of a slice of bread I scoop a generous portion of the beef mixture and sprinkle it with the shredded cheese. I like a thick blanket of cheese that melts into every nook. Top with the other slice of bread, making sure the buttered side is facing out. I heat a separate skillet over medium heat and grill the sandwich until it’s golden brown on both sides and the cheese is fully melted, which usually takes about 3-4 minutes per side. You’ll know it’s right when you hear the crisp crunch as you press the spatula down and when the cheese starts to ooze at the edge. Remove from the heat, slice, and serve warm with whatever optional toppings you love.
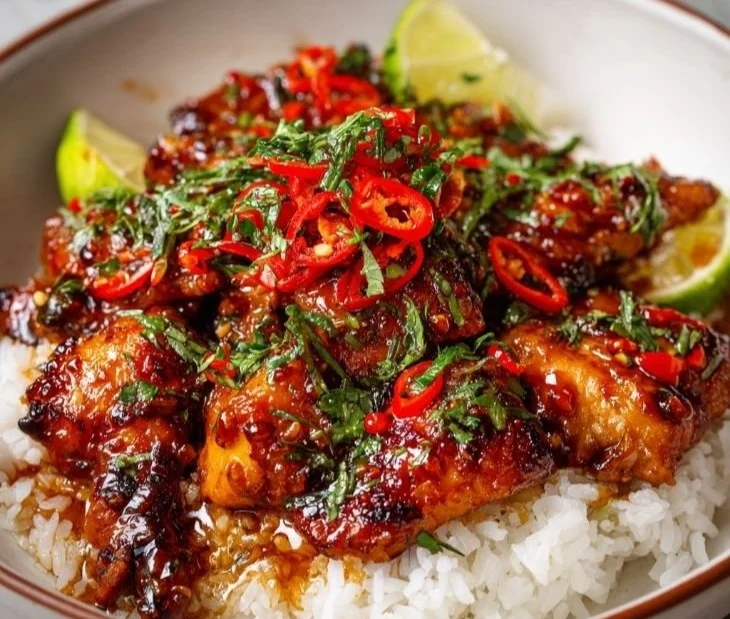
If you are a protein enthusiast, you might enjoy ideas like the high-protein ground beef power bowls I sometimes make on days I want similar flavors but in a bowl.
Little Tricks That Save the Day
I have a few tricks I always use. One: finely chop the onion so it integrates into the beef instead of leaving big chunks. Two: shred your own cheese if you have time; pre-shredded cheese has anti-caking agents that stop it from melting as luxuriously. Three: don’t skimp on butter on the outside of the bread. It seems decadent, but that butter is what gives you the irresistible crunch and golden color. A personal trick I learned from my grandmother is to press the sandwich gently with a spatula in the skillet for the first minute to get good contact and encourage the cheese to melt faster.
If something goes wrong and the bread browns too quickly before the cheese melts, lower the heat and give it a few minutes covered with a lid, which traps heat and helps the cheese flow without charring the bread. And if you ever have leftover seasoned beef, it transforms into tacos without fuss, just like in my go-to baked ground beef tacos recipe.
What to Serve and Leftovers
This sandwich loves sides that are simple. A crisp green salad with vinegary dressing cuts through the richness, fries are an obvious and beloved partner, and a handful of pickles or a smear of mustard brightens each bite. For serving, I tend to set out pickles, mustard, and ketchup and let people customize — those familiar condiments make the sandwich feel like home. To know when it is done right, look for a deeply golden exterior, a slight give when you press it, and melting cheese peeking from the edges.
Leftovers keep well if you want to plan ahead. Store cooled beef in an airtight container in the fridge for up to three days. The best way to reheat a sandwich is back in a skillet over low heat with a lid on for a few minutes so the cheese remelts and the bread crisps again. You can also freeze the cooked beef mixture in portions and thaw as needed to make another round of melts; it reheats wonderfully and turns into new meals like the spicy cauliflower bowls in my rotation, such as the crispy chile ground beef cauliflower protein bowls.
Variations are where this recipe gets playful. Swap the cheddar for pepper jack and add pickled jalapenos for heat. Use thick Texas toast for a heartier sandwich or try caramelized onions and Swiss cheese for a patty-melt vibe. You can also replace the ground beef with ground turkey or a plant-based crumble and follow the same steps for a lighter or vegetarian-friendly version.
Conclusion
If you want to riff toward a classic patty melt style, check out Easy Cheesy Patty Melt – Simply Delicious Food for inspiration and techniques that translate well to this sandwich. For a deeper, methodical take on what makes a great patty melt and to borrow ideas for crisping and cheese combinations, I also like The Best Patty Melt Recipe – Serious Eats as a reference.
Ultimate Cheesy Ground Beef Melt
Ingredients
Method
- Heat a skillet over medium heat and cook the chopped onion until it softens and becomes translucent.
- Add the ground beef, season with salt and pepper, and cook until browned, breaking it up and allowing bits to caramelize for flavor.
- Butter one side of each slice of bread.
- Assemble the sandwiches by scooping a generous portion of the beef mixture onto the non-buttered side of a slice of bread, sprinkle with shredded cheese, and top with another slice of bread, buttered side facing out.
- Heat a separate skillet over medium heat and grill the sandwiches until golden brown on both sides and the cheese is fully melted, about 3-4 minutes per side.
- Remove from heat, slice, and serve warm with optional toppings.