Valentine’s Day Red Velvet Cheesecake Recipe
A Slice of Love: My Valentine’s Day Red Velvet Cheesecake Recipe Every Valentine’s Day, I find myself wandering down the same path, drawn to a vibrant love story that unfolds between layers of cream cheese, chocolate goodness, and the unmistakable allure of red velvet. There’s just something about this cheesecake that resonates with me. It’s…
A Slice of Love: My Valentine’s Day Red Velvet Cheesecake Recipe
Every Valentine’s Day, I find myself wandering down the same path, drawn to a vibrant love story that unfolds between layers of cream cheese, chocolate goodness, and the unmistakable allure of red velvet. There’s just something about this cheesecake that resonates with me. It’s a little indulgent, a little sultry, and completely irresistible. As the day of love approaches, I couldn’t resist sharing my Valentine’s Day Red Velvet Cheesecake recipe with you. It’s perfect for any romantic occasion—or really, just whenever you want to treat yourself.
Discovering the Foundation of Deliciousness
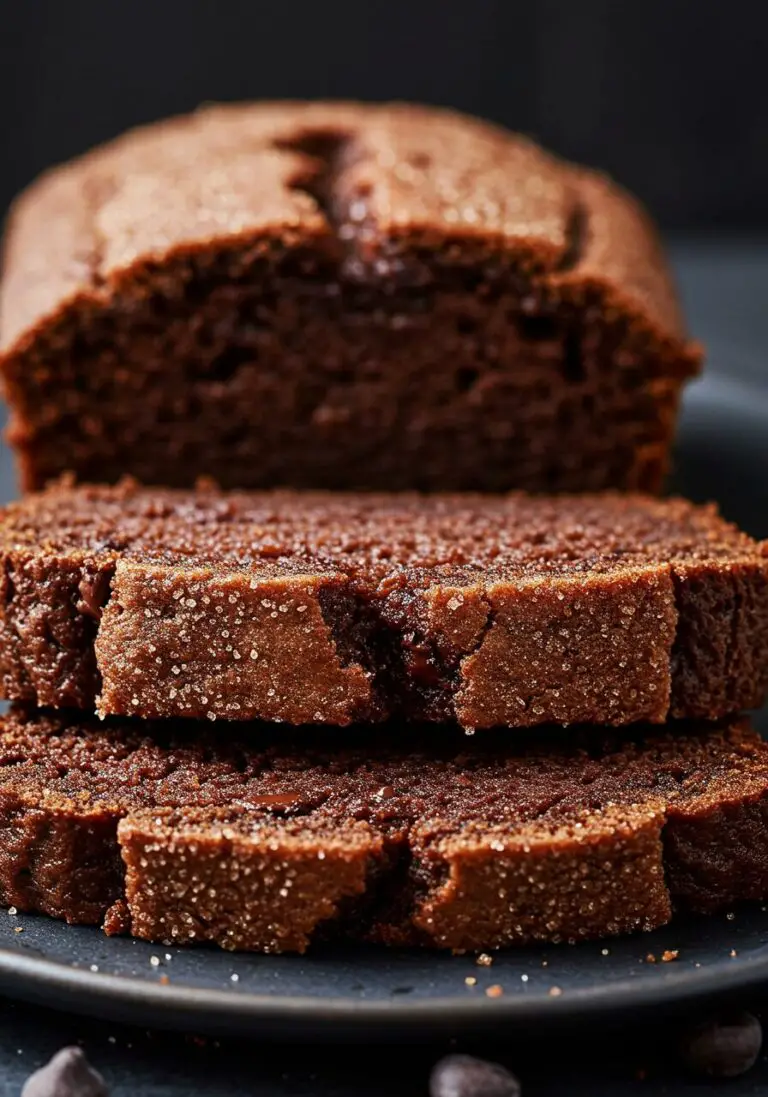
The beauty of this red velvet cheesecake lies in its foundation. We start with a simple yet delightful crust made from chocolate sandwich cookies. The contrast of the dark crust against the vibrant red cheesecake is simply stunning. To create this crust, I grab about 24 chocolate sandwich cookies—usually the classic ones—and crush them into fine crumbs. Head over to the pantry and pull out some unsalted butter too. You’ll need about four tablespoons, melted.
In a mixing bowl, combine your cookie crumbs and melted butter, mixing it until every crumb is coated. There’s something therapeutic about this process. The smell of crushed cookies wafting through your kitchen? Heavenly. Press this mix firmly into the bottom of a greased 9-inch springform pan and line the bottom with parchment paper for easy removal later. Then, you’ll bake this crust for a sweet ten minutes in a preheated oven set at 325°F (160°C). As it bakes, I can hardly resist sneaking a taste—luckily, there’s not much more to do while it’s cooling.
The Heart of the Cheesecake
Now comes the fun part, where you get to create that dreamy cheesecake filling. It all starts with 24 ounces of softened cream cheese, which I beat until it’s perfectly smooth, like a cloud. It’s crucial to let it soften well so it incorporates seamlessly and doesn’t leave lumps behind. Once it’s all velvety, I add one cup of granulated sugar and three tablespoons of unsweetened cocoa powder. The cocoa brings a depth that elevates this cheesecake to new heights, while the sugar ensures it stays sweet and balanced.
The next steps are just as essential. I incorporate three large eggs one at a time, allowing each to blend in nicely. It’s like building a foundation for your love story—the eggs bring richness and stability to the filling. Once that’s mixed well, I add a cup of sour cream and half a cup of buttermilk. This is where the magic happens! The buttermilk makes it luscious; I can practically taste the creaminess.
To finish off this flavor explosion, we’ll mix in two teaspoons of vanilla extract, two teaspoons of white vinegar (a little acid to brighten up those flavors), and a bold splash of two tablespoons of red food coloring. It’s always a little scary to pour in that vibrant color, but trust the process—it will transform your cheesecake into a heart-stopping centerpiece.
Baking the Cheesecake: Where Patience Meets Flavor
Pouring this delicious filling over the crust is like watching your love story unfold. I place the springform pan into a larger roasting pan filled with water halfway up the sides. This water bath method helps ensure an even bake, creating a silky texture that melts in your mouth. Now, we let it bake for about 55 to 65 minutes. I usually place my timer and wandering sounds of a good playlist fill the air.
You’ll know it’s done when the center is set but still slightly jiggly—a little dance to remind you that this cheesecake is soft and luscious. Once it’s out of the oven, let it cool slowly in there, with the door ajar. I promise you, this gentle cooling helps avoid cracks, making your cheesecake look as stunning as it tastes. Then, refrigerate for several hours, preferably overnight if you can resist.
Final Touches: Whipped Cream Dreams
When I finally unveil my red velvet cheesecake—a heart-stopping beauty covered in a fluffy layer of whipped cream—I feel a surge of joy. To make this topping, simply whip 1 ½ cups of heavy whipping cream with 1/3 cup of powdered sugar and a teaspoon of vanilla extract until stiff peaks form. It’s this fluffy cloud that transforms your cheesecake into a creamy masterpiece!
Once you’ve spread the whipped cream over your cheesecake, be sure to garnish it with chocolate shavings or fun heart-shaped sprinkles—whatever feels right for your occasion. I could stare at this stunning cake for ages, but my loved ones are already salivating at the sight of it.
When Things Don’t Go as Planned
Sometimes, things can go awry. I learned this the hard way the first time I made this cheesecake; it cracked right down the center after cooling because I was too impatient. The trick is to be gentle during baking and cooling, and trust me, a little patience goes a long way in making this dish a success. If it cracks, don’t fret too much; just cover it with whipped cream, and no one will know.
Storing and Serving
This cheesecake is perfect for prepping ahead of time. As it chills in your fridge, the flavors deepen, creating an almost magical taste. I recommend serving it the next day after it sets. If you happen to have leftovers (which is rare when I serve this), restaurant-style cheesecake stores beautifully in the refrigerator for about 3-5 days. Just cover it well, and it’ll remain tasty and fresh.
Making It Your Own
While I love this classic recipe, there are so many ways to mix it up. Try adding a layer of chocolate ganache for an extra indulgent treat, or swirl in some raspberry sauce for a hint of tartness. You can even swap the cream cheese for a low-fat alternative to lighten it up for a more guilt-free dessert.
As Valentine’s Day approaches, this Red Velvet Cheesecake is just the sweet ending every romantic meal deserves. When I slice into it, I see the love story unfold—not just in the cheesecake itself but in all the memories shared around the table. So grab your ingredients, preheat your oven, and let the love begin—because nothing says "I love you" like a slice of homemade cheesecake.

Red Velvet Cheesecake
Ingredients
Method
- Preheat oven to 325°F (160°C).
- Crush the chocolate sandwich cookies into fine crumbs.
- In a mixing bowl, combine cookie crumbs and melted butter until fully coated.
- Press the crumb mixture into the bottom of a greased 9-inch springform pan.
- Bake the crust for 10 minutes and let it cool.
- Beat the softened cream cheese until smooth.
- Add sugar and cocoa powder, mixing until combined.
- Incorporate the eggs one at a time, mixing well after each addition.
- Mix in sour cream, buttermilk, vanilla extract, white vinegar, and red food coloring until fully integrated.
- Pour the cheesecake filling over the cooled crust.
- Place the springform pan into a larger roasting pan and fill with water halfway up the sides.
- Bake for 55 to 65 minutes until the center is set but slightly jiggly.
- Cool slowly in the oven with the door ajar to prevent cracks.
- Refrigerate for several hours or ideally overnight.
- Whip the heavy cream with powdered sugar and vanilla extract until stiff peaks form.
- Spread whipped cream over the cooled cheesecake and garnish with chocolate shavings or sprinkles.