Decadent Chocolate Melting Cups (An Irresistible Molten Dessert!)
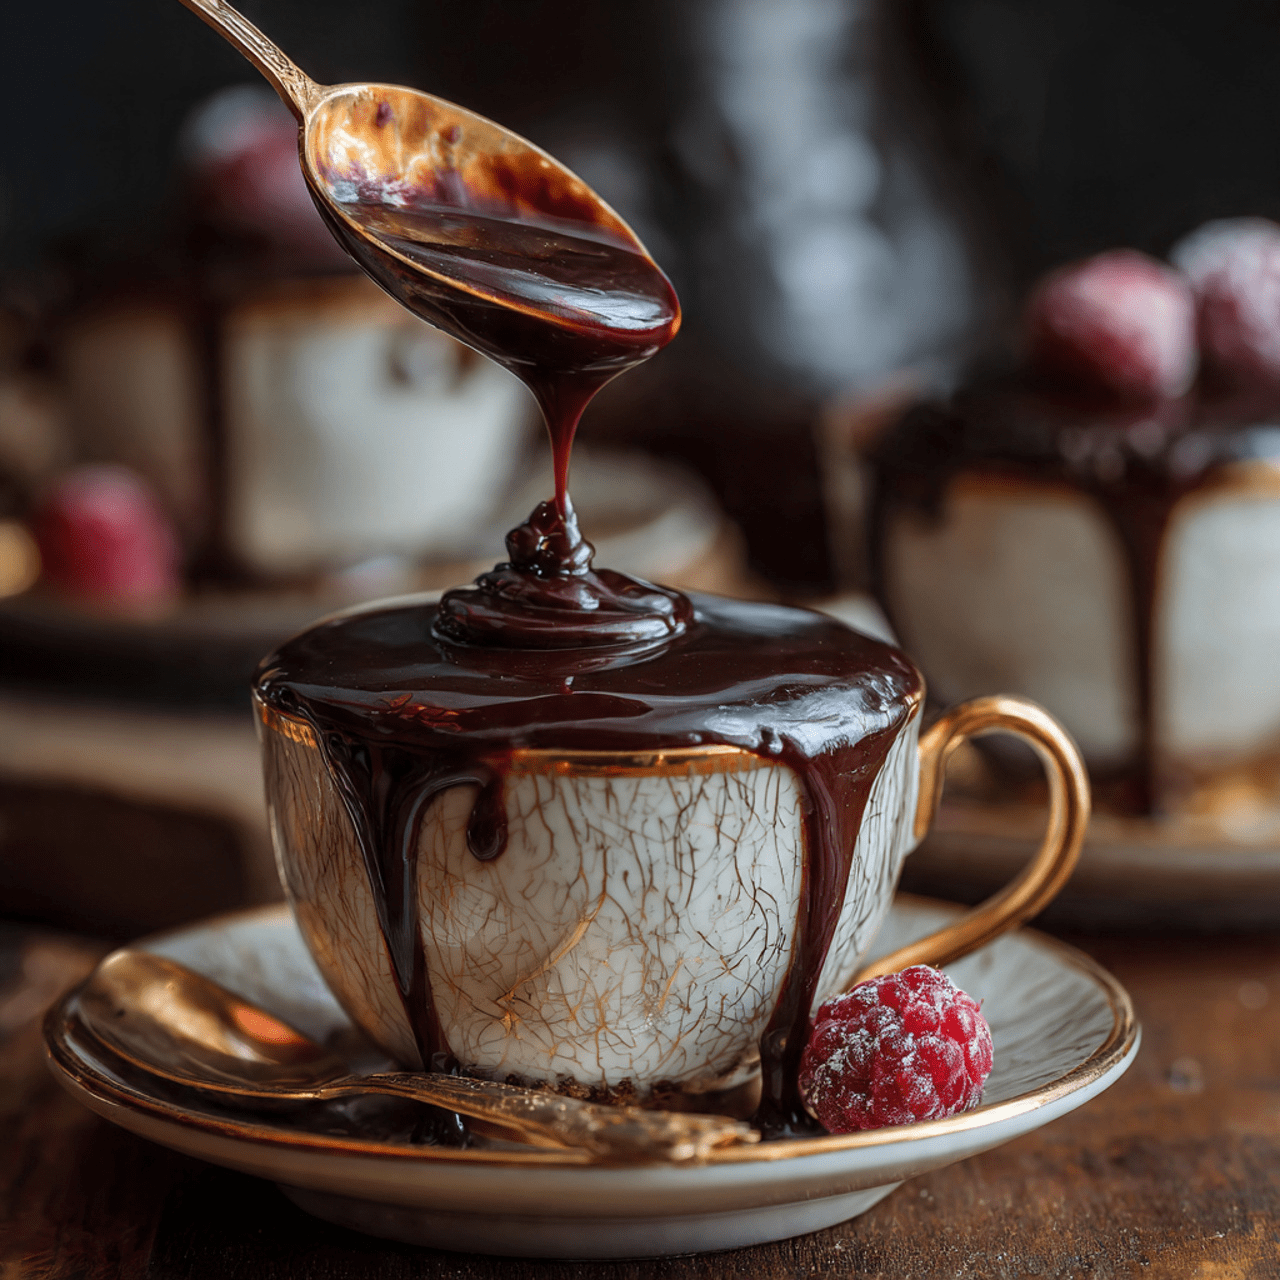
Imagine a dessert that captures the absolute best of all things chocolate. A treat that’s not quite a cake, not quite a pudding, but something magically in between—impossibly rich, intensely chocolatey, with a melt-in-your-mouth texture that is pure, unadulterated bliss. That, my friends, is the elegant, show-stopping magic of these Warm Chocolate Melting Cups. This…
Imagine a dessert that captures the absolute best of all things chocolate. A treat that’s not quite a cake, not quite a pudding, but something magically in between—impossibly rich, intensely chocolatey, with a melt-in-your-mouth texture that is pure, unadulterated bliss. That, my friends, is the elegant, show-stopping magic of these Warm Chocolate Melting Cups. This isn’t just a dessert; it’s a personal-sized portion of chocolate heaven.
I promise you, there is no greater feeling than pulling these beautiful little ramekins from the oven and serving them warm to your guests. Each spoonful is a perfect, luxurious experience—a warm, rich, and intensely chocolatey bite that simply melts on your tongue. They are a true show-stopper that is secretly one of the easiest and most forgiving desserts you can make.
Get ready to discover the most elegant and delicious chocolate dessert that will have everyone believing you’re a professional pastry chef.

Why These Melting Cups Are Pure Chocolate Magic!
You are going to be completely captivated by the unique texture and deep flavor of this dessert. It’s a must-make for so many good reasons:
- A Dreamy, Melt-in-Your-Mouth Texture: This is the star of the show. Thanks to the water bath baking method, these cups have a texture that’s a cross between a rich chocolate pudding and a fudgy, flourless chocolate cake.
- Intense, Deep Chocolate Flavor: By creating a cooked cocoa base and adding melted chocolate chips, this recipe delivers a robust, complex chocolate flavor that is truly decadent.
- Perfect Individual Portions: Serving dessert in beautiful, individual ramekins is so elegant and makes serving incredibly simple. No slicing required!
- A Perfect Make-Ahead Dessert: While they are served warm, these can be prepared in advance and gently reheated, making them an ideal, stress-free dessert for dinner parties.
- Surprisingly Simple to Make: Despite the gourmet results, the recipe uses simple ingredients and straightforward techniques. The water bath is the easy secret to its foolproof texture!
Recipe Snapshot
| Prep Time | 20 minutes |
| Cook Time | 20 minutes |
| Total Time | 40 minutes |
| Servings | 10 (4-oz.) servings |
| Calories | 197 kcal per serving |
| Course | Dessert |
| Cuisine | American / French-Inspired |
| Difficulty/Method | Easy / Baking |
Your Shopping List for This Chocolate Indulgence
This recipe uses classic pantry staples to create a truly spectacular and elegant dessert.

→ For the Melting Cups
- 1 ¼ cups sugar, divided → For the perfect sweetness in the base and the egg mixture.
- ½ cup baking cocoa → For a deep, rich chocolate foundation.
- 2 tablespoons all-purpose flour → Just a touch to give the cups a bit of structure.
- ⅛ teaspoon salt → To enhance the chocolate flavor.
- ¾ cup water → For the chocolate base.
- ¾ cup plus 1 tablespoon semisweet chocolate chips → For a rich, melty, decadent finish.
- 1 tablespoon brewed coffee → A secret weapon that intensifies the flavor of the chocolate.
- 1 teaspoon vanilla extract → A must-have for any chocolate dessert.
- 2 large eggs & 1 large egg white → All at room temperature, to create the light, airy texture.
- Baking cocoa → For dusting the ramekins.
→ For Serving (Optional)
- Sliced fresh strawberries → Their bright, fresh acidity is the perfect complement to the rich chocolate.
Let’s Make Melting Cups! Your Step-by-Step Guide
Ready to create a truly special, restaurant-quality dessert? Let’s get started!
Part 1: The Rich Chocolate Base
- Preheat and Prep: Preheat your oven to 350°F. Thoroughly butter ten 4-oz. ramekins and dust the insides with baking cocoa, tapping out any excess. Place the prepared ramekins in a large baking pan (like a 9×13-inch pan).
- Cook the Chocolate Sauce: In a small saucepan, combine ¾ cup of the sugar, the cocoa powder, flour, and salt. Gradually stir in the water until smooth. Place the pan over medium heat, bring it to a boil, and then cook and stir for 2 minutes, until the mixture is thick and glossy.
- Melt in the Flavor: Remove the pan from the heat. Immediately stir in the chocolate chips, brewed coffee, and vanilla extract. Keep stirring until the chocolate is completely melted and the mixture is smooth and luscious. Transfer this rich chocolate base to a large bowl to cool slightly.
Part 2: The Lightening Eggs & Assembly
- Whip the Eggs: In a separate, clean bowl, use an electric mixer to beat the 2 whole eggs and the 1 egg white until they are slightly thickened.
- Create the Ribbon: With the mixer still running, very gradually add the remaining ½ cup of sugar. Continue to beat on high speed until the mixture is thick, pale, and lemon-colored. When you lift the beaters, the mixture should fall back in a slow, thick “ribbon.” This step is key for the light texture!
- Fold It All Together: Gently fold the thick, pale egg mixture into the slightly cooled chocolate base in the large bowl. Use a spatula and gentle motions until everything is just combined and no streaks remain.
Part 3: The Water Bath and Bake
- Fill the Ramekins: Divide the finished batter evenly among your ten prepared ramekins.
- Create the Water Bath: Bring a kettle of water to a boil. Carefully place the baking pan with the ramekins in the preheated oven. Pull out the rack slightly and pour the boiling water into the outer pan until it comes about 1 inch up the sides of the ramekins. Be careful not to splash water into the batter!
- Bake to Perfection: Bake, uncovered, for 20-25 minutes. You’ll know they’re done when the centers are just set. They should still have a very slight wobble.
- Serve Immediately: Carefully remove the pan from the oven and then remove the ramekins from the water bath. Garnish with fresh strawberries, if desired, and serve immediately while they are warm and at their most “melting.”
Warm Chocolate Melting Cups
Ingredients
Equipment
Method
- Preheat oven to 350°F. Butter and dust ten 4-oz. ramekins with cocoa powder. Place them in a large baking pan.
- In a small saucepan, combine 3/4 cup sugar, cocoa, flour and salt. Gradually stir in water. Bring to a boil; cook and stir for 2 minutes or until thickened.
- Remove from heat; stir in the chocolate chips, coffee and vanilla until smooth. Transfer to a large bowl.
- In another bowl, beat eggs and egg white until slightly thickened. Gradually add remaining 1/2 cup sugar, beating until thick and lemon-colored (ribbon stage).
- Gently fold the egg mixture into the chocolate mixture until just combined.
- Transfer the batter to the prepared ramekins. Place the baking pan in the oven and add 1 inch of boiling water to the pan to create a water bath.
- Bake, uncovered, for 20-25 minutes, or just until the centers are set but still have a slight wobble. Garnish with strawberries if desired and serve immediately.
Notes
WiseRecipes’ Top Tips for Perfect Melting Cups
These are the little secrets that ensure this elegant dessert turns out perfectly every time.
- Don’t Skip the Water Bath (Bain-Marie)! This is the most crucial step for the perfect texture. The steam from the hot water creates a gentle, even heat that “steams” the custards rather than baking them, resulting in that incredibly smooth, creamy, melt-in-your-mouth consistency without a crust.
- Master the Ribbon Stage. The key to the light yet rich texture is whipping the eggs and sugar properly. Be patient and beat them on high speed until they are truly thick, pale, and form a ribbon when drizzled. This incorporates air that gives the cups their unique texture.
- Room Temperature Eggs are a Must. Cold eggs will not whip up to the same volume as room temperature eggs. For the best result and the lightest texture, set your eggs on the counter for about 30 minutes before you begin.
- Do Not Overbake! The goal is a “melting” center. Pull the ramekins from the oven the moment the centers are just set—they should still have a slight jiggle, similar to a cheesecake. They will continue to set as they cool slightly. Overbaking will lead to a denser, more cake-like texture.
- Serve them WARM. These are at their absolute peak of deliciousness when served immediately, warm from the oven. This is when their “melting” quality is most pronounced.
Keep Them Fresh! Storing Your Chocolate Cups
While best served fresh, leftovers are still a delicious treat!
- Make-Ahead: You can prepare the batter, fill the ramekins, and keep them covered in the refrigerator for up to 24 hours before you plan to bake them. Just add a few extra minutes to the baking time since they’ll be starting from cold.
- Refrigerator: Store any leftover baked cups, covered, in the refrigerator for up to 3 days.
- Reheating: To enjoy leftovers, you can eat them chilled like a rich pudding, or you can gently reheat them. Place the ramekins in a baking pan, add a little hot water to the pan, and warm them in a 300°F oven for about 10 minutes.
FAQs: Your Melting Cup Questions, Answered!
What is the texture of these supposed to be like?
It’s a unique and wonderful texture! It’s not a liquid-center lava cake, and it’s not a loose pudding. It’s a very soft, smooth, and rich baked custard that is completely uniform. Think of it as a very light, fudgy, crustless brownie or a very dense pot de crème. It literally melts on your tongue.
Do I absolutely need a water bath?
For this specific recipe, yes. The water bath is essential for the gentle, even cooking that creates the signature smooth and creamy texture. Baking them directly in the dry oven heat would make them bake too quickly from the outside in, resulting in a firm, cake-like texture instead of a soft, melting one.
Can I make this as one large dessert instead of in ramekins?
You can try it in a single, larger soufflé or casserole dish, but you will need to significantly increase the baking time. Keep it in the water bath and bake until the center is just set. It will be harder to achieve the perfect texture, which is why the individual ramekins are highly recommended.
Can I add other flavors?
Absolutely! This is a wonderful base for other flavors. You can add a pinch of cinnamon or chili powder to the cocoa mixture for warmth, or substitute the vanilla with a different extract like peppermint or orange for a different flavor profile.
Final Thoughts: A Moment of Pure Indulgence
There is nothing more elegant than serving a perfect, personal-sized chocolate dessert. These Warm Chocolate Melting Cups are a celebration of pure, deep chocolate flavor and a truly luxurious texture. They are a simple yet sophisticated way to end a special meal, and a recipe that is guaranteed to impress. I hope you enjoy every single meltingly delicious spoonful. Happy baking!