The Best Spooky Witch Finger Cookies (A Halloween Classic!)
Hello, my little monsters, and welcome to the ultimate creepy, crawly, and completely delicious Halloween baking project! It simply isn’t Halloween without a platter of these incredible, spooky, and surprisingly realistic Witch Finger Cookies. This is one of my all-time favorite recipes to make for a party, because they are so much fun to create…
Hello, my little monsters, and welcome to the ultimate creepy, crawly, and completely delicious Halloween baking project! It simply isn’t Halloween without a platter of these incredible, spooky, and surprisingly realistic Witch Finger Cookies. This is one of my all-time favorite recipes to make for a party, because they are so much fun to create and they get the best reaction from everyone.
This isn’t just a gimmick; it’s a genuinely delicious cookie. We start with a rich, buttery, and almond-flavored shortbread dough, tinted a ghoulish green. Then, we shape them into knobby, warty fingers, give them a creepy almond fingernail, and add a final, bloody touch with some red jam. They are perfectly crumbly, not too sweet, and an absolute blast to make. Get ready to delight and fright your friends and family!

Why These are The Perfect Spooky Treat
This is guaranteed to be the most talked-about dessert at your Halloween party.
- Incredibly Spooky & Realistic: The knobby knuckles, the almond fingernail, and the “bloody” jam tip create a cookie that looks amazingly and spookily realistic.
- Delicious Buttery Flavor: Underneath the spooky exterior is a rich, tender, almond-flavored shortbread cookie that is absolutely delicious and not overly sweet.
- So Much Fun to Make: Shaping the fingers, carving the knuckles, and adding the “blood” is a super fun and creative process. It’s the perfect Halloween project for older kids and adults.
- A True Halloween Icon: These cookies are a beloved and classic Halloween tradition for a reason. A platter of these is an instant party centerpiece.
Gather Your Ghoulishly Good Ingredients: What You’ll Need
This impressive cookie comes together with just a handful of classic baking staples.
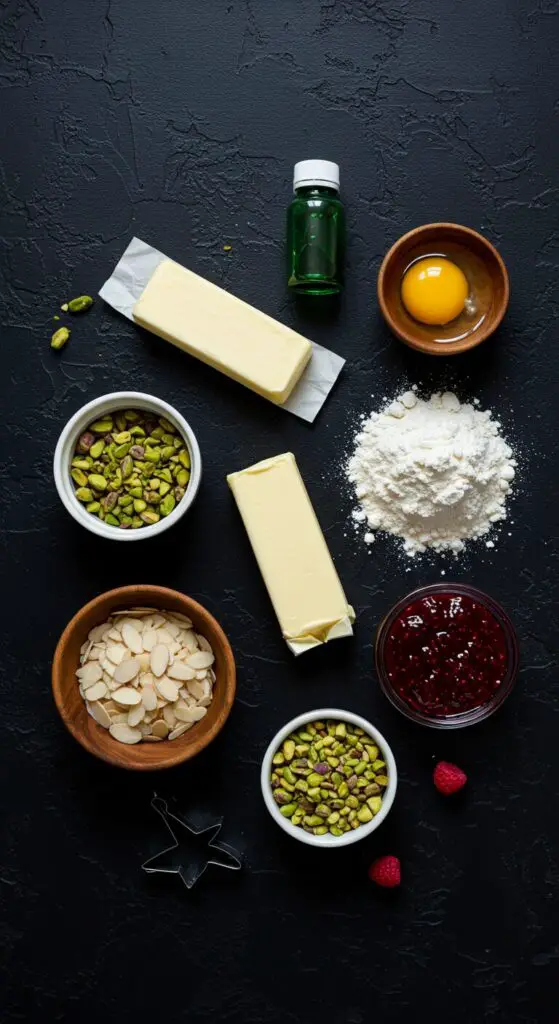
- 1 1/4 cups (145 g.) confectioners’ sugar
- 1 cup (2 sticks) unsalted butter, softened
- 1 large egg
- 1 tsp. almond extract
- 1 tsp. pure vanilla extract
- 5 to 6 drops of green food coloring
- 2 3/4 cups (330 g.) all-purpose flour
- 1 tsp. kosher salt
- 1/2 cup finely chopped pistachios, plus more for “warts”
- 3/4 cup sliced almonds
- 1/2 cup (135 g.) red jam (cherry, strawberry, or raspberry)
Crafting Your Witch Finger Cookies: Step-by-Step Guide
Let’s conjure up these delightfully creepy cookies. The chilling steps are key!
- Make the Cookie Dough: In a large bowl using a stand mixer or handheld mixer, beat the confectioners’ sugar and softened butter on medium speed for about 2 minutes, until pale and fluffy. Beat in the egg for 1 more minute, then add the almond extract, vanilla, and green food coloring and beat until combined. In a separate bowl, whisk the flour and salt. Add the dry ingredients to the butter mixture and beat on low speed until just combined. Fold in the finely chopped pistachios. Cover the bowl and refrigerate the dough for at least 30 minutes.
- Shape the Fingers: Line two large baking sheets with parchment paper. Working with a quarter of the dough at a time (keeping the rest chilled), portion it into 1-tablespoon-sized balls. Roll each ball between your palms to form a thin log, about the length and thickness of your pinky finger.
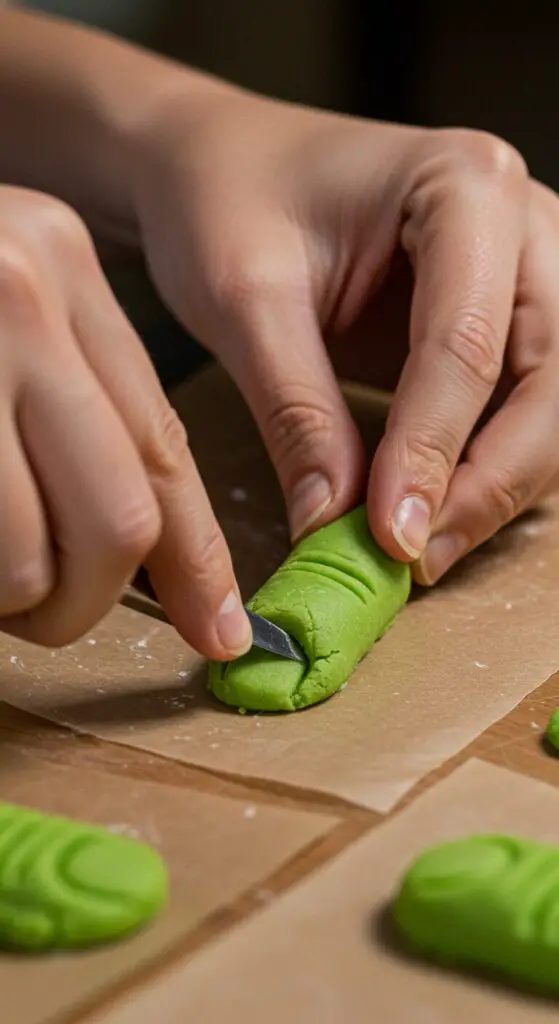
- Add the Creepy Details: Arrange the logs on your prepared baking sheet. To create the nail bed, press a sliced almond firmly into the tip of each finger. To create the knuckle, gently pinch the dough just below the almond and again about halfway down the log. Use the tip of a sharp knife to carefully carve a few horizontal lines of varying lengths into the knuckle to create realistic creases. For extra flair, press one or two small pieces of pistachio into the finger to create spooky “warts.”
- Freeze and Bake: Repeat the shaping process with all the dough. Place the baking sheets with the shaped fingers into the freezer for 30 minutes. This is a crucial step that helps the cookies hold their spooky shape while baking! While they chill, preheat your oven to 375°F (190°C). Bake the chilled cookies for 7 to 9 minutes, rotating the trays halfway through, until the edges are firm and the tops look dry. Let them cool slightly on the baking sheets.
- Add the “Blood”: This is the final ghoulish touch! Once the cookies are cool enough to handle, gently lift off an almond fingernail from one of the cookies. Add a tiny dab of red jam onto the exposed nail bed.
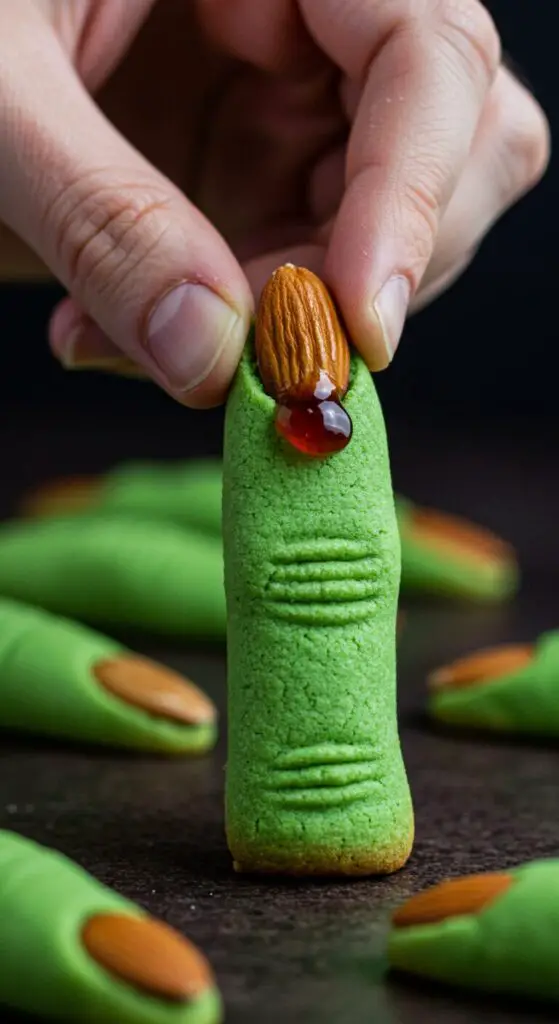
- Finish and Cool: Replace the almond fingernail, pressing down gently to make the jam ooze out realistically from the sides. Use a small knife or your finger to spread a little jam onto the bottom, severed-looking end of each finger. Let the cookies cool completely on a wire rack.
Wise Tips for the Spookiest Witch Fingers
- Keep the Dough Cold: This is a buttery shortbread dough, so it’s essential to keep it chilled. Working with only a quarter of the dough at a time while the rest stays in the fridge will make it much easier to shape.
- The Freeze is Non-Negotiable: The 30-minute freeze before baking is the absolute secret to cookies that don’t spread into blobs. This step ensures all your creepy knuckle and fingernail details remain intact.
- Don’t Overbake: These cookies should be pale and spooky, not golden brown! Pull them from the oven as soon as the tops are dry and the edges are firm to the touch.
- Embrace the Imperfections: Don’t worry about making every finger look perfect! Crooked, knobby, and slightly misshapen fingers look even more realistic and creepy.
Spooky Witch Finger Cookies
Ingredients
Equipment
Method
- In a large bowl, beat confectioners’ sugar and butter until pale and fluffy. Beat in the egg, then the almond extract, vanilla, and food coloring.
- In a separate bowl, whisk flour and salt. Add to the butter mixture and beat on low until just combined. Fold in the pistachios. Cover and refrigerate for at least 30 minutes.
- Line 2 baking sheets with parchment. Working with a quarter of the dough at a time, roll 1-Tbsp. balls of dough into a 3″ finger shape. Arrange on the baking sheet.
- Press a sliced almond into the tip for a fingernail. Pinch the dough below the almond and halfway down to create a knuckle. Use a knife to carve lines into the knuckle. Press pistachio pieces in for ‘warts’. Repeat with all dough. Freeze the shaped cookies for 30 minutes.
- Preheat oven to 375°F. Bake the chilled cookies for 7 to 9 minutes, until the edges are firm. Let cool slightly.
- Gently lift off an almond fingernail, add a tiny dab of red jam, then replace the almond, pressing to make the jam ooze. Spread a little jam on the bottom of each finger. Let cool completely.
Notes
Frequently Asked Questions (FAQ) – Witch Finger Cookies
Can I make the dough ahead of time?
Yes! The cookie dough can be made and stored, tightly wrapped, in the refrigerator for up to 2 days before you shape and bake the cookies.
What if I have a nut allergy?
You can use a pumpkin seed (pepita) for the fingernail and omit the chopped pistachios from the dough. Be sure to use only vanilla extract and omit the almond extract.
How do I store the finished cookies?
Store the completely cooled cookies in a single layer in an airtight container at room temperature for up to 5 days.
Conclusion
These Spooky Witch Finger Cookies are such a fun, classic, and delicious way to celebrate the Halloween season. They are a wonderfully creative baking project that results in a truly memorable and impressive treat. Happy Haunting and Happy Baking!