Cherry Cobbler with Pie Filling
The Joy of Cherry Cobbler with Pie Filling There’s something wonderfully nostalgic about a warm cherry cobbler fresh out of the oven. The aroma fills the kitchen, reminding me of cozy family dinners and sunny afternoons spent with loved ones. Cherry cobbler is a dessert that seems to bridge generations, and I’ve recently been rekindling…
The Joy of Cherry Cobbler with Pie Filling
There’s something wonderfully nostalgic about a warm cherry cobbler fresh out of the oven. The aroma fills the kitchen, reminding me of cozy family dinners and sunny afternoons spent with loved ones. Cherry cobbler is a dessert that seems to bridge generations, and I’ve recently been rekindling my love for it using cherry pie filling. This method simplifies the process without sacrificing taste! You may also find Cherry Chocolate Chip Cookies With Mocha Chips useful.
I remember the first time I made this cherry cobbler with pie filling. I needed something quick for a gathering, and after digging through countless recipes, I stumbled upon this fantastic one. It quickly became a staple in my dessert repertoire, especially because it only requires a handful of ingredients. You start with the basics: 4 tablespoons of unsalted butter, melted in the pan, a cup of all-purpose flour, three-quarters of a cup of white sugar, a teaspoon of baking powder, a cup of milk, and of course, a can of cherry pie filling.
How It All Comes Together
To start the magic, I place the butter in a 1-1/2 quart casserole dish and then put it in a cold oven. As I preheat the oven to 350°F (175°C), the butter slowly melts, creating a deliciously buttery base for the cobbler. The melted butter is crucial because it helps create that golden, crispy edge that we all crave.
While the oven warms up, it’s the perfect time to mix the dry ingredients. I whisk together the flour, sugar, and baking powder in a bowl and then gently stir in the milk until just combined. It’s essential not to over-mix here; the batter should be somewhat lumpy but cohesive.
Once the butter is melted and bubbling, I carefully remove the hot dish from the oven. Here’s where it gets exciting: I pour the batter directly over the melted butter, taking care not to stir it. The bubbly butter does an incredible job of cooking the bottom of the cobbler. Then, I spoon dollops of the cherry pie filling over the batter, making sure to distribute it evenly without stirring again. The layers form a beautiful contrast that results in a tender, cake-like bottom with a luscious cherry topping.
Timing is Key
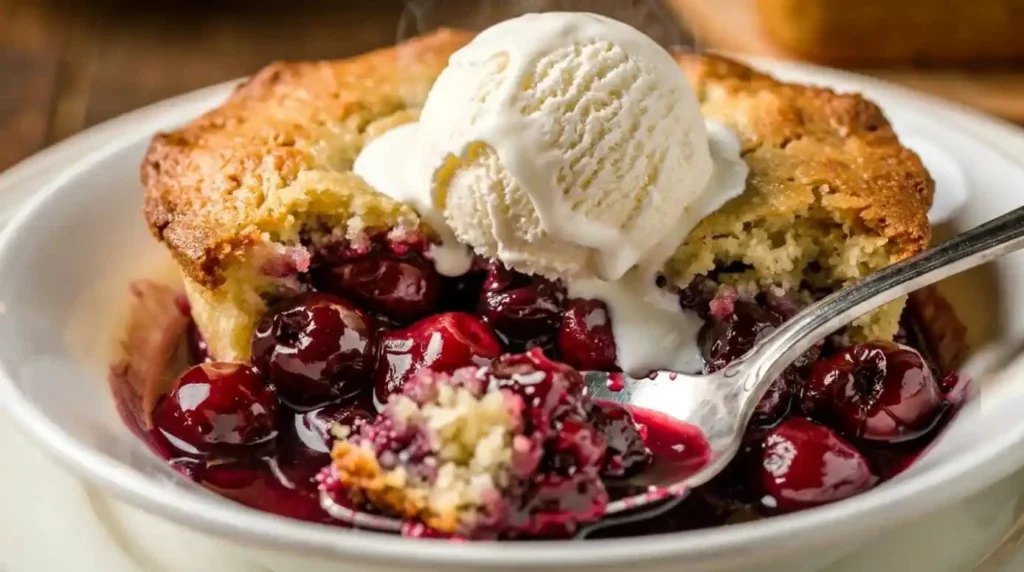
Baking is always about perfect timing, and this cobbler bakes for about 40-45 minutes. You know it’s ready when the top is golden brown and the edges are bubbling – a sure sign of deliciousness. I recommend letting it stand for about ten minutes after taking it out of the oven. This pause allows the cobbler to set, making it easier to serve warm.
One of the best parts of this dessert is that it pairs perfectly with a scoop of vanilla ice cream. The combination of warm cobbler and cold ice cream is simply divine. If you’re feeling adventurous, you might also enjoy it alongside a slice of cherry and blueberry pie. Just imagine the medley of flavors!
My Grandmother’s Trick
In my quest for the best cherry cobbler, I’ve picked up a few tips over the years. My grandmother always advised never to skimp on the butter; it’s what gives the cobbler its delightful flavor and texture. Additionally, using high-quality cherry pie filling enhances the overall taste. Some prefer making their filling from scratch, but I find that a good can yields fantastic results, especially when you’re short on time.
Making It Work for Busy Weeknights
This recipe is perfect for busy weeknights when a craving for something sweet strikes but the thought of extensive baking feels overwhelming. I often whip up this cobbler in just over an hour from start to finish. Plus, it’s an excellent dessert for potlucks and gatherings because it serves a crowd and is easy to transport. Just pop it in the oven while you finish dinner, and you’ll have a perfect warm dessert ready to serve right after.
Experimenting with flavors is also a fun way to make this dessert your own. For instance, mix in some chocolate by adding chocolate chips to the batter, or try swapping in different fruits for an unexpected twist. I once made a batch using mixed berries, which turned out deliciously.
Enjoying Your Leftovers
If you have leftovers (though I seldom do), storing them is simple. Just cover the cobbler with plastic wrap or aluminum foil and keep it in the fridge for up to three days. Reheating individual portions in the microwave is a great way to revive that warm, comforting experience.
There’s something so satisfying about digging into a warm serving, even days after baking. As you enjoy the last few bites, you might find yourself thinking of ways to adapt or improve the recipe for next time. Perhaps I’ll experiment further with seasonal fruits or different toppings!
Conclusion
Cherry cobbler with pie filling has become a cherished recipe in my household, combining ease with delightful flavor. It’s a dessert that encourages experimentation and creativity. If you want to try another delicious cherry dessert, check out this cherry cobbler recipe from Salty Side Dish. I hope this dish brings as much joy to your gatherings as it has to mine!
Cherry Cobbler with Pie Filling
Ingredients
Method
- Preheat your oven to 350°F (175°C) with the butter in a 1-1/2 quart casserole dish.
- In a bowl, whisk together the flour, sugar, and baking powder.
- Gently stir in the milk until just combined, making sure the batter remains lumpy.
- Remove the melted butter from the oven and pour the batter over it without stirring.
- Spoon dollops of cherry pie filling over the batter evenly.
- Bake for 40-45 minutes until the top is golden brown and edges are bubbling.
- Let it stand for about 10 minutes before serving.