Classic Spiced Christmas Cookies: Perfect for Decorating!
There’s a certain kind of magic that fills the air during the holiday season, and for me, a huge part of that magic happens in the kitchen. It’s the aroma of warm spices, the joy of creating something beautiful with your own hands, and the sweet satisfaction of sharing a homemade treat. These Classic Spiced…
There’s a certain kind of magic that fills the air during the holiday season, and for me, a huge part of that magic happens in the kitchen. It’s the aroma of warm spices, the joy of creating something beautiful with your own hands, and the sweet satisfaction of sharing a homemade treat. These Classic Spiced Christmas Cookies are the very essence of that feeling. While I adore a classic gingerbread, sometimes I crave a cookie that’s a little more delicate—a buttery, tender shortbread-style cookie that provides the perfect canvas for decorating. This is that cookie. It’s a simple, no-fuss dough, infused with a cozy blend of cinnamon, nutmeg, and allspice. It’s lighter in color than gingerbread, which makes your colorful icing and sprinkles truly pop! Best of all, this dough is a dream to work with and holds its shape perfectly, so your snowflakes will have sharp edges and your stars will be perfectly pointed. This is my go-to recipe for a day of festive decorating with the kids or for making beautiful, edible ornaments for the tree.

Why This Will Be Your New Go-To Holiday Cookie Recipe!
- The Perfect Canvas for Decorating: This dough is specifically designed to hold its shape, meaning no frustrating spreading in the oven! Your cut-out shapes will come out perfectly defined and ready for icing.
- Warmly Spiced & Buttery: The flavor is pure holiday comfort. It’s a rich, buttery cookie with a wonderful warmth from a classic blend of Christmas spices.
- Incredibly Simple to Make: With just a handful of pantry staples and a quick mix in the food processor, this dough comes together in minutes. It’s foolproof!
- A Fun Holiday Activity: From cutting out the shapes to decorating with icing and sprinkles, this is the perfect recipe for creating sweet memories with the whole family.
- Perfect for Gifting: These sturdy, beautiful cookies are ideal for packing into tins and gifting to friends, family, and neighbors.
Recipe Snapshot
| Prep Time | 25 minutes (includes chilling) |
| Cook Time | 15 minutes |
| Total Time | 40 minutes |
| Servings | 35 cookies |
| Calories | See recipe card for details |
| Course | Dessert |
| Cuisine | American, Holiday |
| Method | Baking |
Your Holiday Baking Shopping List
This classic recipe comes together with simple, timeless baking ingredients. Quality is key for the best flavor!

→ For the Spiced Cookie Dough
- Butter: 125g (about 1/2 cup + 1 tbsp), softened. Using softened, room temperature butter is crucial for a light, fluffy dough.
- Vanilla Essence: 1 teaspoon. For that classic, warm aroma.
- Warm Spices: A festive blend of 1 tsp ground cinnamon and 1/2 tsp each of ground nutmeg and allspice. Use fresh spices for the best flavor!
- Caster Sugar: 1/2 cup. This superfine sugar dissolves easily, creating a finer, more tender cookie crumb.
- Egg: 1, lightly beaten. To bind our dough together.
- Flour: 2 cups. Standard all-purpose flour works perfectly here.
→ For Decorating
- Icing Sugar (Powdered Sugar): To make a simple royal icing or glaze.
- Festive Sprinkles: Think silver balls, colorful nonpareils, or holiday-themed shapes!
- Glace Cherries: For a classic, jewel-toned decoration.
Let’s Bake Some Holiday Magic! A Step-by-Step Guide
This recipe is wonderfully simple. The food processor does most of the work, and the results are spectacular!
Phase 1: Make and Chill the Dough (Time: ~5 minutes + 15 mins chilling)
Creating a well-chilled dough is the most important secret to perfect cut-out cookies that don’t spread.
- Prep Your Oven. Preheat your oven to 180°C (350°F).
- Process the Base. In a food processor, pulse the softened butter, vanilla, cinnamon, nutmeg, allspice, and caster sugar until the mixture is light and fluffy.
- Add Wet and Dry Ingredients. Add the lightly beaten egg and pulse to combine. Then, add the flour and pulse until a firm dough just comes together.
- Chill the Dough. Gather the dough into a ball, wrap it in plastic, and chill in the fridge for at least 15 minutes.
Why it matters: This quick chill makes the dough much easier to roll out without sticking and is the first step in preventing the cookies from spreading in the oven.
Phase 2: Roll, Cut, and Bake (Time: ~10 minutes prep + 15 minutes baking)
Now for the fun part! It’s time to create our festive shapes.
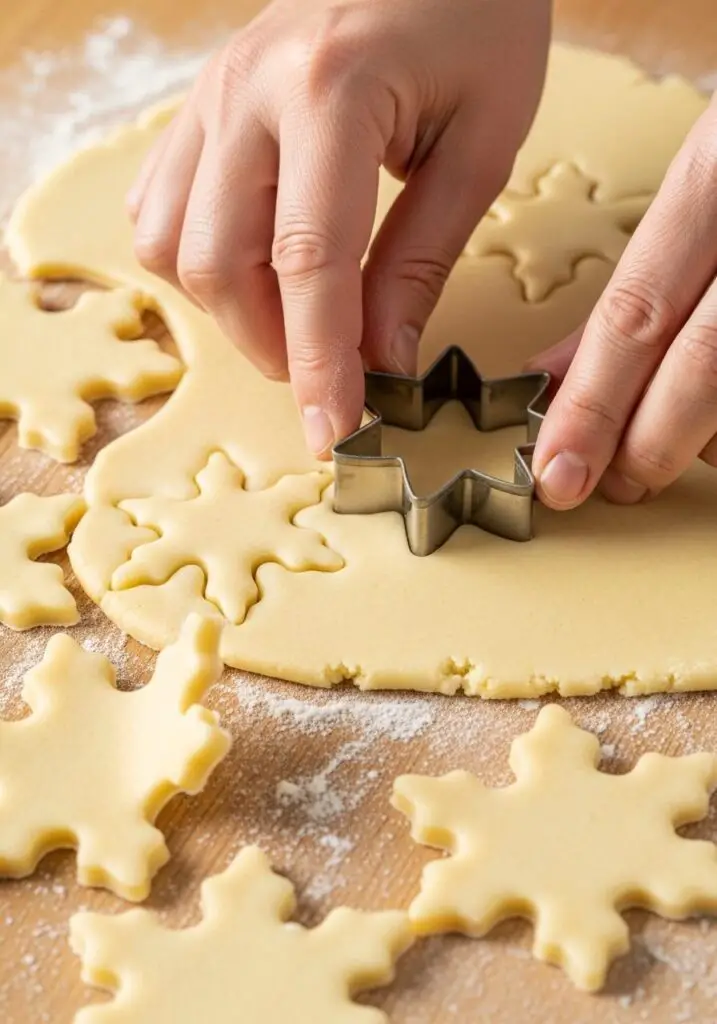
- Roll and Cut. On a lightly floured surface, roll the chilled dough out to about 5mm (just under 1/4 inch) thickness. Use your favorite Christmas-themed cookie cutters to cut out shapes.
- Make a Hole for Ornaments (Optional). If you want to hang these on your tree, use a thick skewer or a straw to make a hole in the top of each cookie, large enough to thread a ribbon through later.
- Bake to Perfection. Carefully transfer the cut-out shapes to a parchment-lined baking tray. Bake for 10-15 minutes, until the edges are just starting to turn a light golden brown.
- Cool Completely. Let the cookies cool on the tray for a few minutes before transferring them to a wire rack to cool completely. They must be 100% cool before you can decorate them!
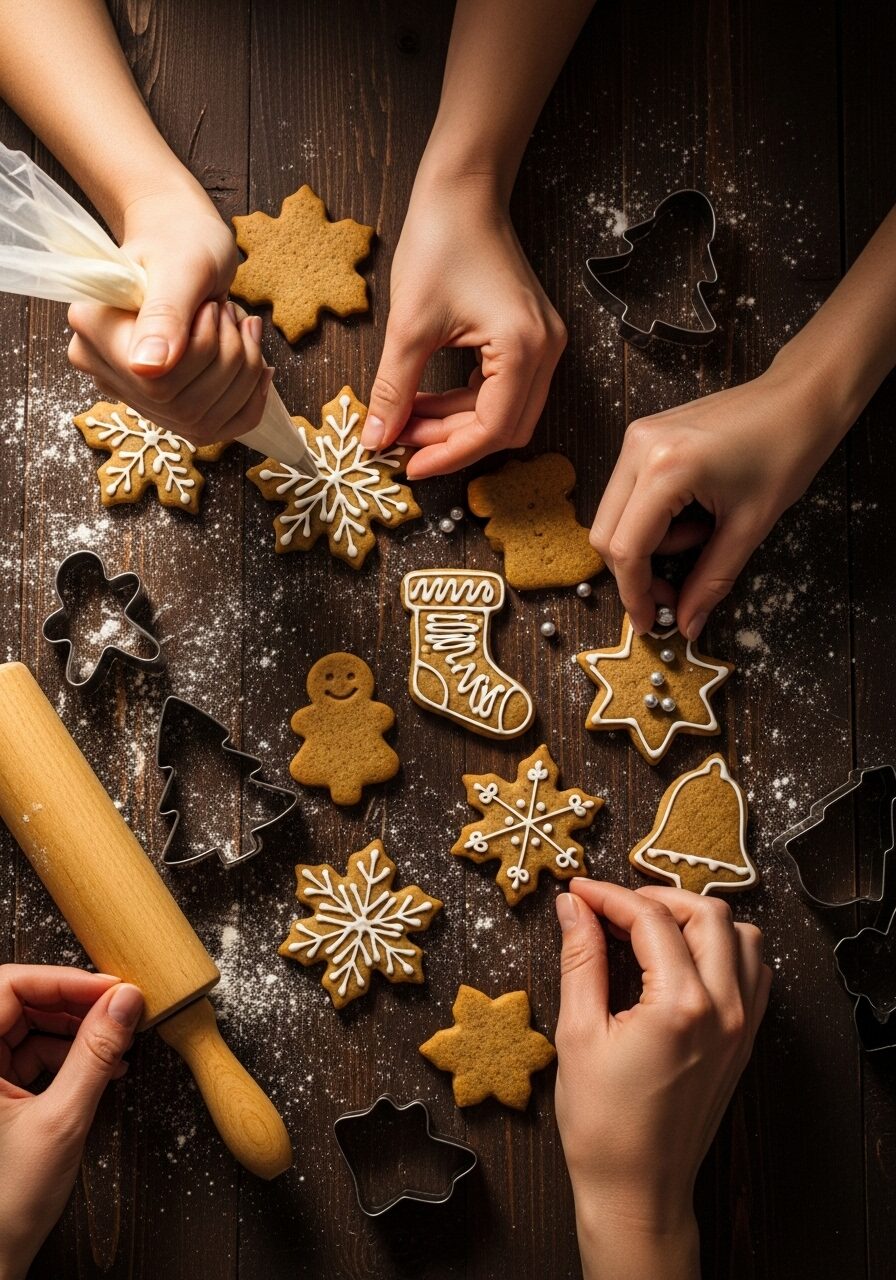
Phase 3: Decorate Your Masterpieces! (Time: ~20 minutes)
This is where you can let your creativity run wild. Put on some holiday music and have fun!
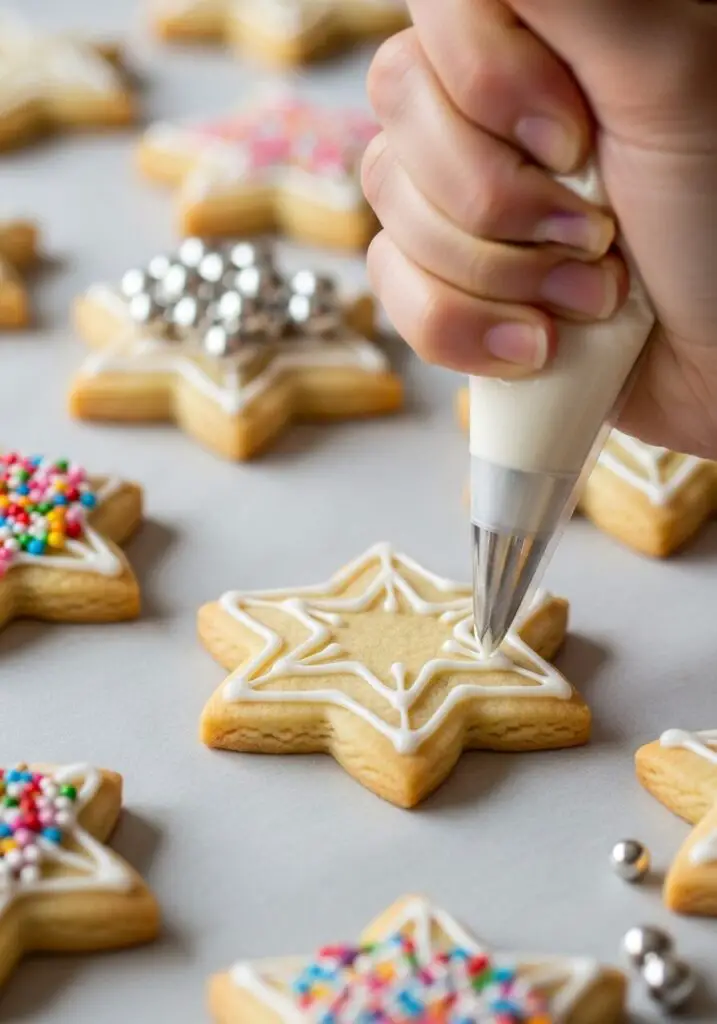
- Get Creative! Once the cookies are completely cool, it’s time to decorate. Use a simple glaze made from icing sugar and a little water or milk, or whip up a batch of royal icing for more detailed piping. Add your favorite sprinkles, silver balls, or chopped glacé cherries.
- Let them Set. Allow the icing to set completely before you stack or store the cookies.
WiseRecipes’ Top Tips for Perfect Christmas Cookies!
- Don’t Skip the Chill: I know it’s an extra step, but chilling the dough is the non-negotiable secret to cut-out cookies that hold their beautiful, sharp shapes in the oven.
- Use a Food Processor for Ease: While you can make this dough with a mixer, a food processor makes it incredibly fast and easy, bringing the dough together in seconds.
- Consistent Thickness is Key: Try to roll your dough to an even 5mm thickness. This ensures that all your cookies bake evenly and have the same wonderful texture.
- Cool Completely Before Decorating: This is the golden rule of cookie decorating! Even slightly warm cookies will cause your beautiful icing to melt into a sticky puddle.
- Get the Kids Involved: This is the perfect recipe to make with children. Let them help cut out the shapes and, of course, go wild with the sprinkles during the decorating stage!
Creative Twists: Delicious Ways to Customize Your Cookies!
- Add Some Zest: Add the zest of one orange or lemon to the dough along with the sugar for a bright, citrusy note that pairs beautifully with the spices.
- Make Sandwich Cookies: Bake smaller, round cookies and sandwich two together with a layer of buttercream, ganache, or your favorite jam.
- Chocolate-Dipped: Dip half of each baked and cooled cookie in melted white or dark chocolate for an elegant, decadent touch.
- Try Different Spices: Feel free to add 1/4 teaspoon of ground ginger or a pinch of cardamom to the spice blend for a different flavor profile.
- Glitter and Gold: Use edible glitter or gold leaf to make your decorated cookies extra special and festive for a party.
Classic Spiced Christmas Cookies for Decorating
Ingredients
Equipment
Method
- Preheat oven to 180°C (350°F).
- In a food processor, mix the butter, vanilla, spices, and sugar until light and fluffy. Add the egg and mix to combine.
- Add the flour and pulse until a firm dough forms. Chill the dough for 15 minutes in the fridge.
- On a lightly floured surface, roll the dough out to about 5mm thickness. Cut into shapes with Christmas cookie cutters.
- If making ornaments, use a skewer to make a hole in the top of each cookie for a ribbon.
- Place the cookies on a parchment-lined oven tray and bake for 10-15 minutes, until lightly browned at the edges.
- Let the cookies cool completely on a wire rack before decorating with your favorite icing and sprinkles.
Notes
Keep Them Festive! Storing Your Holiday Cookies
These cookies store wonderfully, making them the perfect treat to bake ahead of the holiday rush.
Storing Decorated Cookies
Once the icing is completely set and hardened, store the cookies in an airtight container at room temperature. Placing sheets of parchment paper between the layers will help protect your beautiful decorations. They will stay fresh for up to a week.
Freezing
You can freeze both the unbaked dough and the baked, undecorated cookies. Wrap the dough ball tightly in plastic wrap and freeze for up to 3 months. To freeze the baked cookies, let them cool completely and store them in a freezer-safe container. Decorate them after they have thawed.
FAQs: Your Spiced Christmas Cookie Questions, Answered!
Can I make this dough without a food processor?
Yes, absolutely! You can use a stand mixer with a paddle attachment or a hand mixer. Just cream the butter and sugar first, then beat in the egg and vanilla, and finally, mix in the dry ingredients on low speed until the dough comes together.
Why did my cookies spread and lose their shape?
This is almost always because the dough was too warm when it went into the oven. The 15-minute chill after mixing is a good start, but for extra insurance, you can also chill the cut-out shapes on the baking sheet for another 10-15 minutes before baking.
What’s the difference between caster sugar and regular granulated sugar?
Caster sugar has a much finer crystal than regular granulated sugar. This allows it to dissolve more easily into the butter, which helps create a finer, more tender texture in shortbread-style cookies. If you don’t have it, you can pulse regular granulated sugar in a food processor for a few seconds to make it finer.
How do I make a simple icing for decorating?
The easiest icing is a simple glaze. Just take about 1 cup of icing sugar (powdered sugar) and whisk in 1-2 tablespoons of milk or water, a little at a time, until you reach your desired consistency. You can add a drop of vanilla for flavor and food coloring to make it festive!
These Spiced Christmas Cookies are more than just a dessert; they are a tradition in the making. They are a canvas for creativity, a vessel for holiday cheer, and a delicious, buttery treat that will fill your home with the most wonderful, festive aromas. I hope you and your loved ones have a blast creating (and eating!) your own beautiful masterpieces. Happy holidays!