Crumbl Copycat Red Velvet Cookies Recipe
Crumbl Copycat Red Velvet Cookies Recipe There’s something special about red velvet, isn’t there? It’s that rich color and the perfect hint of chocolate that just pulls at your heartstrings every time. I remember the first time I tried a red velvet cookie at a Crumbl shop; that decadent frosting and soft texture made me…
Crumbl Copycat Red Velvet Cookies Recipe
There’s something special about red velvet, isn’t there? It’s that rich color and the perfect hint of chocolate that just pulls at your heartstrings every time. I remember the first time I tried a red velvet cookie at a Crumbl shop; that decadent frosting and soft texture made me fall in love instantly. I swore to myself that I’d find a way to recreate that heavenly experience in my own kitchen. And guess what? I’ve stumbled upon a Crumbl copycat red velvet cookies recipe that’s even better than the original!
The Secret Behind Perfect Crumbl Copycat Red Velvet Cookies Recipe
Let’s dive in, shall we? The best part about this recipe is that it’s not overly complicated. You probably have most of the ingredients already. To start, you’ll need half a cup of unsalted butter, which should be softened to that dreamy spreadable state. Alongside it, gather ⅓ cup of granulated sugar and ⅓ cup of light brown sugar, two sweet powerhouses that will form your cookie base. You’ll also need one large egg, a teaspoon of vinegar (this is key for that famous red velvet tang), and don’t forget the star of the show—1 to 2 teaspoons of red gel food color to bring that vibrant hue to life.
Now, before we get too excited, let’s talk dry ingredients. You’ll need about 1¼ cups of all-purpose flour (that’s around 163 grams), and a couple of tablespoons of natural cocoa powder to give it that chocolatey essence. Also grab a half teaspoon of baking soda, a quarter teaspoon of baking powder, and a pinch of salt. Believe me when I say, these little guys work wonders in helping your cookies rise to perfection!
If we’re going to do red velvet cookies right, we mustn’t skimp on the cream cheese frosting. So, save about 6 ounces of softened cream cheese and a cup of icing sugar for the topping, which will send your cookies straight into dessert heaven.
Getting the Texture Just Right
The magic begins when you whisk the softened butter with the granulated and brown sugars in a bowl. You want it to be fluffy, almost like a cloud. The scent wafts through the kitchen, and I sometimes catch myself just stopping to breathe it in! After about two to three minutes of whisking, it’s time to throw in that large egg, the vinegar, and the vanilla extract.
Next comes the fun part—splashing in that vibrant red gel food color. It’s like pouring your heart into the mix, and you get to decide how bold you’d like the color to be. Once everything is well combined, you’ll sift in the flour, cocoa powder, baking soda, baking powder, and salt. Gently fold it until it’s just mixed; don’t overdo it. You want those cookies to stay tender and squishy after baking.
Chilling Out Time
After everything is combined, I usually pop the dough in the fridge for 15 to 20 minutes. This helps it firm up a bit, ensuring that the cookies don’t spread too much while baking. Meanwhile, I slowly begin prepping my baking sheet; I preheat my oven to 375°F (190°C) and line the sheet with parchment paper. You don’t want a sticky mess, trust me on that!
Now, squeeze in a moment to think about variations. If you’re feeling adventurous, how about adding a touch of white chocolate chips or even sprinkle in some crushed nuts? The possibilities are endless!
The Best Part About This Dish
Once your dough is chilled, you can start shaping it. You’ll want to roll it into balls and then gently flatten them. I find that a good size is about two tablespoons each; not too big, not too small—just right! They’re going to puff up beautifully in the oven.
When you place them in the preheated oven, set a timer for about 10 to 11 minutes. The trick here is to take them out while they’re still soft in the center. They’ll continue to cook a bit after you pull them out, which ensures that moist, chewy texture we all love. Let them cool completely on a wire rack, and by this time, your kitchen will be filled with the most irresistible aroma.
Frosting: The Icing on the Cake (Literally)
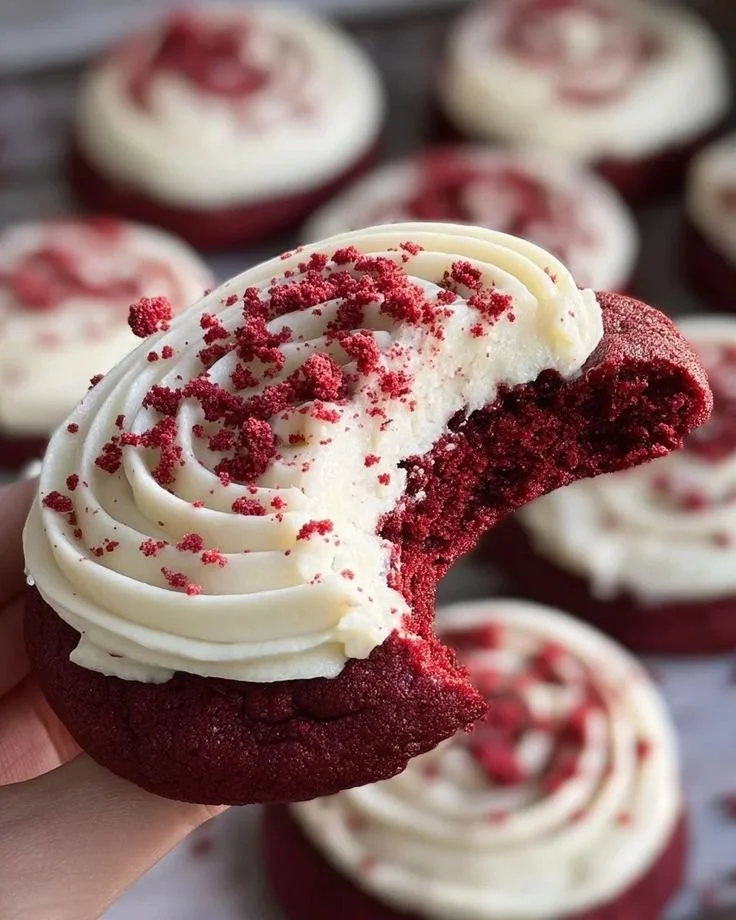
While the cookies are cooling, you can whip up the cream cheese frosting. This part is delightful because it means you’ll be rewarded soon! In a separate bowl, beat the softened cream cheese with butter until it’s smooth. Gradually mix in the icing sugar and just a splash more vanilla extract for flavor—it’s divine! When the cookies are cooled, use a piping bag (or just a zip-top bag with the corner cut off) to pipe that luscious frosting on top of each cookie.
But wait, there’s more! For an extra touch, if you have leftover red velvet crumbs, sprinkle them on top for that picture-perfect finish. It’s like putting a cherry on top, but better!
When Things Don’t Go As Planned
I’ve had my share of cookie mishaps, believe me. One time, I completely forgot to add the baking soda and wondered why my cookies came out flat. So, make sure you’ve laid out all your ingredients, and take a moment to double-check. That little bit of baking powder makes a world of difference in the texture!
Making It Work for Busy Weeknights
Now, if you’re short on time, you can make the dough ahead of time and chill it overnight in the fridge. Just shape the balls and pop them straight into the oven the next day! It’s a lifesaver for those busy weeknights when you simply need a sweet treat without the fuss.
For leftovers, I’ve found that storing them in an airtight container keeps them fresh for days. Perfect for when the cravings hit again at midnight!
Wrapping Up
So, there you have it! This Crumbl copycat red velvet cookie recipe has become a staple in my baking routine. It’s easy, satisfying, and perfect for sharing—or keeping all to yourself, no judgment here! With just the right balance of flavors and textures, you’ll understand why I’m so smitten with these cookies. Just grab a glass of milk, find your favorite cozy spot, and indulge in the delightful goodness of these red velvet treasures. Happy baking!
Crumbl Copycat Red Velvet Cookies
Ingredients
Method
- In a bowl, whisk together softened butter, granulated sugar, and brown sugar until fluffy.
- Add the egg, vinegar, and vanilla extract to the mixture.
- Stir in the red gel food color until well combined.
- Sift in flour, cocoa powder, baking soda, baking powder, and salt. Gently fold until just mixed.
- Chill the dough in the fridge for 15-20 minutes.
- Preheat the oven to 375°F (190°C) and prepare a baking sheet with parchment paper.
- Roll the chilled dough into balls, about two tablespoons each, and flatten them slightly.
- Bake for 10-11 minutes, taking them out when they're still soft in the center.
- Let cookies cool on a wire rack.
- In a separate bowl, beat softened cream cheese with butter until smooth.
- Gradually mix in icing sugar and a splash of vanilla extract.
- Once cookies are cooled, pipe frosting onto each cookie. Optionally, sprinkle with leftover red velvet crumbs.