Easy Apricot Jam
The Joy of Making Easy Apricot Jam There’s something magical about transforming fresh fruit into a beautiful jar of jam. For me, apricot jam holds a special place in my heart; it’s sweet, tangy, and bursts with the sunny flavor of summer. I remember the first time I tried making it with my grandmother. We…
The Joy of Making Easy Apricot Jam
There’s something magical about transforming fresh fruit into a beautiful jar of jam. For me, apricot jam holds a special place in my heart; it’s sweet, tangy, and bursts with the sunny flavor of summer. I remember the first time I tried making it with my grandmother. We spent the afternoon in the kitchen, the air filled with the comforting aroma of simmering fruit and sugar. It was a lesson in patience and love, and today I want to share that same warmth with you through this easy recipe.
To get started, you’ll need just a handful of simple ingredients. Think about lovely ripe apricots, pitted and chopped—about four cups will do. You’ll also want two cups of sugar, a quarter cup of lemon juice, and a quarter cup of water. It’s a straightforward ensemble that packs a punch, making every spoonful celebratory.
Getting Started with Your Apricots
Begin by gathering your apricots. The brighter and riper they are, the more flavorful your jam will be. Once you’ve pitted and chopped the fruit, grab a large pot and combine those beautiful apricots with the sugar, lemon juice, and water. As you mix these ingredients, you’ll see the sugar start to dissolve. This is where the magic begins!
Heat your pot over medium heat, stirring frequently until the sugar has completely melted away. This initial step is crucial because it sets the stage for your jam to come to life. I like to think of this as the jam’s warm-up before the big event.
The Transformation Begins
Once the sugar is dissolved, it’s time to crank up the heat! Bring your mixture to a boil and let it bubble away. This is where you’ll need to keep an eye on things. Stir occasionally to prevent any sticking and burning on the bottom of the pot. Just imagine the transformation happening: you’re moving from a simple fruit and sugar mixture to a thickening jam.
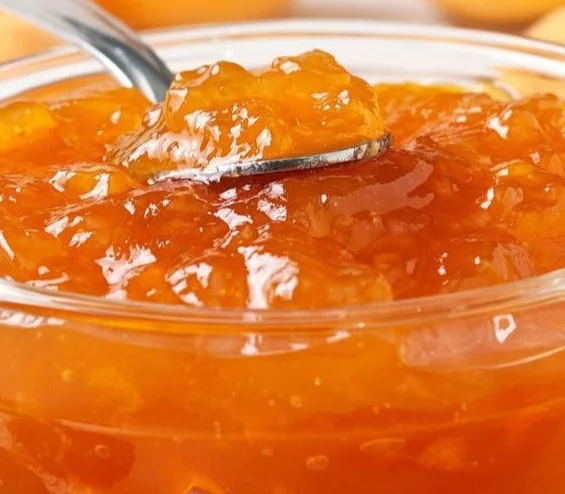
For about 20-30 minutes, let it boil and stew. You’ll want to watch for the consistency—this is a personal preference based on how thick or runny you love your jam. A great way to test it is by placing a spoonful of the mixture on a plate. If it holds its shape and doesn’t run back together quickly, you’re golden!
The Perfect Finish
Once you’ve reached the desired consistency, remove your pot from the heat and allow the jam to cool slightly. This pause is important—it gives your jam the opportunity to settle just a bit.
Next, it’s time to get your jars ready. I always recommend using sterilized jars for preserving. Pour the jam into the jars, leaving a little headspace, and seal them tightly. Allow them to cool completely before storing them in the refrigerator. You can even stash some away in the freezer for later enjoyment. If you want to explore more preservation techniques, check out this homemade jambalaya recipe that also highlights the beauty of savory preserving.
Making It Your Own
One of the reasons I adore this apricot jam recipe is its versatility. You can experiment in so many ways! For instance, try adding a pinch of cinnamon or a bit of vanilla extract for a unique twist. If you’re feeling adventurous, consider mixing in other fruits, such as peaches or strawberries, for a blended fruit jam experience. While you’re at it, you might appreciate another easy fruit spread—an easy strawberry rhubarb jam recipe is a perfect companion during the spring and summer months.
Of course, you can also adjust the sugar content based on your taste or dietary needs. Want to make it even healthier? Use alternatives or reduce the sugar, remembering that the jam might have a slightly different texture.
When to Serve It
The best part about homemade apricot jam is the joy it brings when served. Imagine slathering it on toast in the morning, pairing it with soft cream cheese on crackers for a delightful snack, or even using it as a filling in pastries. It’s perfect for breakfast, brunch, or really any time you crave a sweet touch to your day.
Conclusion
Making apricot jam is not just a cooking process; it’s a cherished memory tied to family traditions and the delight of sharing. I invite you to dive into this simple recipe and experience the joy it brings. If you’re looking for quick variations, you may want to check out the easiest 8-minute small batch apricot jam recipe for those busy days or explore another delicious recipe for apricot jam that can inspire your next jam-making adventure. Enjoy every spoonful of your creation!
Apricot Jam
Ingredients
Method
- Gather your ripe apricots, pit and chop them into small pieces.
- In a large pot, combine the chopped apricots, sugar, lemon juice, and water.
- Heat the pot over medium heat, stirring frequently until the sugar is completely dissolved.
- Once dissolved, increase the heat and bring the mixture to a boil, stirring occasionally to prevent sticking.
- Allow it to boil for about 20-30 minutes, watching for your desired consistency.
- To test consistency, place a spoonful of the mixture on a plate; if it holds its shape, it's ready.
- Remove the pot from heat and allow the jam to cool slightly.
- Pour the jam into sterilized jars, leaving some headspace, and seal them tightly.
- Allow to cool completely before storing in the refrigerator or freezer.