Easy Frankenstein Crispy Rice Treats
Unleashing Halloween Fun with Easy Frankenstein Crispy Rice Treats Halloween is just around the corner, and I always love getting into the festive spirit by creating fun treats that everyone will enjoy. That’s where my Easy Frankenstein Crispy Rice Treats come in. Not only are these crisp and chewy desserts guaranteed to bring a smile…
Unleashing Halloween Fun with Easy Frankenstein Crispy Rice Treats
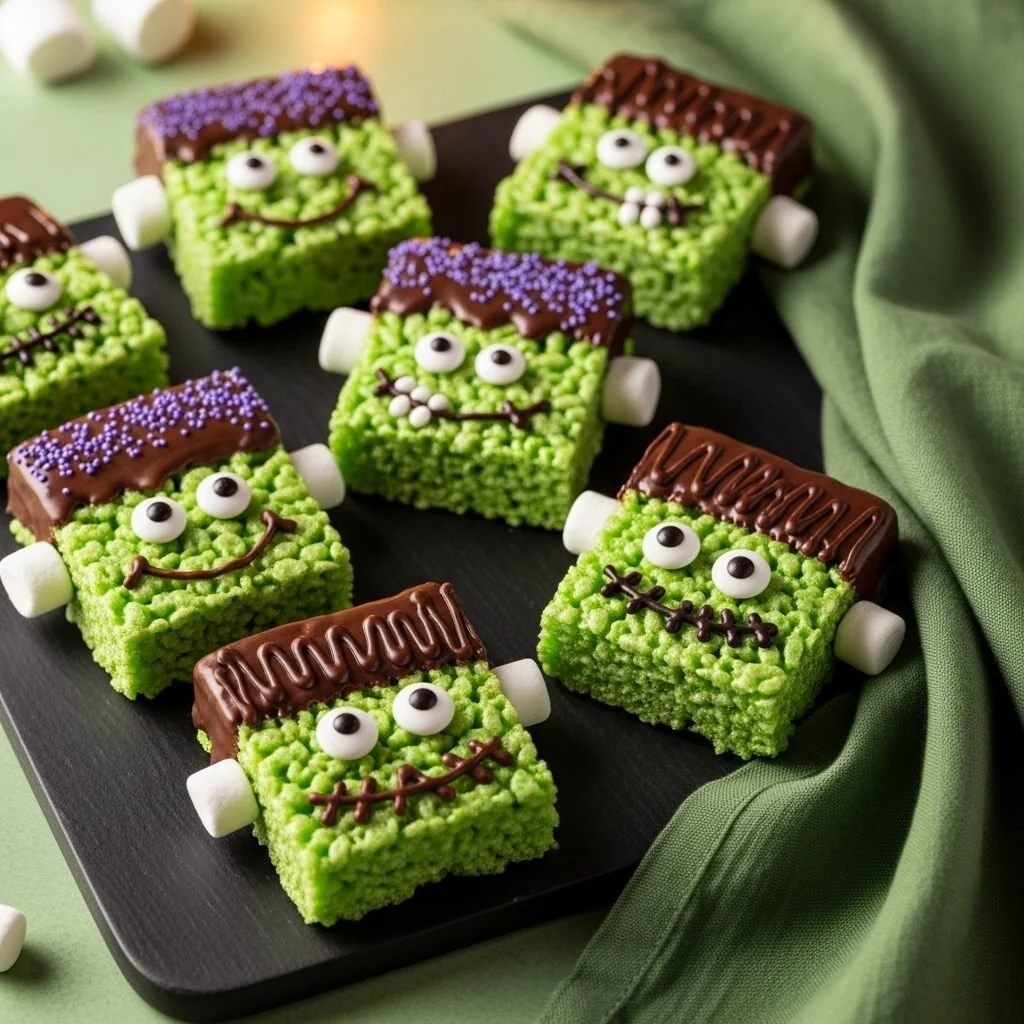
Halloween is just around the corner, and I always love getting into the festive spirit by creating fun treats that everyone will enjoy. That’s where my Easy Frankenstein Crispy Rice Treats come in. Not only are these crisp and chewy desserts guaranteed to bring a smile to both kids and adults, but they are surprisingly simple to whip up. The vibrant green color and silly facial features make them an ideal option for any Halloween gathering. You may also find Easy Frankenstein Crispy Rice Treats useful.
To get started, here are the goodies you’ll need: nonstick cooking spray, unsalted butter, mini marshmallows, some green food coloring, crisp rice cereal (like Rice Krispies), semisweet chocolate chips, black icing for decoration, and some candy decorations that mimic facial features. Oh, and don’t forget the mini marshmallows that will serve as the iconic neck bolts! You may also find Frankenstein Crispy Rice Treats useful.
The Simple Magic of Making Frankenstein Treats
The magic begins with melting the butter—I’m telling you, the smell of melted butter and marshmallows is heavenly! In a large pot over low heat, melt three tablespoons of unsalted butter and then add in four cups of mini marshmallows. Here’s a tip I use: to make them a bit spooky, add a splash of green food coloring while stirring until everything melts smoothly. It takes about three minutes of gentle stirring before you can move on to the next step.
Next, you’ll want to fold in six cups of crisp rice cereal. The mixture is quite sticky, so I like to spray my hands with a bit of nonstick cooking spray before patting it into a 9-by-13-inch baking dish. This is a good time to chill the mixture; it helps to set the treats and makes them easier to cut later. Refrigerate for about an hour until they’re firm and ready for some monster magic!
Once you’ve given the mixture some time in the fridge, flip the dish onto a cutting board and gently tap it to release the treats. You’ll need to trim the edges a little, then cut the massive rectangle in half lengthwise and slice each long piece into approximately five equal sections. Voilà, you now have what could be a monster’s head!
Getting Creative with Decorations
Now comes the fun part: decorating! Line a rimmed baking sheet with wax paper as your decorating station. Melt a 12-ounce bag of semisweet chocolate chips in a microwave-safe bowl; I usually do this on 50% power and stir occasionally until it’s just melted. The chocolate is what will create the hair on our Frankenstein treats!
Dip one short edge of each rectangle into the chocolate, letting any excess drip off. Here I just use a toothpick to make fun patterns with the chocolate—it’s all about creativity! Place them on the wax paper to finish setting.
As for the face, this is where you can have a blast with your black icing and candy decorations. Use a bit of icing to stick on candy eyes and draw fun expressions. For neck bolts, add a mini marshmallow on either side, secured with more icing, of course.
A Little Personal Touch
I always enjoy making these treats with my kids; it’s become a fun Halloween tradition. They love getting creative and sometimes add their own twist, whether that means more colorful sprinkles or a completely unique face for their Frankenstein. I think that’s the best part about these treats—they’re not just delicious; they’re a canvas for your imagination!
For those who might want to mix it up, consider variations like adding peanut butter to the melted marshmallows for a nutty taste or using white chocolate for an entirely different look. It’s remarkable how versatile this recipe can be.
Storing Your Delicious Creations
So, how do you store these delicious creations? If you happen to have leftovers (but let’s be honest, they usually disappear quickly!), simply keep them in a cool and dry place in an airtight container. They will remain good for several days, though I doubt they’ll last that long!
Conclusion
In conclusion, Easy Frankenstein Crispy Rice Treats are a fun, festive way to celebrate Halloween while enjoying quality time with family and friends. You can experiment with the decorations and even switch up the flavors to make it your own. For a similar twist on this Halloween classic, you might want to check out Frankenstein Rice Krispie Treats | 365 Days of Baking and More for even more inspiration!
Easy Frankenstein Crispy Rice Treats
Ingredients
Method
- Melt the butter in a large pot over low heat.
- Add mini marshmallows and a splash of green food coloring; stir gently until melted, about 3 minutes.
- Fold in the crisp rice cereal until fully coated.
- Spray hands with nonstick cooking spray and press the mixture into a 9-by-13-inch baking dish.
- Refrigerate for about 1 hour to firm.
- Flip the dish onto a cutting board and cut the treats into monster heads (approximately 5 pieces).
- Melt semisweet chocolate chips in a microwave-safe bowl at 50% power, stirring until melted.
- Dip one short edge of each rectangle in the melted chocolate and let excess drip off.
- Place dipped rectangles on wax paper to set.
- Use black icing and candy decorations to design faces on the treats.
- Attach mini marshmallows using icing to represent neck bolts.