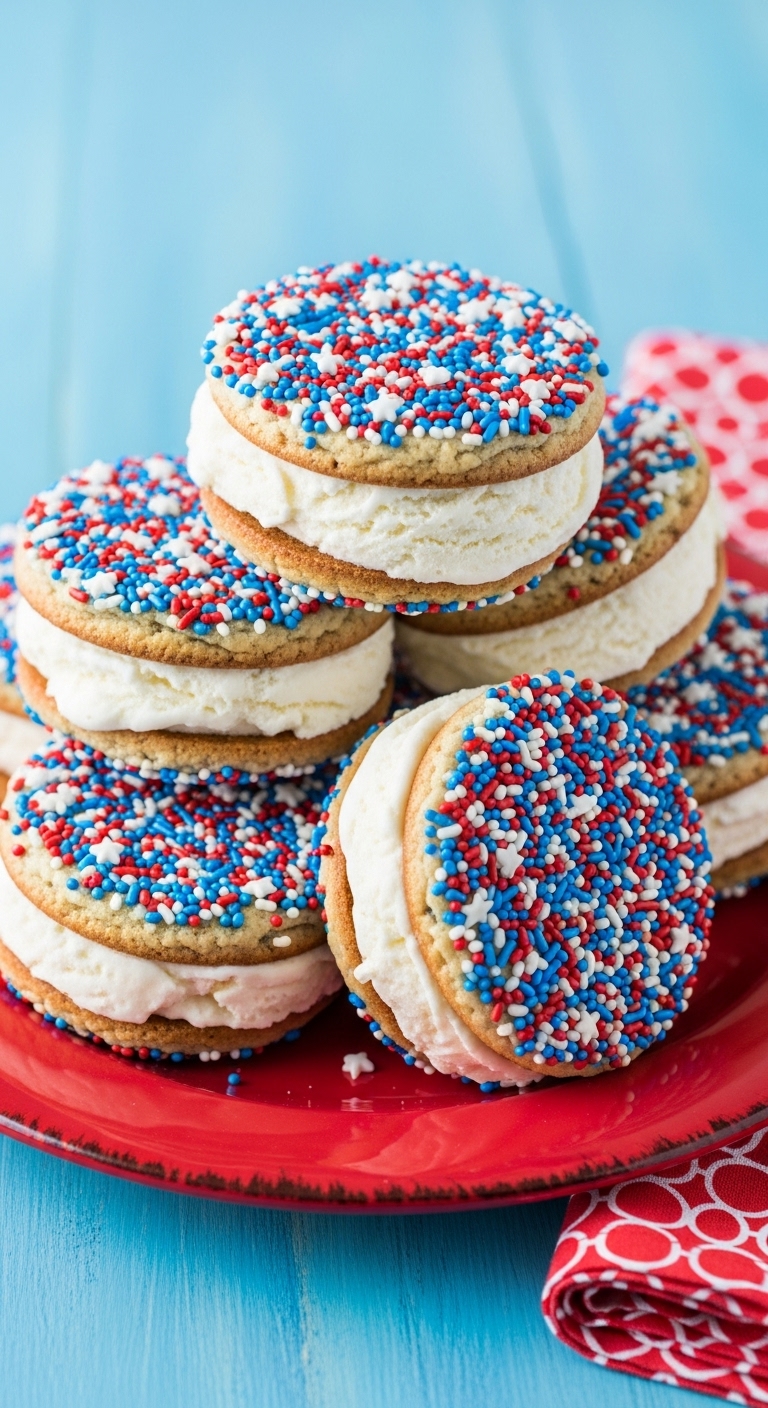
Easy July 4th Ice Cream Sandwiches (The Ultimate Patriotic Treat!)
Hello, my friends! When it comes to celebrating summer holidays like the Fourth of July or Memorial Day, there’s nothing better than a festive treat that’s as fun to look at as it is to eat. And let me tell you, these July 4th Ice Cream Sandwiches are the absolute star of any patriotic party….
Hello, my friends! When it comes to celebrating summer holidays like the Fourth of July or Memorial Day, there’s nothing better than a festive treat that’s as fun to look at as it is to eat. And let me tell you, these July 4th Ice Cream Sandwiches are the absolute star of any patriotic party. Just imagine: two soft, chewy, buttery sugar cookies, absolutely covered in festive red, white, and blue sprinkles, sandwiching a thick, creamy layer of classic vanilla ice cream. It’s a handheld slice of pure joy!
This is such a fun and surprisingly easy recipe to make from scratch. The homemade sugar cookies are soft and delicious, providing the perfect texture that doesn’t get too hard when frozen. It’s a wonderful recipe to make with kids and a guaranteed way to bring a huge smile to everyone’s face. Forget store-bought novelties; this year, let’s create a memorable, homemade dessert that will be the talk of the barbecue!

Why These Ice Cream Sandwiches are a Summer Celebration Staple
This recipe is more than just a dessert; it’s a fun, festive activity that results in the most delicious treat. Here’s why you’ll love it.
- Perfectly Soft & Chewy Cookies: The sugar cookie recipe is specifically designed to be perfect for ice cream sandwiches. They bake up soft and stay that way even after freezing, so you get a perfect bite every time without the ice cream squeezing out the sides.
- Incredibly Festive & Fun: Coated in a blanket of red, white, and blue sprinkles, these sandwiches are the epitome of a patriotic dessert. They look absolutely stunning on a platter.
- Easier Than You Think: While they look impressive, the process is very straightforward. You make a simple sugar cookie dough, bake, and assemble. It’s a great project for a summer afternoon.
- The Ultimate Make-Ahead Dessert: These are designed to be made ahead of time! You can assemble them and keep them in the freezer, ready to be pulled out the moment your guests are ready for a cool, refreshing treat.
- A Guaranteed Crowd-Pleaser: Who doesn’t love an ice cream sandwich? This homemade version takes a beloved classic and gives it a fun, festive, and incredibly delicious upgrade that both kids and adults will go crazy for.
Gather Your Festive Ingredients: What You’ll Need
Let’s gather the simple, classic ingredients for this spectacular summer dessert.
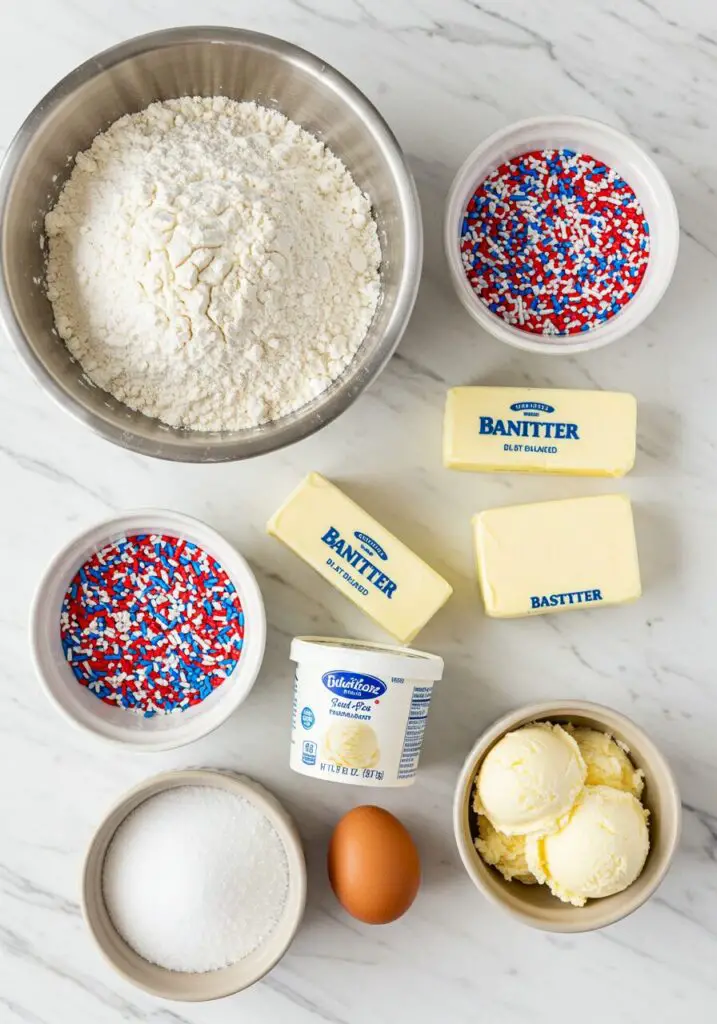
- 1/2 cup Red, White, and Blue Sprinkles: The star of the show! Jimmies work best here.
- 2 1/2 cups All-Purpose Flour
- 2 1/2 tsp. Baking Powder
- 1 tsp. Kosher Salt
- 2 sticks (1 cup) Salted Butter, at room temperature: Make sure it’s nicely softened so it can cream properly with the sugar.
- 1 1/2 cups Sugar
- 1 large Egg
- 1 tsp. Vanilla Extract: For that classic, warm flavor.
- 3 pints Vanilla Ice Cream, slightly softened: Let it sit on the counter for about 10-15 minutes before you plan to assemble.
Crafting Your Ice Cream Sandwiches: Step-by-Step Guide
Let’s get baking! This is a fun and rewarding process.
- Prep and Make the Cookie Dough: Preheat your oven to 350°F and line two large baking sheets with parchment paper. Pour your festive sprinkles into a small, shallow bowl. In a large bowl, whisk together the flour, baking powder, and salt. In a separate large bowl, use an electric mixer to beat the room-temperature butter and sugar on medium-high speed until it’s light and fluffy, which takes about 5 minutes. Beat in the egg and vanilla. Finally, add the flour mixture to the wet ingredients and beat on low speed until it’s just combined.
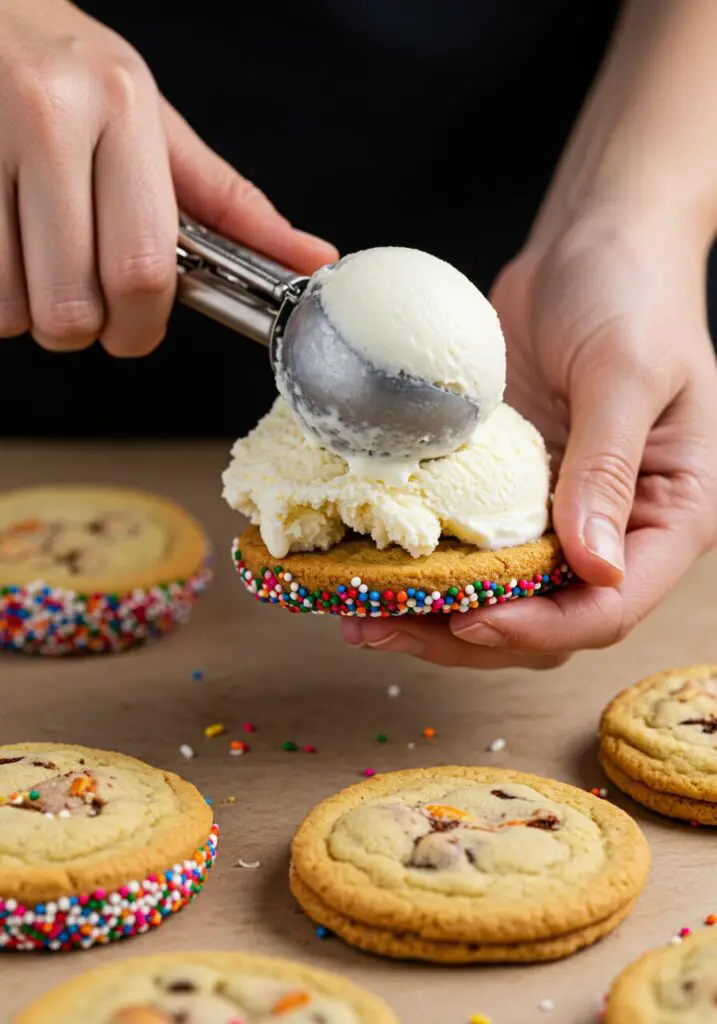
- Form and Decorate the Cookies: Roll the dough into 1 ¼-inch balls (this should make about 24). Flatten each ball with the palm of your hand into a 2-inch disk. Take each disk and press the top side and the rounded edges firmly into the bowl of sprinkles. Make sure to get a good, thick coating! Do not coat the bottom of the cookie.
- Bake the Cookies: Arrange about half of the cookies on your prepared baking sheets, sprinkle-side up, spacing them about 2 inches apart. Bake for about 12 minutes, or until the cookies are set and the bottom edges are just starting to turn a light golden brown. Let the cookies cool for 5 minutes on the baking sheets before carefully moving them to wire racks to cool completely. Repeat the baking process with the remaining cookie dough.
- Assemble the Sandwiches: Once your cookies are completely cool, it’s time for the fun part. Line a separate baking sheet with parchment paper (one that will fit in your freezer). Take one cookie and scoop about ½ cup of slightly softened vanilla ice cream onto the bottom (the non-sprinkle side). Place another cookie on top, sprinkle-side up. Gently press the two cookies together until the ice cream spreads out to the edges.
- Freeze and Serve: Place the finished ice cream sandwich on your parchment-lined baking sheet and transfer it to the freezer. Repeat with all the remaining cookies and ice cream. Freeze the sandwiches for at least 1 hour to allow them to firm up completely before serving.
Wise Tips for the Best Ice Cream Sandwiches
- Room Temperature is Key: For the cookie dough, make sure your butter and egg are at room temperature. This allows them to incorporate fully and create a light, fluffy dough.
- Don’t Overbake the Cookies: You want the cookies to be soft and chewy, not hard and crispy. Pull them from the oven as soon as the edges are just beginning to turn golden. They will continue to set as they cool on the pan.
- Slightly Softened Ice Cream: The perfect consistency for assembling is ice cream that has been sitting on the counter for about 10-15 minutes. It should be easy to scoop but not melted. If it gets too soft, just pop it back in the freezer for a bit.
Easy July 4th Ice Cream Sandwiches
Ingredients
Method
- Preheat oven to 350˚. Line 2 baking sheets with parchment. Whisk together flour, baking powder, and salt. In another bowl, beat butter and sugar until light and fluffy. Beat in egg and vanilla. Add flour mixture and beat on low until just combined.
- Roll dough into 1¼-inch balls (about 24). Flatten into 2-inch disks. Press the top and sides of each disk into a bowl of sprinkles to coat. Arrange on baking sheets and bake for about 12 minutes. Let cool completely.
- Line a separate baking sheet with parchment. Scoop about ½ cup ice cream onto the bottom (non-sprinkle side) of a cookie. Top with another cookie, sprinkle-side up, and gently press to spread the ice cream to the edges.
- Place the finished sandwich on the parchment-lined baking sheet. Repeat with remaining cookies and ice cream. Freeze for at least 1 hour before serving.
Frequently Asked Questions (FAQ) – July 4th Ice Cream Sandwiches
- Can I make these ahead of time?
Yes, they are the perfect make-ahead dessert! Once assembled, wrap each sandwich individually in plastic wrap and they can be stored in the freezer for up to a month. - Can I use a different kind of cookie dough?
You could, but this sugar cookie recipe is specifically designed to stay soft when frozen. A chocolate chip cookie or a brownie cookie would also be delicious alternatives. - What if I can’t find red, white, and blue sprinkles?
No problem! You can use any color of sprinkles you like to match any occasion—rainbow sprinkles for a birthday, or green and red for Christmas. - Can I use a different flavor of ice cream?
Absolutely! While vanilla is classic, strawberry ice cream would be fantastic for an extra patriotic red, white, and blue theme. Chocolate, cookie dough, or your favorite flavor would also be delicious.
Conclusion
There’s something so wonderfully celebratory about these July 4th Ice Cream Sandwiches. They are a festive, fun, and incredibly delicious way to cool down on a hot summer day. Making them from scratch adds that extra bit of love that turns a simple dessert into a cherished memory. I hope you have as much fun making and eating these as I do. Happy celebrating!