Funfetti Cake
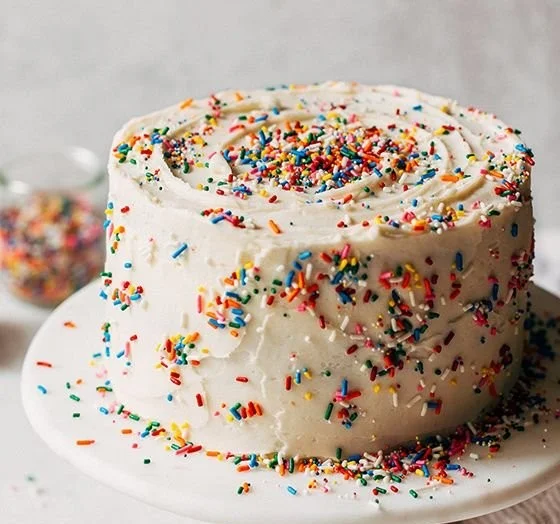
The Joy of Baking Funfetti Cake There’s something magical about a Funfetti cake, isn’t there? It’s not just a dessert; it’s a celebration on a plate! Whenever I see those vibrant speckles of color dotted throughout the cake, I can’t help but feel transported back to my childhood—birthdays, parties, and all the joyful moments spent…
The Joy of Baking Funfetti Cake
There’s something magical about a Funfetti cake, isn’t there? It’s not just a dessert; it’s a celebration on a plate! Whenever I see those vibrant speckles of color dotted throughout the cake, I can’t help but feel transported back to my childhood—birthdays, parties, and all the joyful moments spent around a table, giddy with excitement. So, today I want to share one of my all-time favorite recipes for Funfetti cake—because who said cake shouldn’t bring a little sparkle into our lives?
The Sweet Simplicity of Funfetti
What I love about this cake is its delightful simplicity and versatility. With just a few everyday ingredients, you can create something truly special. You start with two cups of all-purpose flour as the base, paired with a cup and a half of granulated sugar. The sweetness plays a crucial role in this dessert, giving it that classic flavor we all adore. Next, there’s half a cup of softened unsalted butter, which adds richness and moisture.
Now, let’s not forget about the eggs—three of them, in fact—they help bind all of the ingredients together while providing a lovely structure. You’ll also need a cup of milk for the wet ingredients, a tablespoon of baking powder to give the cake its rise, a teaspoon of vanilla extract for that comforting warmth, and just a bit of salt to balance out the sweetness. Of course, the star of the show is the cup of sprinkles; they add that playful pop of color that makes this cake a true Funfetti masterpiece.
From Bowl to Oven: A Simple Process
When I’m ready to embark on this baking adventure, I start by preheating my oven to 350°F (or 175°C) and I generously grease a 9×13 inch baking pan. The last thing I want is for my beautiful creation to stick to the pan.
While the oven warms up, I grab a large mixing bowl to cream together the softened butter and granulated sugar. I usually mix them until it’s light and fluffy, which feels euphoric when you see that transformation happen. Once I achieve that silky texture, I add the eggs one at a time, making sure to beat well after each addition. The sound of the mixer whirring becomes almost like music; it’s a comfort zone I love.
Next, in goes the vanilla extract—just one teaspoon, but it makes such a difference in flavor. In another bowl, I combine my dry ingredients: the flour, baking powder, and salt. I slowly add this mixture to the wet ingredients, alternating with the milk, always beginning and ending with the flour mix. This technique keeps the batter nice and smooth, ensuring I end up with a cake that’s perfectly fluffy.
Now, before I pour the batter into the prepared baking pan, I gently fold in those playful sprinkles. It’s at this point I can feel the excitement building as I imagine the colorful surprise waiting to be discovered once the cake is baked.
Baking to Perfection
I pour the batter into my greased pan, spreading it evenly, and then it’s time to slide it into the preheated oven. I usually set a timer for about 30-35 minutes. The tantalizing aroma of vanilla and baked goodness soon wafts through my kitchen, making it hard to resist sneaking a peek. A toothpick inserted into the center should come out clean to signal that the cake is perfectly baked.
After what feels like an eternity, I pull the cake from the oven and allow it to cool. The cooling phase can be challenging because that sweet scent draws me in, but I know it’s essential for good texture.
Personal Touches and Variations
What makes this recipe so special is its adaptability. You can easily play around with flavors and ingredients! Sometimes, I swap out half of the all-purpose flour for almond flour, giving it a unique, nutty flavor that pairs beautifully with the sprinkles. You could even add a dash of almond extract alongside the vanilla for an extra flavor punch. If you’re feeling a bit adventurous, why not incorporate different kinds of sprinkles or even a flavored frosting to suit the season or event?
Another trick I’ve learned along the way is to use cold ingredients straight from the fridge. This keeps everything from the butter to the eggs at the same temperature, which can create a more homogenous batter. Plus, if you want to make this cake in advance for a party, it stores really well at room temperature for a couple of days, thanks to its moist texture.
The Comfort of Leftovers
If you happen to have any leftovers—though I doubt it will be much—just cover it with foil and let it sit out. I love enjoying a slice of Funfetti cake with a cup of coffee the next morning to kick-start my day. It’s such a cheerful way to greet the day, reminiscing about yesterday’s sweetness.
A Cake Worth Celebrating
Baking brings me so much joy, and there’s something particularly heartwarming about making a cake that is meant to brighten someone’s day. Whether it’s for a birthday, a casual get-together, or just a Tuesday afternoon, Funfetti cake is always a welcomed choice.
And if you’re curious about honing your baking skills even further, I highly recommend checking out this amazing recipe for Funfetti Cake from Scratch.
Conclusion
There you have it—a recipe that captures joy in every bite. Funfetti cake holds a special place in my heart and kitchen, reminding me that sometimes it’s the little things (like a sprinkle-filled slice of cake) that can turn a regular day into something truly memorable. So, gather your ingredients, preheat that oven, and let the baking begin! You’ll be sharing delicious memories in no time. And if you want to dive deeper into variations and ideas, check out this detailed Funfetti cake recipe that provides even more inspiration. Happy baking!