Your New Fall Favorite: Homemade Gluten-Free Pumpkin Pop Tarts
There’s a certain kind of nostalgic joy that comes with the thought of a warm, frosted pop tart. But what if we could take that childhood memory, give it a sophisticated, seasonal twist, and make it completely gluten-free? That is the magic of these incredible Homemade Gluten-Free Pumpkin Pop Tarts. This is the recipe that…
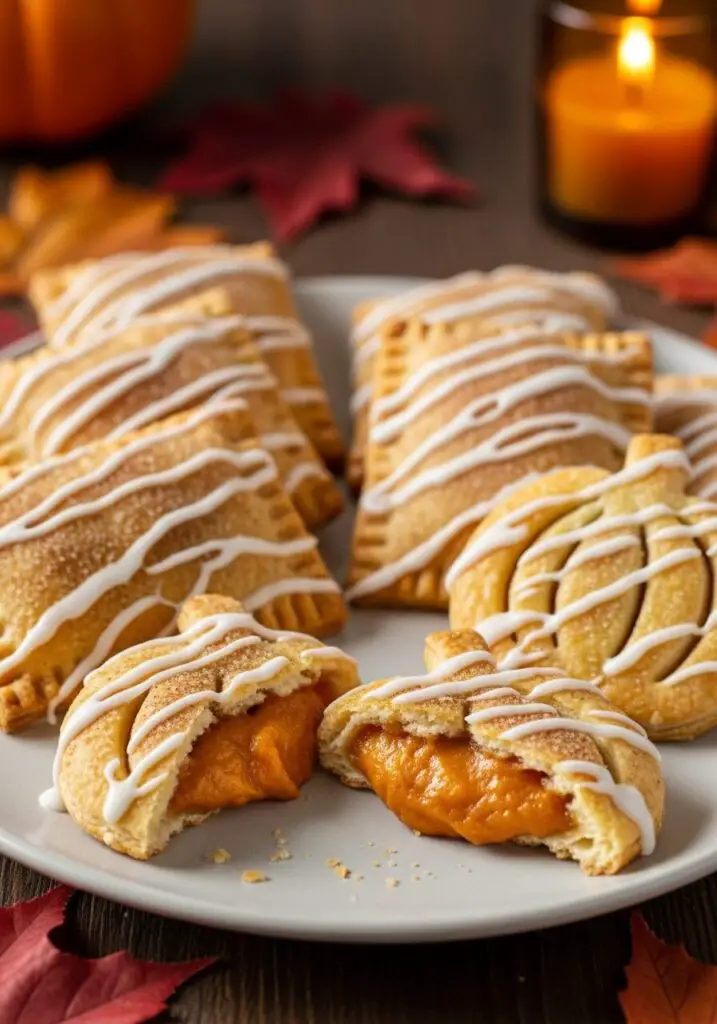
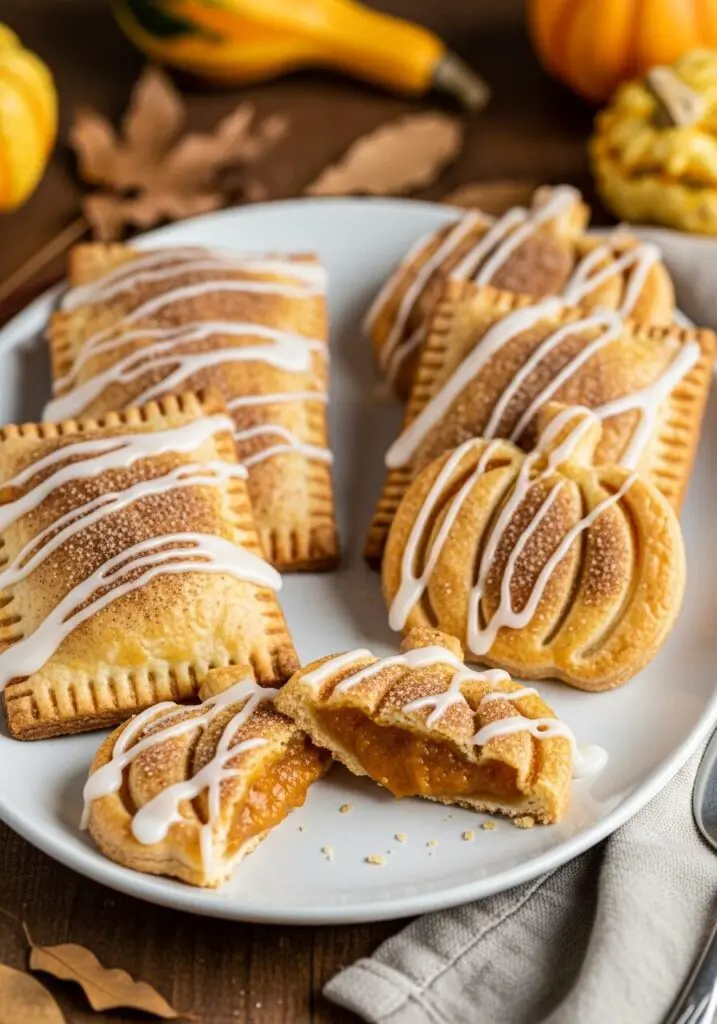
There’s a certain kind of nostalgic joy that comes with the thought of a warm, frosted pop tart. But what if we could take that childhood memory, give it a sophisticated, seasonal twist, and make it completely gluten-free? That is the magic of these incredible Homemade Gluten-Free Pumpkin Pop Tarts. This is the recipe that will define your fall baking season. Imagine a buttery, unbelievably flaky gluten-free pie crust—a true masterpiece that shatters with every bite. Tucked inside is a sweet, warmly spiced pumpkin butter filling that tastes like the very essence of autumn. We then finish them with a sweet maple glaze and a final dusting of cinnamon sugar. They are a true celebration of all things pumpkin spice. And the best part? You can use fun, seasonal cookie cutters to make them into adorable little pumpkins, making them the perfect treat for a Thanksgiving dessert table or a fun fall baking project with the kids. These are not just a gluten-free version of a classic; they are a truly spectacular pastry in their own right.
Why These Pumpkin Pop Tarts Are a Must-Bake This Fall!
- Unbelievably Flaky Gluten-Free Crust: This homemade gluten-free pie crust is tender, buttery, and incredibly flaky. No one will ever guess it’s gluten-free!
- Packed with Cozy Fall Flavor: The sweet, spiced pumpkin butter filling is like a warm hug, perfectly capturing the comforting flavors of the season.
- A Fun and Festive Project: Using cookie cutters to create adorable pumpkin shapes makes this a wonderfully creative and fun baking activity for the whole family.
- Perfect for Making Ahead: The dough needs to be chilled, and the assembled pop tarts can be frozen, making this a fantastic, stress-free recipe for holiday planning.
- Better Than the Box, By a Mile: These homemade pop tarts are a world away from the store-bought version. The flaky crust and fresh filling are a true gourmet treat.
Recipe Snapshot
| Prep Time | 20 minutes (+ 40 mins chilling) |
| Cook Time | 25 minutes |
| Total Time | 1 hour 25 minutes |
| Servings | 18 pop tarts |
| Calories | See recipe card for details |
| Course | Dessert, Breakfast |
| Cuisine | American |
| Method | Baking |
Your Fall Baking Shopping List
This delightful recipe is built on a fantastic gluten-free pastry and a simple, flavorful pumpkin filling.

→ For the Flaky Gluten-Free Pie Crust
- Gluten-Free All-Purpose Flour Blend: 2 1/2 cups. Use a high-quality blend that contains xanthan gum, or be sure to add it separately.
- White Caster Sugar & Salt: For flavor and a tender crust.
- Xanthan Gum: 1 1/4 teaspoon, if your flour blend doesn’t already include it. This is essential for structure in gluten-free baking.
- Cold Butter: 2/3 cup, cut into cubes. Cold is key! You can also use a vegan butter, shortening, or coconut oil.
- Egg: 1, to enrich the dough.
- Ice Cold Water: 4-5 tablespoons. It must be ice cold to keep the butter from melting.
→ For the Sweet Pumpkin Filling & Glaze
- Pumpkin Butter: 6 tablespoons. This gives an intense, pre-spiced pumpkin flavor. The recipe also includes a simple alternative if you only have pumpkin puree!
- Powdered Sugar & Maple Syrup: The base of our delicious, simple glaze.
- Cinnamon & Sugar: For the final, crunchy, spiced dusting.
Let’s Get Baking! Your Guide to Perfect Pumpkin Pop Tarts
This is a wonderful baking project. The key to a flaky crust is keeping your dough cold, so don’t skip the chilling steps!
Phase 1: Make and Chill the Gluten-Free Dough (Time: ~10 mins + 30 mins chilling)
A good, well-chilled dough is the foundation of our flaky pop tarts.
- Combine Dry Ingredients. In a large mixing bowl, whisk together the gluten-free flour blend, xanthan gum (if using), sugar, and salt.
- Cut in the Butter. Add the cold, cubed butter to the flour mixture. Use a pastry cutter or your fingertips to cut the butter into the flour until you have a sandy mixture with some pea-sized pieces of butter remaining. Stir in the egg.
- Form and Chill the Dough. Add the ice-cold water, 1 tablespoon at a time, mixing until a dough just comes together into a ball. Divide the dough in half, form each half into a rectangle, wrap tightly in plastic, and refrigerate for at least 30 minutes.
Phase 2: Assemble the Pop Tarts (Time: ~10 mins + 10 mins chilling)
Now for the fun part: rolling, cutting, and filling our pastries!
- Preheat and Prep. Preheat your oven to 400°F. Line a couple of baking sheets with parchment paper.
- Roll and Cut. Take one half of the chilled dough from the fridge. On a lightly floured surface, roll it into a large rectangle. Cut the dough into nine 2″x3″ rectangles, or use a pumpkin-shaped cookie cutter to cut out your shapes. Repeat with the second half of the dough so you have a matching set of tops and bottoms.
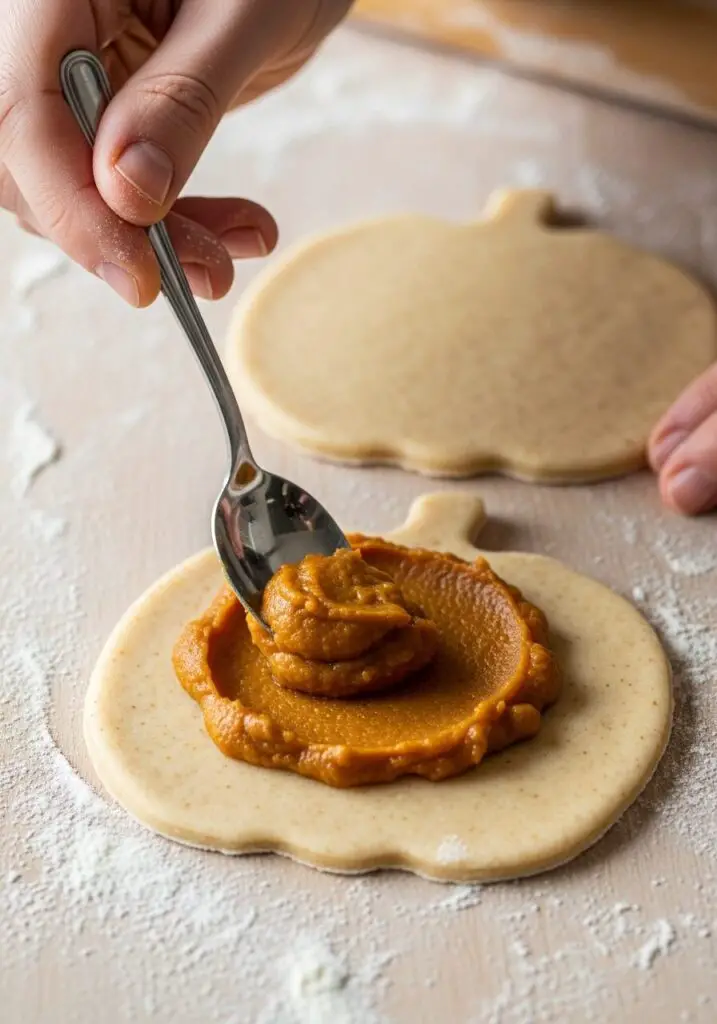
- Fill and Seal. Transfer half of your cut-out dough pieces to the prepared baking sheets. Spoon 1 teaspoon of pumpkin butter into the center of each piece. Place a matching piece of dough on top. Use a fork or your fingers to crimp and seal the edges all the way around.
- Final Chill. Use a fork to prick a few holes in the top of each pop tart to allow steam to escape. Place the assembled pop tarts in the fridge for about 10 minutes to chill one last time.
Crucial Step: This final chill is the secret to a super-flaky crust that holds its shape beautifully!
Phase 3: Bake, Cool, and Glaze (Time: ~25 mins + cooling)
It’s time for the oven to work its magic, and then we’ll add the sweet finishing touches.
- Bake to Golden Perfection. Just before baking, you can brush the tops of the chilled pop tarts with a beaten egg for an extra golden shine. Bake for 20-24 minutes, until the pastries are puffed and the edges are golden brown.
- Cool Completely. Let the pop tarts cool on the pan for a few minutes before transferring them to a wire rack to cool completely. They must be 100% cool before you glaze them.
- Glaze and Dust. Whisk together the powdered sugar, maple syrup, and a pinch of cinnamon to form a thick glaze. In a separate small bowl, mix the granulated sugar and cinnamon.
- Decorate. Once the pop tarts are completely cool, drizzle the glaze over the top. While the glaze is still wet, sprinkle with the cinnamon-sugar mixture. Let the glaze set for about 10 minutes before enjoying!
WiseRecipes’ Top Tips for Flaky Gluten-Free Pastry!
- Keep Everything COLD: This is the golden rule of pie crust! Use ice-cold water and cold butter straight from the fridge. The little pieces of cold butter are what create steam in the oven, leading to those delicious flaky layers.
- Don’t Skip the Chilling: The chilling steps are non-negotiable for gluten-free pastry. It allows the dough to hydrate and firms up the fat, which prevents spreading and results in a much flakier crust.
- Don’t Overfill: Just one teaspoon of filling is all you need. Overfilling can cause the pop tarts to burst open in the oven.
- Get a Good Seal: Press firmly around the edges of your pop tarts with a fork to make sure they are completely sealed. This keeps all that delicious pumpkin filling inside where it belongs.
- Use an Egg Wash: While optional, brushing the tops with a beaten egg before baking gives them a beautiful, shiny, professional-looking golden finish.
Creative Twists: Delicious Ways to Customize Your Pop Tarts!
- Apple Cinnamon Pop Tarts: Use a thick apple butter or apple pie filling instead of pumpkin.
- Add a Nutty Crunch: Add a sprinkle of finely chopped, toasted pecans on top of the pumpkin filling before sealing the pop tarts.
- Chocolate Pumpkin: Add a few mini chocolate chips on top of the pumpkin filling for a delicious chocolate-pumpkin combination.
- Use a Different Glaze: A simple cream cheese glaze would also be incredible on these.
- Add Sprinkles: Top the wet glaze with some festive fall-themed sprinkles instead of the cinnamon sugar.

Homemade Gluten-Free Pumpkin Pop Tarts
Ingredients
Equipment
Method
- In a large bowl, whisk together the flour, xanthan gum, sugar, and salt. Add the cold butter and mix with a pastry cutter or your fingers until it resembles a sandy mixture. Stir in one egg.
- Mix in the ice water 1 tablespoon at a time until a dough forms. Divide the dough in half, form into rectangles, wrap tightly in plastic, and refrigerate for at least 30 minutes.
- Preheat oven to 400°F. Line baking sheets with parchment paper. On a lightly floured surface, roll one half of the dough into a large rectangle. Cut out an even number of 2″x3″ rectangles or use a cookie cutter for shapes. Repeat with the second half of dough.
- Transfer half of the dough pieces to the baking sheet. Add 1 teaspoon of pumpkin butter to the center of each.
- Place the remaining dough pieces on top. Crimp the edges with a fork to seal. Prick holes on top of the dough. Chill in the fridge for about 10 minutes.
- Optional: brush the tops with a beaten egg. Bake for 20-24 minutes until the edges are golden brown. Let cool on a wire rack completely.
- For the glaze, mix the powdered sugar, maple syrup, and a pinch of cinnamon until a thick frosting forms. In another small bowl, whisk the granulated sugar and 1 tsp cinnamon.
- Once the pop tarts are completely cool, drizzle with the glaze, then sprinkle with the cinnamon sugar. Let the glaze set before serving.
Notes
Keep Them Fresh! Storing Your Homemade Pop Tarts
These are a fantastic treat to make ahead for a special Thanksgiving morning breakfast or as part of your dessert spread.
Storing and Make-Ahead
Once the glaze is fully set, store the pop tarts in an airtight container at room temperature for up to 3 days. The unbaked, assembled pop tarts can also be frozen! Flash-freeze them on a baking sheet until solid, then transfer to a freezer-safe bag. You can bake them directly from frozen, just add 5-10 minutes to the baking time.
FAQs: Your Gluten-Free Pop Tart Questions, Answered!
What is pumpkin butter and can I make my own filling?
Pumpkin butter is a concentrated spread made from pumpkin puree, sugar, and spices, similar to apple butter. It’s thicker and more intensely flavored than pumpkin puree. If you can’t find it, the recipe notes provide a great, simple alternative: just mix 6 tablespoons of pumpkin puree with 2 tablespoons of brown sugar and 1 teaspoon of pumpkin pie spice!
Do I have to use a gluten-free flour blend?
This recipe is specifically developed for a gluten-free all-purpose flour blend. You could make it with regular all-purpose flour, but you would need to omit the xanthan gum and the texture may be slightly different.
Why is my gluten-free dough so crumbly?
Gluten-free doughs can sometimes be a bit more delicate than their wheat-based counterparts. If it feels too crumbly to come together, add another tablespoon of ice-cold water. Also, make sure you are using a good quality flour blend with a fine texture.
Can I make these vegan?
Yes! The recipe notes suggest this is possible. Use a vegan butter substitute or cold, solid coconut oil in the crust. For the egg, you can try using a flax egg (1 tablespoon ground flaxseed mixed with 3 tablespoons water). Use a plant-based milk in the glaze.
These Homemade Gluten-Free Pumpkin Pop Tarts are a true celebration of fall flavor. They’re a fun, creative, and completely delicious way to enjoy a special treat during the holiday season. They are proof that gluten-free baking can be just as flaky, buttery, and satisfying as any traditional pastry. I hope they bring a little bit of joy and a lot of deliciousness to your Thanksgiving celebration!