Homemade Croissant Bread
I still remember the first time I baked this loaf: the kitchen filled with a warm, buttery smell that made everyone pause whatever they were doing. I was experimenting with folding techniques I’d learned making classic croissants and thought, what if I made a loaf out of this? The result became a weekly obsession. If…
I still remember the first time I baked this loaf: the kitchen filled with a warm, buttery smell that made everyone pause whatever they were doing. I was experimenting with folding techniques I’d learned making classic croissants and thought, what if I made a loaf out of this? The result became a weekly obsession. If you want to try a Homemade Croissant Bread that pulls apart into flaky layers and toasts like a dream, I’ll walk you through how I do it and the little tricks that make it reliably good. If you’re curious about other takes on croissant-style loaves or want a straightforward loaf recipe for comparison, I sometimes glance back at a simple write-up like the one on homemade croissant bread notes while I bake.
The Secret Behind Perfect Homemade Croissant Bread
The core of this is surprisingly straightforward: you’re making a slightly enriched dough and then laminating it with cold butter so the final loaf has layers. For this recipe you’ll want: 4 cups all-purpose flour, 1/4 cup granulated sugar, 1 tablespoon salt, 1 tablespoon instant yeast, 1 1/4 cups whole milk, warmed, 1/2 cup unsalted butter, softened, 1 cup unsalted butter, cold (for laminating), and 1 egg (for egg wash). Those amounts give you a dough that is tender but strong enough to hold the butter layers without breaking apart.
Start by treating the dough like bread first and pastry second. In a mixing bowl, combine the flour, sugar, salt, and instant yeast. Gradually add the warm milk and softened butter. Mix until a dough forms. Knead for about 8 minutes until smooth. Place the dough in a greased bowl and let it rise in a warm place until doubled in size, about 1-2 hours. That first rise builds flavor and gives you a dough that will laminate beautifully.
A Few Things I’ve Learned
When I roll the dough after the first rise, I dust the surface lightly with flour and try not to work it too much. Once risen, roll the dough into a rectangle. Place the cold butter in the center and fold the dough over to encase it. Roll it out and fold it into thirds to create layers, refrigerate for 30 minutes. Repeat this process three times. That cold butter step is the heart of the technique. I like to cut a slab of cold butter and pat it into a neat rectangle; if it’s too soft it will absorb into the dough, and if it’s too hard it will break the dough. Refrigerating between folds keeps the butter firm and the layers distinct.
A practical tip: use a ruler or mark on your counter to keep each roll about the same size. And when you fold into thirds, think of a letter fold—neatness wins here. If you want a visual refresher while you bake, I sometimes glance at tutorials like the one for homemade croissants to remind myself of the feel of laminated dough.
Getting the Texture Just Right
After your laminations are done and the dough has chilled, shape it into a loaf. Preheat oven to 375°F (190°C). Roll the dough into a loaf shape and place it in a greased loaf pan. Let it rise until it fills the pan, about 30-45 minutes. Brush with egg wash. I use a simple egg wash made from one beaten egg with a splash of water to give the crust a glossy, golden finish. Baking at 375°F gives enough heat to steam those layers but not so much that the loaf browns before the interior sets. Bake for 25-30 minutes until golden brown.
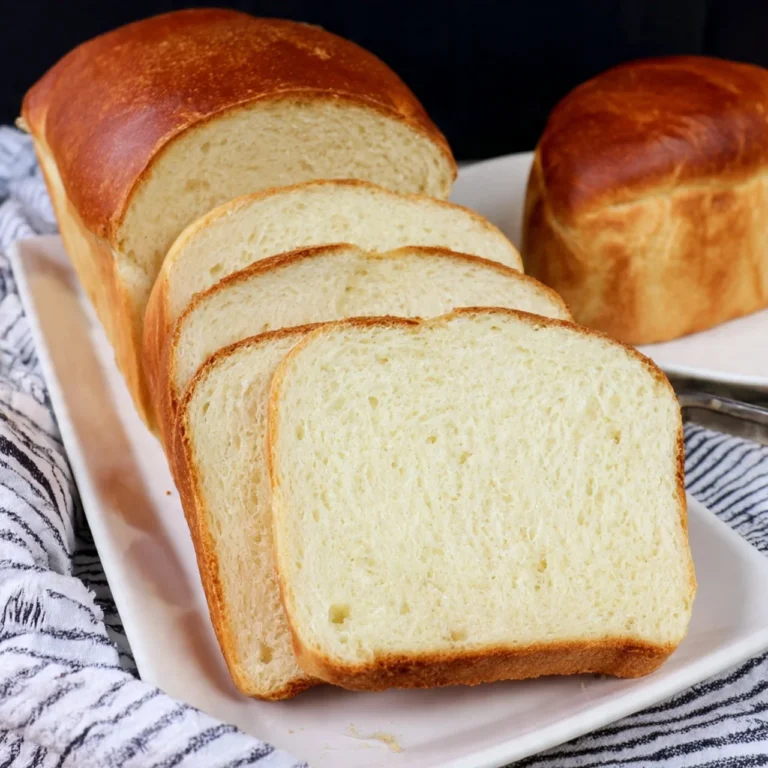
You’ll know it’s done when the top is deep golden brown, it sounds hollow when you tap the bottom, and an instant-read thermometer reads around 190°F in the center. If you don’t have a thermometer, the visual cues and that hollow sound are reliable. The texture inside should be soft, slightly chewy, and layered like a cross between a croissant and a brioche.
When Things Don’t Go As Planned
Once, my butter melted into the dough during a hot summer, and the loaf turned out dense. I learned to keep things cool: chill your dough and butter well, and if your kitchen is warm, give the dough extra fridge time between folds. If the dough refuses to rise, it’s usually because the milk was too hot and killed the yeast, or the yeast was old. Use warm milk that’s comfortably warm to the wrist, not scalding. If your layers smear, give the dough a longer rest in the refrigerator before rolling again.
A small trick that helps when shaping: if your final roll is a little lopsided, tuck the ends under as you place it in the loaf pan. The loaf will still rise and look tidy. And if you need to make this ahead, you can freeze the shaped loaf after the final rise and thaw overnight in the fridge before baking; this is my go-to when I want fresh bread in the morning without the early wake-up.
Making It Your Own
I love this recipe because it sits between simplicity and showmanship. It uses familiar ingredients—4 cups all-purpose flour, 1/4 cup granulated sugar, 1 tablespoon salt, 1 tablespoon instant yeast, 1 1/4 cups whole milk, warmed, and the two kinds of butter—so it feels accessible, but the lamination gives you wow factor. For variations, try adding a thin spread of jam or a sprinkle of cinnamon sugar between folds for a sweet twist, or fold in finely shredded Gruyere and chopped herbs for a savory tear-and-share loaf. If you want a richer crumb, swap half the milk for whole cream, or add an extra egg to the dough for a brioche-like lift.
I often serve this with simple things: soft butter at room temperature, a smear of apricot jam, or alongside eggs for brunch. Toasted slices are incredible with melted cheese and a runny egg. For a savory dinner, slice and use it as the foundation for an open-faced sandwich with roast chicken and arugula.
The Best Part About This Dish
Beyond the flaky, buttery layers, the best part is how making it feels like a small ritual. Kneading the dough, listening to the soft thud of the dough against the counter, rolling until the butter peeks from between layers—each step has a sensory reward. The smell as it bakes is nostalgic, like the kitchens of my childhood where bread was a daily event. If you end up with leftovers, wrap them tightly and store at room temperature for a day or in the refrigerator for up to three days. For longer storage, slice and freeze; reheat slices in a toaster or oven to bring back that fresh-baked texture.
A couple of practical tips I always share: use cold butter for laminating but let the dough relax at room temperature after the final fold before shaping. Rest your dough if it resists rolling, as the gluten will relax and make your life much easier. Keep a small bowl of flour nearby for dusting but use it sparingly to avoid a dry crust.
Conclusion
If you want an approachable video to watch while you work through laminating and folding, I like the step-by-step visuals found in this Gluesticks’ croissant bread video recipe. And for another written take with helpful tips and photos, check out the detailed loaf guide at Sally’s Baking Addiction croissant bread loaf recipe. Give it a try on a slow weekend, and be prepared to fall in love with that first buttery, crackling slice.

Homemade Croissant Bread
Ingredients
Method
- In a mixing bowl, combine the flour, sugar, salt, and instant yeast.
- Gradually add warm milk and softened butter, mixing until a dough forms.
- Knead the dough for about 8 minutes until smooth.
- Place the dough in a greased bowl and let it rise in a warm place until doubled in size, about 1-2 hours.
- Once risen, roll the dough into a rectangle.
- Place the cold butter in the center and fold the dough over to encase it.
- Roll it out and fold it into thirds. Refrigerate for 30 minutes.
- Repeat this process three times, ensuring the butter stays cold and distinct.
- Preheat the oven to 375°F (190°C).
- Shape the dough into a loaf and place it in a greased loaf pan.
- Let it rise until it fills the pan, about 30-45 minutes.
- Brush the top with egg wash.
- Bake for 25-30 minutes until golden brown and sounds hollow when tapped.