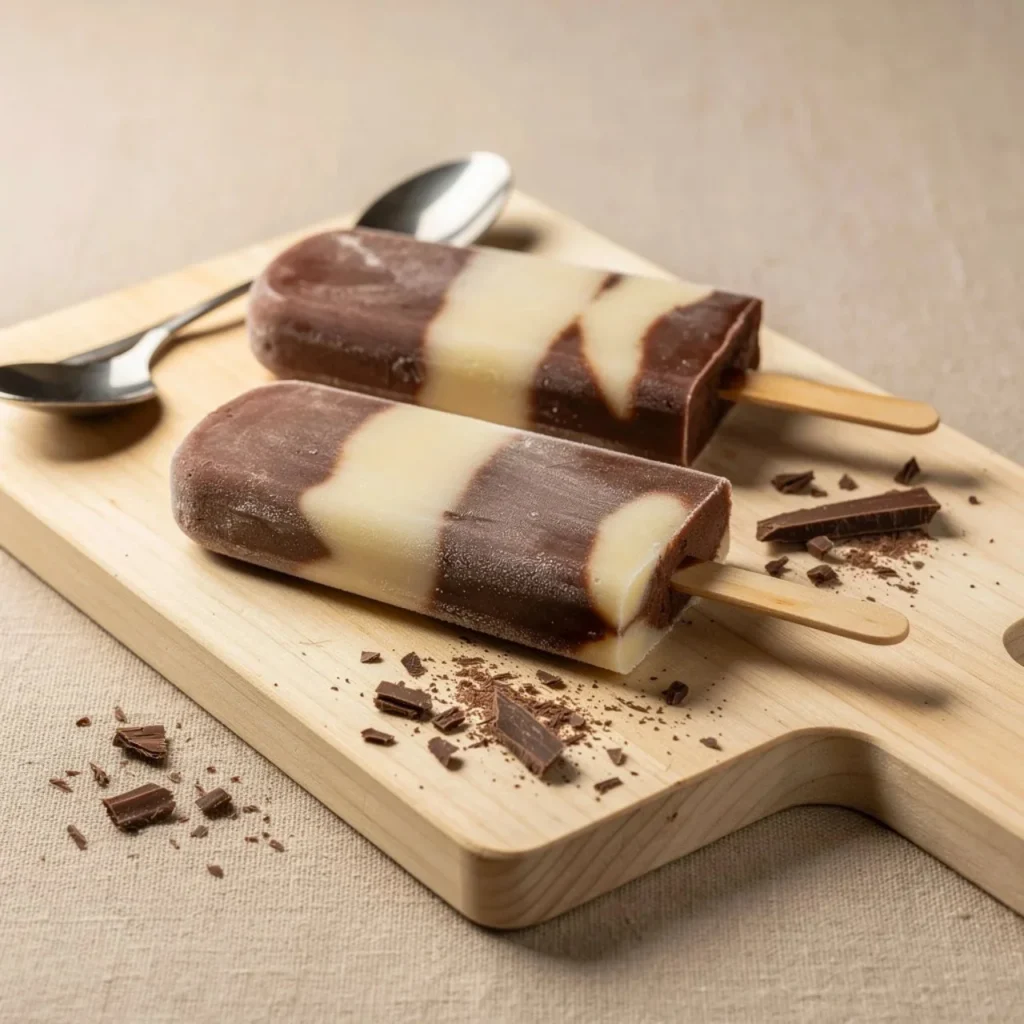
Jello Pudding Pops
The Joy of Making Jello Pudding Pops There’s something wonderfully nostalgic about Jello Pudding Pops. For many of us, they evoke summer afternoons spent outside, the sun shining brightly, and a cool treat in hand. Today, I want to share how easy it is to recreate these lovely frozen desserts at home. If you’re ready,…
The Joy of Making Jello Pudding Pops
There’s something wonderfully nostalgic about Jello Pudding Pops. For many of us, they evoke summer afternoons spent outside, the sun shining brightly, and a cool treat in hand. Today, I want to share how easy it is to recreate these lovely frozen desserts at home. If you’re ready, let’s get started!
To make these delightful pops, you’ll only need a few simple ingredients. Grab a package of Jello pudding mix in your favorite flavor—this could be classic chocolate, luscious vanilla, or even something fruity. You’ll also need 2 cups of milk, some popsicle molds, and wooden sticks. That’s it!
Mixing It All Together
The first step is to mix the Jello pudding mix with the milk. I usually grab a mixing bowl, toss in the pudding mix, and pour the milk on top. You’ll want to stir this mixture until everything is well combined and absolutely smooth. The texture should be thick and creamy, which is just perfect for freezing later.
Once mixed, it’s time to pour the pudding blend into your popsicle molds. I find it helpful to leave a little space at the top to allow for expansion as they freeze. Carefully insert the wooden sticks into each mold, making sure they stand up straight.
Freezing Your Pops
Now comes the best part: placing the molds in the freezer. It’s important to let them freeze for several hours—or even overnight—until they are completely set. Patience is key here! If you’re eager to devour them right away, I completely understand, but waiting will ensure that amazing, creamy texture when you take your first bite.
To remove the pops once they are frozen solid, run warm water over the outside of the molds for a few seconds. This little trick makes pulling them out super easy. Gently tug, and your pudding pops should slide right out—ready to be enjoyed!
Creating Delicious Variations
The beauty of Jello Pudding Pops lies in their versatility. While I enjoy the classic flavors, you can easily mix things up. For instance, you could add crushed cookies or candy pieces to the pudding mix before freezing for added texture and flavor. Why not try an extra layer of excitement by incorporating peppermint pieces, particularly around the holidays?
For a protein boost, you could switch things up by preparing a chocolate protein pudding. Using a recipe like the one found in this chocolate protein pudding recipe can make for a tasty and more nutritious alternative. It’s a fantastic way to enjoy dessert while packing in some extra protein!
Storing Leftovers
If you’ve made a big batch but can’t finish them all in one sitting (though I can’t blame you if you want to), storing your pudding pops is simple. Wrap each pop in plastic wrap and then place them back into the freezer. Just remember to enjoy them within a few weeks for the best flavor and texture.
Why I Keep Coming Back to This Recipe
I love this recipe not just for its simplicity but for the joy of making it with my loved ones. The process is fun, and it’s a great project to get kids involved in the kitchen. Watching their faces light up as they enjoy a frozen treat they helped to make is truly priceless. Many times, I’ve found that these little moments create lasting memories.
Conclusion
In summary, Jello Pudding Pops are an absolute delight that can be made at home with minimal effort, bringing a little bit of nostalgia into your kitchen. If you find yourself wondering what happened to the Jello Pudding Pops of your childhood, check out this intriguing article on their history and legacy. Enjoy the process and happy freezing!
Jello Pudding Pops
Ingredients
Method
- In a mixing bowl, combine the Jello pudding mix with the milk.
- Stir the mixture until smooth and creamy.
- Pour the pudding blend into popsicle molds, leaving a little space at the top.
- Insert wooden sticks into each mold, ensuring they are upright.
- Place the molds in the freezer for several hours or overnight, until completely set.
- To remove the pops, run warm water over the outside of the molds for a few seconds.
- Gently tug the pops to release them from the molds.