The Ultimate Molten Red Velvet Cakes (with Cream Cheese Whipped Cream!)
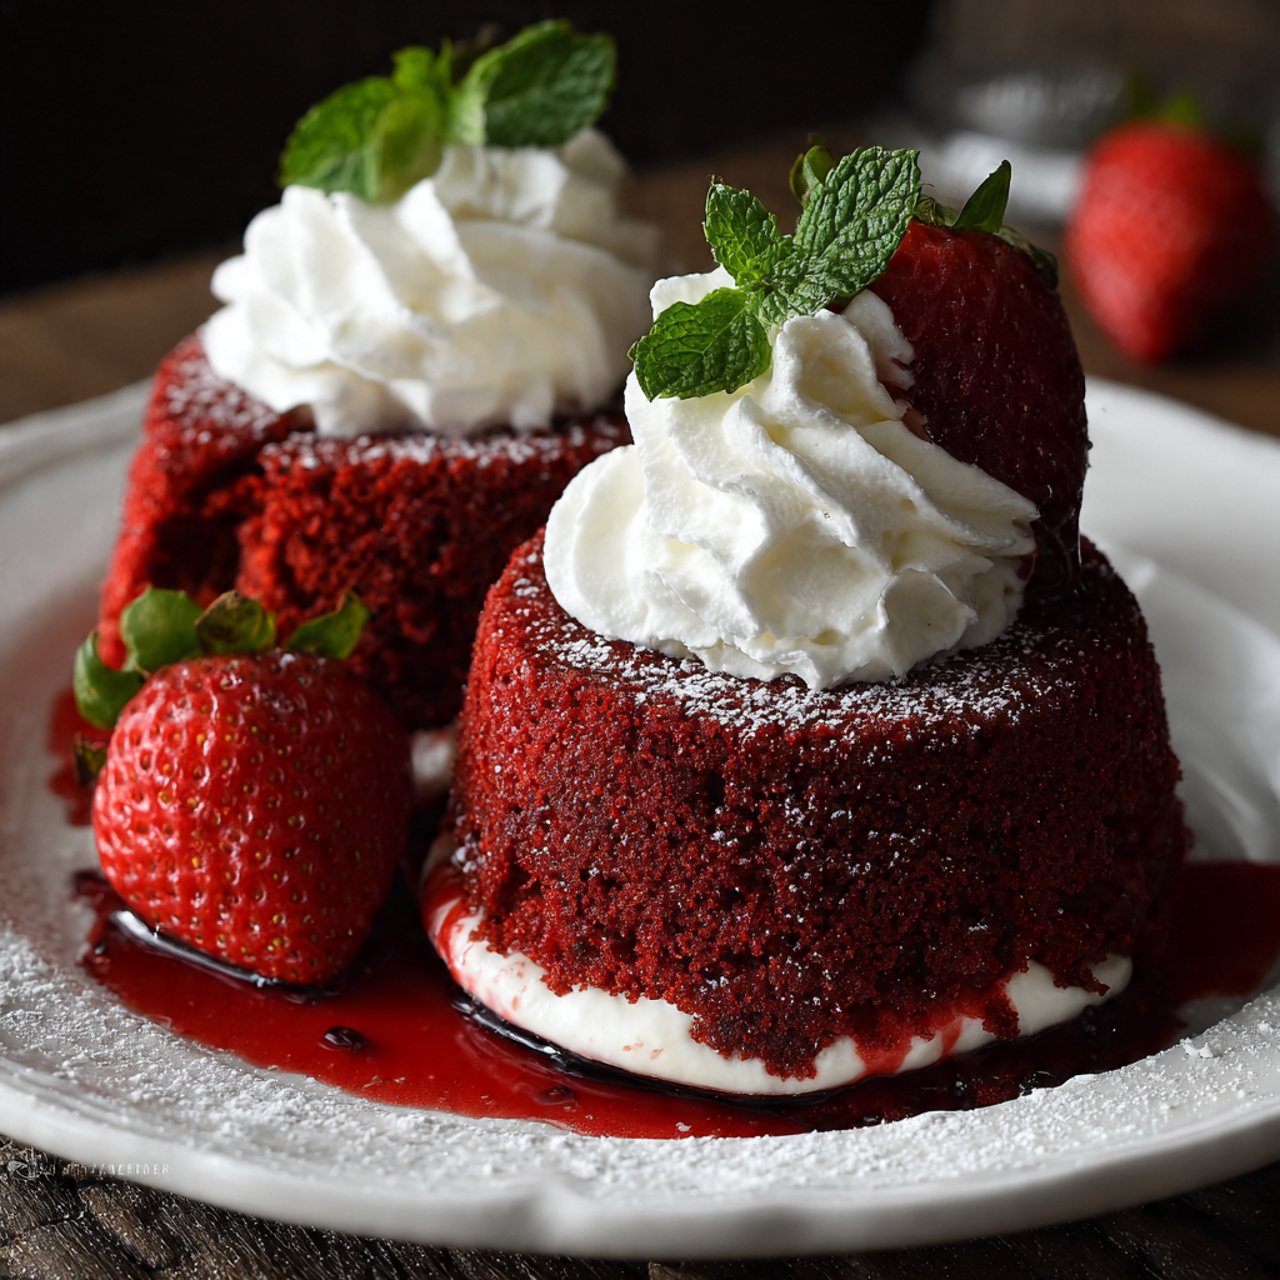
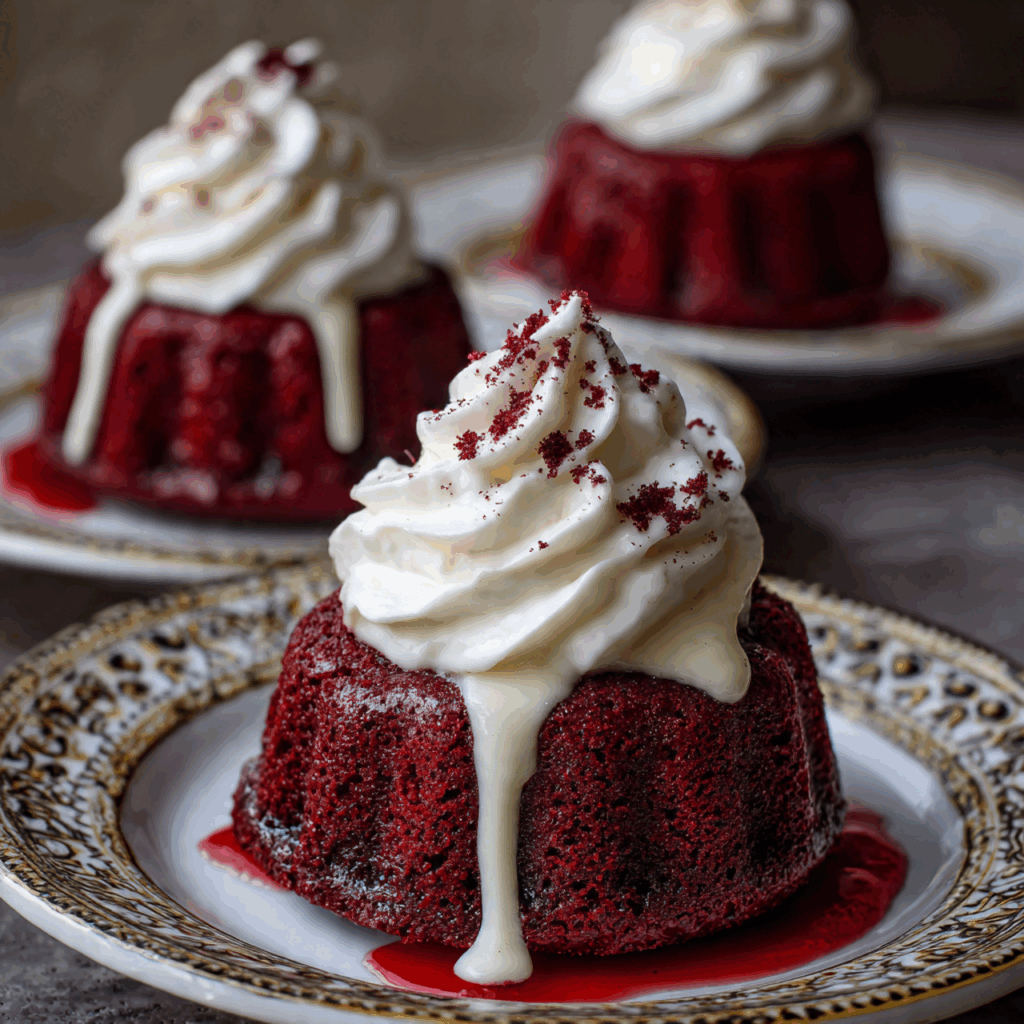
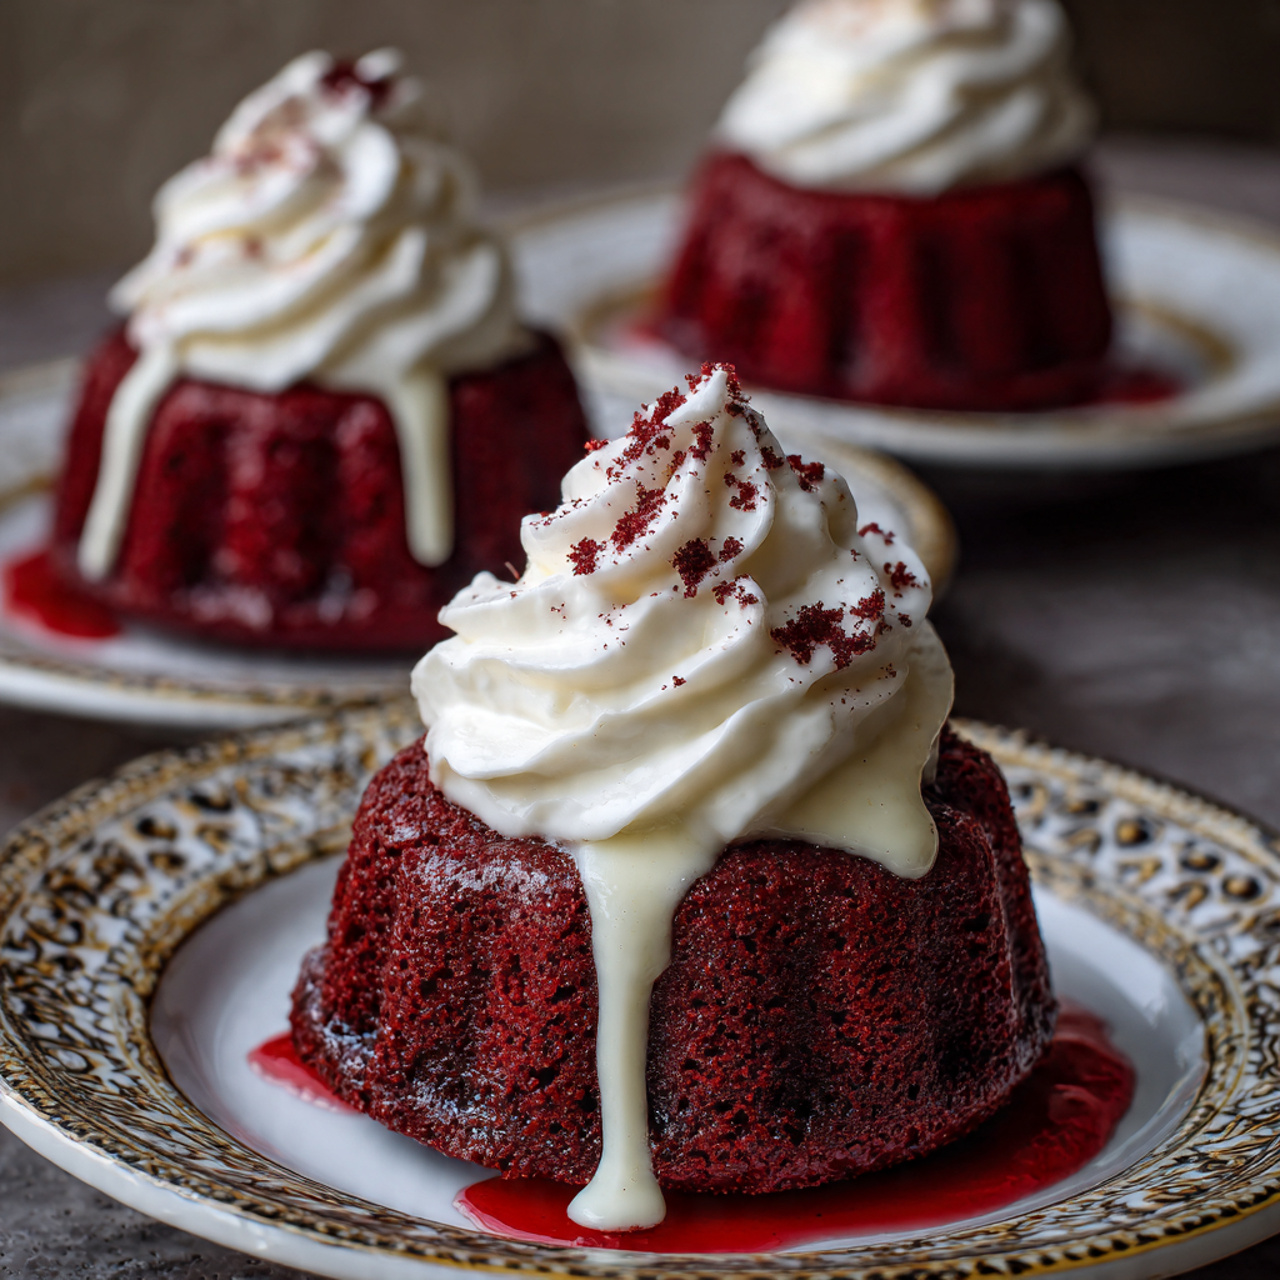
Imagine the most dramatic and decadent dessert imaginable. Picture a personal-sized, vibrant red velvet cake, warm from the oven, with a delicate, tender crumb. Now, imagine taking a spoon and breaking through that cake to reveal a torrent of rich, molten chocolate lava cascading onto the plate. Topped with a cloud of tangy cream cheese…
Imagine the most dramatic and decadent dessert imaginable. Picture a personal-sized, vibrant red velvet cake, warm from the oven, with a delicate, tender crumb. Now, imagine taking a spoon and breaking through that cake to reveal a torrent of rich, molten chocolate lava cascading onto the plate. Topped with a cloud of tangy cream cheese whipped cream, this, my friends, is the show-stopping, unforgettable magic of these Molten Red Velvet Cakes. This is, without a doubt, the most romantic and impressive dessert you will ever create.
I promise you, from the moment you invert that perfect little cake onto a plate and see the “lava” flow, you will feel like a true pastry chef. Each spoonful is a perfect harmony of flavors and temperatures—the warm, tender red velvet cake, the hot, rich chocolate sauce, and the cool, tangy cream cheese topping. It’s a true masterpiece, perfect for Valentine’s Day, an anniversary, or any time you want to serve a dessert that is pure, unadulterated indulgence.
Get ready to master the art of the perfect molten cake and create a stunning, restaurant-quality dessert that will leave everyone speechless.
Why This Will Be Your New Favorite Special Occasion Dessert!
You are going to be so incredibly proud of this beautiful and outrageously delicious dessert. It is a guaranteed sensation. Here’s why you have to make it:
- The Ultimate “Wow” Factor: The dramatic river of molten chocolate that flows from the center of the warm cake is an incredibly impressive and satisfying moment that will delight your guests.
- A Perfect Flavor Combination: This dessert brilliantly combines two beloved classics—the rich, gooey surprise of a chocolate lava cake with the tangy, vibrant flavor of a red velvet cake.
- Elegant Individual Portions: Baked in individual ramekins, these cakes make for a stunning, personal, and restaurant-quality presentation.
- Perfectly Paired Topping: The cool, tangy cream cheese whipped cream is the absolute perfect counterpoint to the warm, rich, and sweet cake and chocolate sauce.
- Easier Than It Looks: While the final result is incredibly sophisticated, the steps are straightforward and can be prepped in advance, making for a stress-free dessert for your special occasion.
Recipe Snapshot
| Prep Time | 20 minutes |
| Cook Time | 20 minutes |
| Chill Time | 2 hours |
| Total Time | 2 hours 40 minutes |
| Servings | 4 individual cakes |
| Calories | ~750 kcal per cake |
| Course | Dessert |
| Cuisine | American |
| Difficulty/Method | Intermediate / Baking |
Your Shopping List for This Decadent Dessert
This recipe uses a handful of special ingredients to create its signature flavor and effect. Here’s what you’ll need:

→ For the Molten Chocolate Center
- 2 ounces semisweet chocolate baking bar, finely chopped
- 1/4 cup heavy cream
→ For the Red Velvet Cakes
- 1 cup cake flour → Cake flour is key for a light, tender crumb.
- 1 1/2 teaspoons unsweetened cocoa → Just a hint for that classic red velvet flavor.
- 1/4 teaspoon baking soda & 1/4 teaspoon salt
- 1/2 cup salted butter, melted → Plus more for greasing the ramekins.
- 1/2 cup granulated sugar
- 6 tablespoons buttermilk
- 1 1/2 teaspoon red liquid food coloring
- 1/2 teaspoon vanilla extract & 1/2 teaspoon apple cider vinegar → The vinegar reacts with the baking soda for a tender crumb.
- 1 large egg yolk
→ For the Cream Cheese Whipped Cream
- 2 ounces cream cheese, softened
- 3 tablespoons powdered sugar
- 1/2 teaspoon vanilla extract
- 3/4 cup cold heavy cream
Let’s Get Baking! Your Step-by-Step Guide
Ready to create a truly spectacular dessert? This process is all about the prep, leading to a dramatic and delicious finale.
Part 1: The Molten Chocolate Center (Prep Ahead!)
- Make the Ganache: Combine the finely chopped semisweet chocolate and 1/4 cup of heavy cream in a small microwave-safe bowl. Microwave on high for 30 seconds, let it stand for 1 minute, then whisk until completely melted and smooth.
- Chill Until Firm: Place a piece of plastic wrap directly on the surface of the chocolate to prevent a skin from forming. Chill in the refrigerator for at least 2 hours, or until the ganache is completely firm and scoopable. This can be done a day in advance!
Part 2: The Red Velvet Cakes
- Preheat and Prep: Preheat your oven to 400°F (200°C). Generously grease 4 (8-ounce) ramekins with butter. Dust them with a little unsweetened cocoa powder, tapping out any excess.
- Mix Dry and Wet Ingredients: In a medium bowl, whisk together the cake flour, cocoa, baking soda, and salt. In a separate large bowl, whisk together the melted butter, granulated sugar, buttermilk, red food coloring, vanilla, vinegar, and the egg yolk.
- Combine the Batter: Add the butter mixture to the flour mixture and whisk just until the batter is blended and smooth. Do not overmix.
- Assemble the Cakes: Divide the batter evenly among the four prepared ramekins. Using a small cookie scoop, portion the chilled, firm chocolate ganache into 4 equal balls. Place one chocolate ball in the center of the batter in each ramekin, pressing it down lightly.
- Bake: Place the ramekins on a baking sheet. Bake for about 18 minutes, until the center of the cake springs back when lightly pressed.

Part 3: The Topping and Grand Finale
- Make the Whipped Cream: While the cakes bake, prepare the topping. In a medium bowl, stir together the softened cream cheese, powdered sugar, and vanilla until smooth. Add the cold heavy cream and beat with an electric mixer on medium-high speed until soft peaks form.
- The Grand Reveal: As soon as the cakes come out of the oven, immediately run a thin knife or offset spatula around the outer edge of each cake to loosen it. Carefully invert each warm red velvet cake onto a serving plate.
- Garnish and Serve: Dust the cakes with a little powdered sugar. Top each with a generous dollop of the cream cheese whipped cream and serve immediately to enjoy the molten chocolate lava!
Molten Red Velvet Cakes with Cream Cheese Whipped Cream
Ingredients
Equipment
Method
- Combine chopped chocolate and 1/4 cup heavy cream in a small bowl. Microwave on high 30 seconds, let stand 1 minute, then whisk until smooth. Place plastic wrap directly on the surface and chill until firm, about 2 hours.
- Preheat oven to 400°F. Grease 4 (8-ounce) ramekins with butter and dust with cocoa powder.
- Whisk together flour, cocoa, baking soda, and salt. In a separate bowl, whisk together melted butter, sugar, buttermilk, food coloring, vanilla, vinegar, and egg yolk.
- Add the wet mixture to the dry mixture and whisk just until blended. Divide batter among the ramekins.
- Portion the chilled chocolate mixture into 4 balls. Place 1 ball in the center of the batter in each ramekin, pressing lightly. Place ramekins on a baking sheet.
- Bake for about 18 minutes, until the center springs back when lightly pressed.
- Meanwhile, stir together softened cream cheese, powdered sugar, and vanilla until smooth. Add the heavy cream and beat with an electric mixer until soft peaks form.
- Immediately run a knife around the edge of the hot cakes and invert each onto a serving plate.
- Dust cakes with powdered sugar, top with a large dollop of the Cream Cheese Whipped Cream, and serve immediately.
Notes
WiseRecipes’ Top Tips for Perfect Molten Cakes
These simple secrets will ensure your decadent dessert is a flawless show-stopper.
- The Ganache Must Be COLD. The key to the molten center is a very cold, firm ball of ganache. This allows the cake around it to bake completely while the center just melts into a perfect lava. Do not skip the 2-hour chilling time!
- Properly Prep Your Ramekins. For the cakes to release cleanly for that dramatic tableside reveal, you must grease and cocoa-dust your ramekins thoroughly. The butter helps with release, and the cocoa powder adds flavor and prevents a white floury coating on your beautiful red cakes.
- Don’t Overmix the Batter. Once you combine the wet and dry ingredients, whisk only until you no longer see streaks of dry flour. Overmixing will develop the gluten and result in a tough cake instead of a tender one.
- Serve IMMEDIATELY. The magic of a molten lava cake is the temperature and texture contrast. They are at their absolute peak the moment they come out of the oven. Have your plates and whipped cream ready to go!
- Use Cake Flour. While you can substitute with all-purpose flour in a pinch, cake flour has a lower protein content, which is the secret to the incredibly fine, soft, and tender crumb of these delicate cakes.
Keep Them Fresh! Storing & Make-Ahead Tips
These cakes are designed for immediate gratification, but you can prep ahead!
- Make-Ahead: This is a fantastic dessert for entertaining because you can do most of the work in advance. The ganache can be made and chilled a day ahead. You can also prepare the full cake batter, divide it among the prepared ramekins, place the ganache ball inside, cover each with plastic wrap, and refrigerate for up to 24 hours. When ready, just bake them straight from the fridge, adding a few extra minutes to the baking time. The whipped cream can also be made a few hours ahead and kept in the fridge.
FAQs: Your Molten Cake Questions, Answered!
Can I make this in a muffin tin?
You can, but the results will be different. A standard muffin tin is smaller, so you would need to reduce the baking time significantly (start checking around 10-12 minutes). The cakes will also be smaller and have less of a dramatic “lava” flow.
My chocolate center wasn’t molten. What happened?
This is almost always due to overbaking. Every oven is different. The moment the top of the cake springs back when you gently touch it, it’s done. Even an extra minute or two of baking can cause the ganache center to cook through and become more like a pudding than a liquid lava.
Can I use a different kind of chocolate for the center?
Yes! For a different flavor profile, you could use a high-quality milk chocolate for a sweeter center, or even a white chocolate ganache for a beautiful color contrast when you cut into the cake.
What if I don’t have buttermilk?
You can easily make a substitute! For the 6 tablespoons needed in this recipe, simply measure out 6 tablespoons of regular milk and stir in about 1/2 teaspoon of lemon juice or white vinegar. Let it sit for 5 minutes; it will curdle slightly and be ready to use.
Final Thoughts: A Dessert to Remember
There is nothing quite like a dessert that provides a bit of theater at the table. These Molten Red Velvet Cakes are a true celebration of indulgence, flavor, and that little bit of kitchen magic that makes a meal unforgettable. It’s a rewarding, impressive, and deeply delicious recipe that I know will become your go-to for romantic dinners and special celebrations. Happy baking!