Oreo No-Bake Cheesecake Cups
Discovering a Delicious Treat Whenever I get a craving for something sweet, one of my all-time favorite treats is Oreo No-Bake Cheesecake Cups. They are incredibly simple to make and perfect for any occasion, be it a dinner party or just a cozy night in with the family. There’s just something about the creamy texture…
Discovering a Delicious Treat
Whenever I get a craving for something sweet, one of my all-time favorite treats is Oreo No-Bake Cheesecake Cups. They are incredibly simple to make and perfect for any occasion, be it a dinner party or just a cozy night in with the family. There’s just something about the creamy texture and the crunch of the Oreos that keeps you reaching for more. Plus, it’s a no-bake dessert, which makes it perfect for the summer months when you want something cool and delightful without heating up the kitchen. You may also find Healthy No Bake Oreo Cheesecake Bites Recipe useful.
To whip up these delicious cups, you’ll need just a few ingredients: an 8 oz block of softened cream cheese, 8 oz of Cool Whip or your favorite whipped topping, 2/3 cup of powdered sugar, 1 teaspoon of vanilla extract, and around 24 to 26 Oreo cookies—though I often add a few more for good measure. Trust me, you can never have too many Oreos!
The Joy of Crushing Oreos
Let’s dive right into the fun part—making the crust! Start by placing the Oreo cookies in a sturdy plastic bag and sealing it tight. Grab a rolling pin or a wooden spoon and get to work crushing those cookies into coarse crumbs. This step is not just therapeutic; it’s the foundation of your dessert. You’ll want to spoon about 1.5 to 2 tablespoons of those crushed Oreos into the bottom of six small dessert dishes. Make sure these dishes are at least three-quarters to a cup in size so that they can hold all that deliciousness. Set them aside for now.
As the base is setting, it’s time to move on to the cheesecake filling. Using either a hand mixer or a standing mixer, beat together the softened cream cheese and the powdered sugar until the mixture becomes creamy and smooth. This step really brings out the sweetness of the cream cheese while ensuring a lovely texture.
The Creamy Filling
Next, you’ll want to add the teaspoon of vanilla. I can’t stress enough how much this little addition elevates the entire flavor profile of the cheesecake. Beat it for a little longer to make sure it’s well incorporated. Now comes the fun part: gently fold in the Cool Whip until it’s mixed in seamlessly. Be careful not to deflate the mixture; you want to keep that light and airy quality.
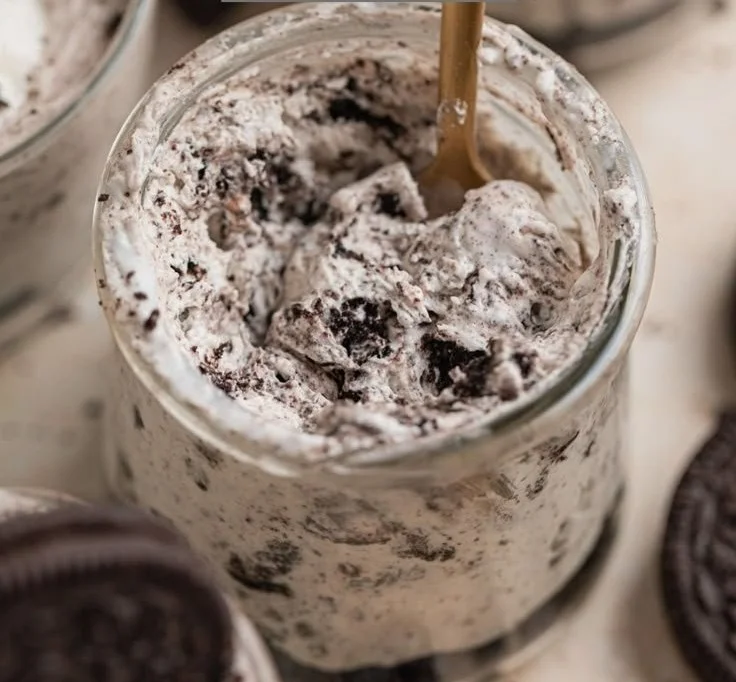
After incorporating the Cool Whip, fold in the remaining crushed Oreos. At this point, your mixture is looking delightful, a perfect blend of creamy and crunchy.
Now, take that delicious filling and divide it evenly among the dessert dishes, making sure to press it gently onto the Oreo crust at the bottom. Chilling these beauties is essential. Pop them in the refrigerator for about an hour, or even longer if you can wait.
The Perfect Finish
When you’re ready to serve, you can add a final touch by topping each cheesecake cup with some whipped cream and a sprinkle of extra crushed Oreos. You can also use this time to get creative. If you’re feeling adventurous, consider trying out different flavors or variations. For instance, why not look into adding mint for a refreshing twist? You could follow a recipe like this No-Bake Oreo Mint Cheesecake to inspire your next creation!
Storing Leftovers
If you manage to have any leftovers—though I highly doubt it!—these cheesecake cups can be stored in the refrigerator for up to 3 days. Just make sure you cover them well so they stay nice and fresh.
Additionally, if you’re prepping for a party, you can make them a day ahead. They tend to get even more flavorful after sitting overnight, as the flavors in the cheesecake meld beautifully. Just remember to add the whipped cream and extra Oreo topping just before serving so they stay pristine and look appetizing.
My Favorite Treat to Share
I love making these Oreo No-Bake Cheesecake Cups for gatherings because they are always a hit. I remember the first time I brought them to a family gathering, every single one was gone within minutes. The smiles on my family’s faces as they indulged in these little cups of happiness fueled my desire to create more sweets like this. They perfectly balance the richness of the cheesecake with the crunch of Oreos, creating a dessert that everyone seems to love.
Whether served after a hearty meal or enjoyed as an afternoon snack, these desserts are bound to impress. The combination of textures—the creamy filling, the adorable cup form, and the crumbly crust—make them irresistible.
Conclusion
For those looking for inspiration beyond just the Oreo cheesecake cups, I recommend checking out these amazing No Bake OREO Cheesecake Cups. They offer a delightful twist and are sure to please everyone at your next gathering! Enjoy crafting these sweet delights, and happy baking!
Oreo No-Bake Cheesecake Cups
Ingredients
Method
- Crush the Oreo cookies by placing them in a sturdy plastic bag and using a rolling pin or wooden spoon to make coarse crumbs.
- Spoon about 1.5 to 2 tablespoons of the crushed Oreos into the bottom of six small dessert dishes.
- In a mixing bowl, beat together the softened cream cheese and powdered sugar until creamy and smooth.
- Add the vanilla extract and beat for a little longer until well incorporated.
- Gently fold in the Cool Whip, being careful not to deflate the mixture.
- Fold in the remaining crushed Oreos.
- Divide the filling evenly among the dessert dishes, pressing gently onto the Oreo crust.
- Place the dessert dishes in the refrigerator for about an hour, or longer if desired.
- Top each cheesecake cup with whipped cream and extra crushed Oreos before serving.