Pastel Sugar Cookie Sandwiches Recipe
A Sweet Escape: Pastel Sugar Cookie Sandwiches Recipe There’s something about a pastel sugar cookie sandwich that transports me right back to my childhood. Every time I see those soft, colorful cookies, memories of sunny afternoons spent baking with my grandma flood my mind. With her expert guidance, the kitchen would transform into a delightful…
A Sweet Escape: Pastel Sugar Cookie Sandwiches Recipe
There’s something about a pastel sugar cookie sandwich that transports me right back to my childhood. Every time I see those soft, colorful cookies, memories of sunny afternoons spent baking with my grandma flood my mind. With her expert guidance, the kitchen would transform into a delightful chaos of flour clouds and sweet laughter, as we created treats that brought everyone together. So today, I thought it might be fun to share my favorite pastel sugar cookie sandwiches recipe with you. Trust me, they’re as fun to make as they are to eat!
The Joy of Colorful Baking
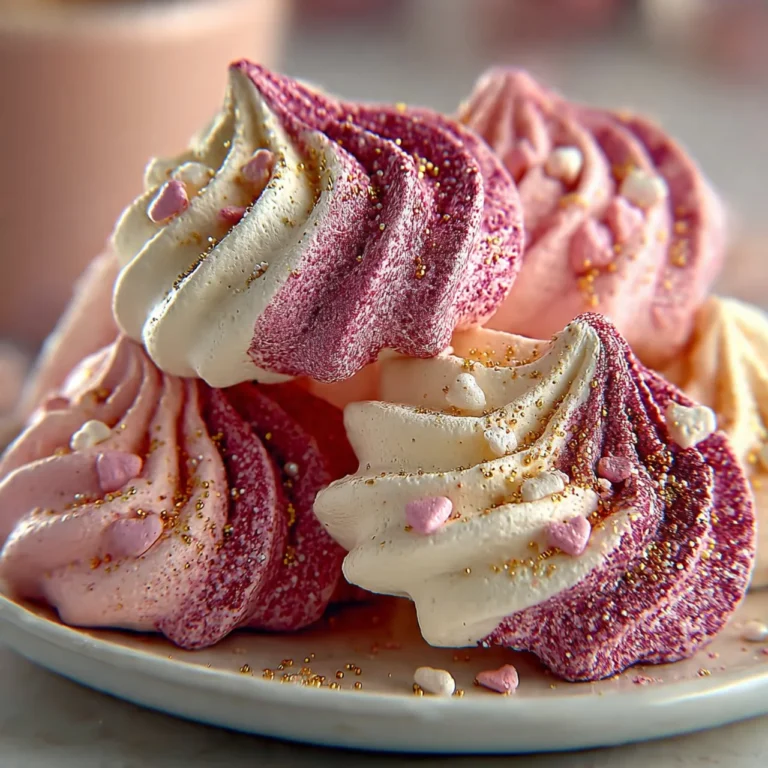
First off, let’s talk about what makes these cookies so enchanting: their beautiful pastel hues. When I was first learning to bake, I was enchanted by how a splash of gel food coloring can take something as simple as sugar cookies to the next level. Picture this: a platter filled with vibrant pinks, sunny yellows, soft greens, calming blues, and gentle purples. They’re eye-catching and perfect for any celebration, whether it’s a birthday, baby shower, or just because it’s Tuesday!
To kick things off, let’s get our prep done. Preheat your oven to 350°F (175°C) and grab a baking sheet lined with parchment paper. It’s a small step, but it sets the stage for our sweet masterpieces!
Crafting the Perfect Dough
Now, let’s blend together the ingredients that will form our cookie base. In a large mixing bowl, beat together one cup of softened unsalted butter and one and a half cups of granulated sugar. This is where the magic begins—mixing these two until they’re light and fluffy, taking about two minutes. The rich aroma of butter and sweetness of sugar will fill your kitchen, and I promise, it’s a mood booster.
Next, add in a large egg and two teaspoons of vanilla extract. Continue mixing until everything is fully incorporated. At this stage, I often sneak a little taste of the dough (just a spoonful!).
Now, in a separate bowl, whisk together two and three-quarters cups of all-purpose flour, one teaspoon of baking soda, a half teaspoon of baking powder, and a pinch of salt. Gradually add these dry ingredients to your wet mixture, mixing on low speed. The dough will be thick, almost like a soft clay, which is just how we want it. For that extra creaminess, add two tablespoons of milk and mix until combined. This is the moment when your kitchen will start smelling like pure joy.
Getting Creative with Colors
Now comes the fun part! Time to make our dough a vibrant canvas. Divide the dough into five portions and take a moment to get your gel food coloring ready. With a few drops of each color—pink, yellow, green, blue, and purple—you can create the cutest pastel hues. Just knead the coloring into each portion until it’s mixed thoroughly. I love this step because it transforms the boring, plain dough into a colorful work of art, and it makes me feel like a kid again.
If you’re looking to try different colors, you can absolutely switch things up with seasonal shades. Mint green for spring, soft orange for Halloween—it’s all about having fun with it!
Baking to Perfection
Once your dough is colorful and playful, it’s time to shape the cookies. Scoop about one tablespoon of dough for each cookie and roll it into smooth balls. Place these little orbs onto your prepared baking sheet, spaced about two inches apart. They’re going to puff up just a bit while baking, and you want to ensure they don’t end up cramped in the oven.
Pop them in the oven for about 8-10 minutes. You’ll know they’re done when the edges are set, and the tops look slightly cracked but not browned. The smell that wafts from your oven while they bake is nothing short of heavenly. Let them cool on the baking sheet for about five minutes before moving them to a wire rack. This cooling period is crucial. Patience is key when you want your cookies to maintain the perfect texture.
A Dreamy Vanilla Filling
Now, let’s whip up that dreamy vanilla filling that will hold our cookies together. In a mixing bowl, beat half a cup of softened unsalted butter until it’s smooth and creamy. Gradually add two cups of powdered sugar, and then mix in two tablespoons of heavy cream or milk, another teaspoon of vanilla extract, and a pinch of salt. The combination of flavors will leave you craving spoonfuls of this sweet filling.
As you beat it until it’s fluffy and spreadable, you may want to taste it just to make sure. Adjust the consistency with a little more cream if it’s too thick, or add a touch more sugar if it’s too thin. This filling should be as luxurious as the cookies themselves.
Assembling Your Sweet Creations
This is the best part: once your cookies are completely cool, it’s time to bring it all together. Match the cookies into pairs of similar sizes (you’ll want them to be as uniform as possible). Using a piping bag or just a spoon, spread a generous amount of the vanilla filling on the flat side of one cookie and then press the second cookie on top. It’s like giving them a big hug!
Once you’ve assembled all the sandwiches, let them sit for about ten minutes. This allows the filling to firm up slightly, making them even easier to handle as you serve them.
The Sweet Ending (Or Just the Beginning!)
These pastel sugar cookie sandwiches are not only visually stunning but delightfully sweet with the perfect bite. They bring a smile to anyone who takes a bite, which is why I adore making them for gatherings or simply to brighten my day. I’ll often serve them with a warm cup of tea or a frothy homemade latte, making it a cozy little moment all on its own.
A quick note on leftovers: if you happen to have any (I rarely do!), store them in an airtight container at room temperature for a few days, though they are best enjoyed fresh.
Lastly, embracing variations can be so much fun! You could swap out the vanilla filling for chocolate or even a fruity jam for a unique twist. Each time you make these, you can experiment with different flavors or colors, keeping the memories of childhood alive while creating new ones.
So, next time you’re looking for a sweet escape, gather your ingredients, channel your inner child, and create some magic in your kitchen with these delightful pastel sugar cookie sandwiches. You’ll be amazed at how such simple ingredients can create something so heartfelt and delicious!

Pastel Sugar Cookie Sandwiches
Ingredients
Method
- Preheat your oven to 350°F (175°C) and prepare a baking sheet lined with parchment paper.
- In a large mixing bowl, beat together softened unsalted butter and granulated sugar until light and fluffy, about 2 minutes.
- Add in a large egg and vanilla extract, mixing until fully incorporated.
- In a separate bowl, whisk together the all-purpose flour, baking soda, baking powder, and salt.
- Gradually add the dry ingredients into the wet mixture while mixing on low speed until a thick dough forms.
- Add milk to the dough and mix until combined.
- Divide the dough into five portions and knead gel food coloring into each portion until desired colors are achieved.
- Scoop about one tablespoon of dough for each cookie and roll it into smooth balls.
- Place the cookie balls onto the prepared baking sheet, spaced two inches apart.
- Bake in the oven for about 8-10 minutes or until the edges are set and the tops look slightly cracked.
- Remove from the oven and let cool on the baking sheet for about five minutes before transferring to a wire rack.
- In a mixing bowl, beat softened unsalted butter until smooth and creamy.
- Gradually add powdered sugar, then mix in heavy cream, vanilla extract, and a pinch of salt until fluffy and spreadable.
- Adjust the consistency if necessary, adding more cream or sugar as needed.
- Once cookies are completely cool, match them into pairs of similar sizes.
- Spread a generous amount of vanilla filling on the flat side of one cookie and then press the second cookie on top.
- Let assembled sandwiches sit for about ten minutes to firm up the filling.