Red Velvet Brownies
Discovering the Magic of Red Velvet Brownies There’s something enchanting about red velvet desserts; they possess an elegance and a dash of indulgence that feels both classic and festive. When I first stumbled upon the idea of red velvet brownies, I was intrigued. How could you marry the richness of brownies with the charming allure…
Discovering the Magic of Red Velvet Brownies
There’s something enchanting about red velvet desserts; they possess an elegance and a dash of indulgence that feels both classic and festive. When I first stumbled upon the idea of red velvet brownies, I was intrigued. How could you marry the richness of brownies with the charming allure of red velvet? After a bit of experimentation, I finally struck gold, and the result has become a beloved treat in my household. You may also find Chocolate Covered Strawberry Brownies useful.
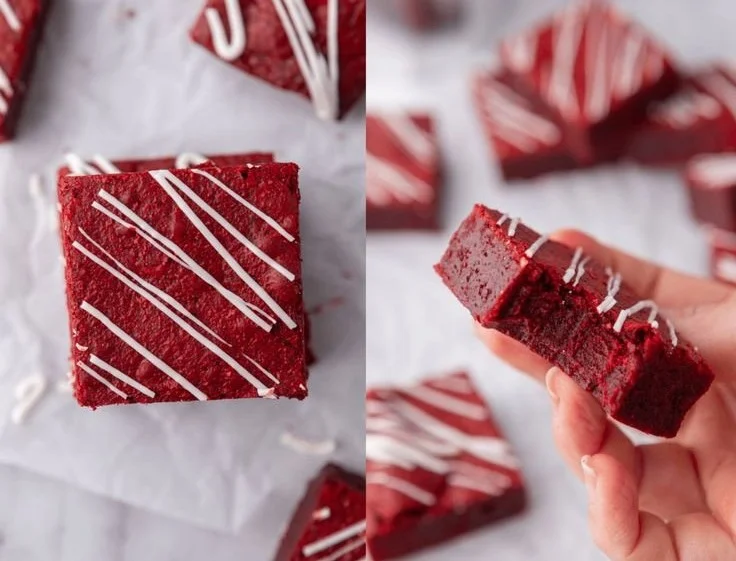
The first time I baked these beauties, I could hardly wait until they cooled to snap a picture—I had that urge to dive right in! The vibrant red color paired with the moist, fudgy texture creates a spectacle for both the eyes and the palate. Plus, the hint of cocoa adds just the right amount of chocolate flavor. If you’re ready to take your brownie game to the next level, let’s dive into this delicious recipe.
The Core Ingredients
You won’t need a laundry list of ingredients to whip up these red velvet brownies. Here’s what you’re going to need:
- 3/4 cup unsalted butter, melted
- 2 oz of chopped semi-sweet chocolate bar
- 1 & 1/4 cup granulated sugar
- 2 large eggs
- 2 teaspoons vanilla extract
- 1 teaspoon white vinegar
- 1/2 tablespoon red gel food coloring
- 2 tablespoons unsweetened cocoa powder
- 1 & 1/4 cup all-purpose flour
- 1/4 teaspoon salt
- Optionally, 1/2 cup white chocolate chips, either folded into the batter or melted for drizzling on top
As you can see, the ingredients come together beautifully. I love how the red gel food coloring gives these brownies their signature hue while maintaining the rich, chocolaty goodness that brownies are known for.
Start Baking!
To kick things off, preheat your oven to 350°F and line an 8×8-inch baking pan with parchment paper. This simple step will save you from the dreaded brownie mess later.
In a large microwave-safe mixing bowl, melt the butter and chopped chocolate together. I often do this in 30-second increments to make sure I’m not burning anything—stirring in between heats until the mixture is smooth and velvety. At this point, add in the granulated sugar, mixing until everything is well-combined. Then, crack in those eggs, one at a time, beating well after each addition. This is where you can really start to feel the magic come together as the mixture becomes thick and glossy.
Next, stir in the vanilla extract, white vinegar, and, of course, the red gel food coloring. It’s like watching a potion transform in front of your eyes! After you’ve achieved that lovely shade of crimson, it’s time to tackle the dry ingredients.
In another bowl, sift together the cocoa powder, flour, and salt. Gradually add this dry mixture to your wet mixture, folding it in until just combined. Here’s a little tip: be careful not to overmix! That can lead to dense brownies, and we’re all about moist and fudgy here. If you’re feeling adventurous, this is the moment to fold in those white chocolate chips, adding another layer of taste and texture.
Finally, pour the beautiful red batter into your prepared pan, spreading it evenly. Pop it into your preheated oven and bake it for about 30-35 minutes. You’ll know they’re done when a toothpick inserted into the center comes out with a few moist crumbs, but not wet batter. Trust me, that perfect balance is worth waiting for.
A Luxurious Finishing Touch
Let the brownies cool completely in the pan before cutting them into squares. If you want to elevate your creation even more, consider drizzling melted white chocolate on top before serving. It adds a sophisticated touch and makes those rich flavors pop even more.
Speaking of rich flavors, if you’re a fan of variations, you could also check out the easy red velvet brownies with cheesecake layer for an indulgent twist. And for a fun change, experimenting with chocolate-covered strawberry brownies could also make for a delightful afternoon treat.
Storing Leftovers
If you’re lucky enough to have any leftovers (which, let’s be real, is often just a dream), keep the brownies in an airtight container at room temperature. They’re best enjoyed fresh, but they can last for about four days. Throwing one in the microwave for a few seconds brings back that gooey goodness, perfect for a late-night snack.
Why I Love These Red Velvet Brownies
Apart from their stunning looks and rich taste, I adore how versatile these brownies are. Whether it’s a casual get-together, a birthday celebration, or just a cozy evening at home, they fit right in. Moreover, the texture is simply divine. They’re not too cakey nor too fudgy; they strike that perfect balance that makes each bite a satisfying experience.
Baking these brownies also brings back fond memories of cooking with my family. I remember standing on a stool to reach the countertop, mixing ingredients while my grandmother offered tidbits of wisdom about baking. It’s more than just a recipe; it’s a way to connect with those I love while creating something delicious.
Conclusion
Red velvet brownies are not merely a sweet treat; they’re a celebration of flavors and memories. If you’re inspired to explore more about red velvet, check out this red velvet brownies recipe for another fantastic adventure in baking. Whether enjoyed straight from the pan or dressed up for an occasion, these brownies are sure to bring joy and deliciousness to your day!
Red Velvet Brownies
Ingredients
Method
- Preheat your oven to 350°F and line an 8×8-inch baking pan with parchment paper.
- In a large microwave-safe mixing bowl, melt the butter and chopped chocolate together in 30-second increments, stirring in between until smooth.
- Add the granulated sugar and mix until well-combined.
- Crack in the eggs, one at a time, beating well after each addition until thick and glossy.
- Stir in the vanilla extract, white vinegar, and red gel food coloring until combined.
- In another bowl, sift together the cocoa powder, flour, and salt.
- Gradually add the dry mixture to the wet mixture, folding until just combined. Be careful not to overmix.
- Optionally, fold in the white chocolate chips.
- Pour the batter into the prepared pan, spreading it evenly.
- Bake in the preheated oven for about 30-35 minutes. Use a toothpick to check for doneness; it should come out with a few moist crumbs.
- Allow the brownies to cool completely in the pan before cutting into squares.
- Optionally, drizzle melted white chocolate on top before serving.