The Ultimate Red Velvet Cake Truffles (Easy No-Bake Recipe!)
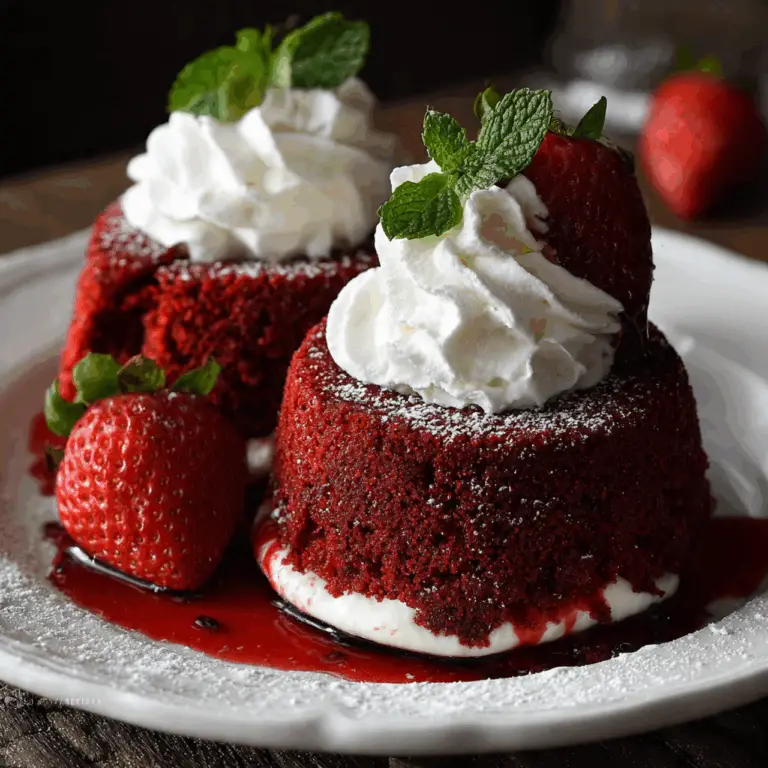
Imagine the most decadent, fudgy bite of red velvet cake, perfectly blended with rich cream cheese frosting, and enrobed in a sweet, crisp shell of white candy coating. That, my friends, is the irresistible, bite-sized magic of these Red Velvet Cake Truffles. They are, without a doubt, the easiest and most impressive no-bake treat you…
Imagine the most decadent, fudgy bite of red velvet cake, perfectly blended with rich cream cheese frosting, and enrobed in a sweet, crisp shell of white candy coating. That, my friends, is the irresistible, bite-sized magic of these Red Velvet Cake Truffles. They are, without a doubt, the easiest and most impressive no-bake treat you will ever make, perfect for any and every occasion.
Here’s the thing about a truly great cake truffle: the texture has to be perfect. It must be moist and fudgy, never dry. I am completely obsessed with this recipe because it uses a brilliant shortcut—a baked red velvet cake mix and prepared frosting—to guarantee that perfect, decadent consistency every single time. It’s my go-to recipe for creating a stunning, bakery-worthy treat with minimal effort.
I promise you, there is no greater joy than biting through the crisp white shell to reveal the vibrant, deep red, and incredibly moist cake center. The classic flavor combination of tangy cream cheese and rich red velvet is a match made in heaven. They are the star of any holiday platter, a beautiful homemade gift, and the perfect elegant treat for a party.
Get ready to master the art of the cake truffle and create a stunning, delicious confection that will have everyone believing you’re a professional chocolatier.

Why These Red Velvet Truffles Are an Absolute Must-Make!
You are going to be completely amazed by how simple it is to create these stunning and delicious truffles. This recipe is a keeper for so many reasons. Here’s why:
- Incredibly Easy with Smart Shortcuts: This recipe brilliantly uses a boxed cake mix and prepared frosting, which takes all the guesswork out and guarantees a perfectly moist, flavorful result.
- Perfectly Fudgy, Melt-in-Your-Mouth Texture: The ratio of cake to frosting creates an unbelievably rich, dense, and fudgy center that is absolutely irresistible.
- A True No-Bake Treat (Almost!): Once the cake is baked, the rest of the process is a fun, no-bake project of mixing, rolling, and dipping.
- Stunningly Beautiful Appearance: The contrast of the vibrant red velvet interior against the pristine white candy coating is simply gorgeous, making these a show-stopper on any dessert table.
- Perfect for Gifting and Parties: These truffles look like they came from a high-end candy shop, making them the perfect impressive, yet easy, homemade gift or party dessert.
Recipe Snapshot
| Prep Time | 60 minutes |
| Cook Time | 0 minutes |
| Total Time | 1 hour |
| Servings | 15 to 30 truffles |
| Calories | 210 kcal per truffle |
| Course | Dessert |
| Cuisine | American |
| Difficulty/Method | Easy / No-Bake |
Your Shopping List for These Decadent Truffles
This recipe is all about smart shortcuts for a gourmet result. Here’s the simple list of what you’ll need:
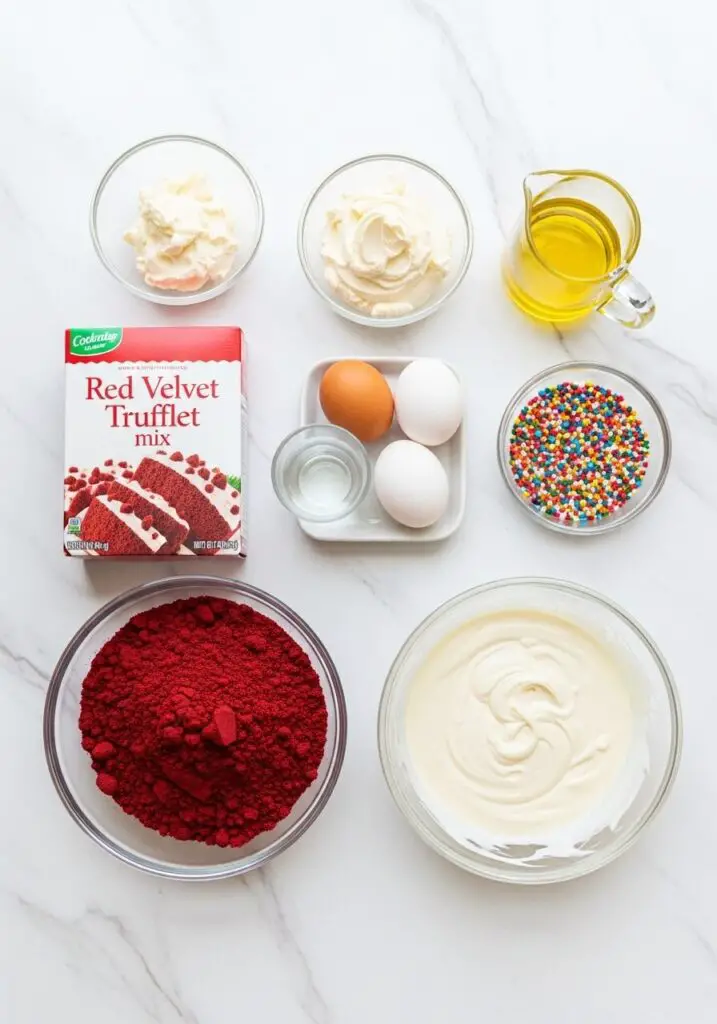
→ For the Truffles
- 1 box red velvet cake mix → Plus the ingredients called for on the box (usually eggs, oil, and water).
- 1 (16-ounce) can prepared cream cheese frosting → The perfect rich and tangy binder for our cake crumbs.
- 1 pound white candy coating → Also known as almond bark or Candiquick. It melts beautifully and creates a perfect, crisp shell.
- Sprinkles or reserved cake crumbs → Optional, for a beautiful, decorative topping.
Let’s Get Rolling! Your Step-by-Step Guide
This is a fun and rewarding project. Let’s transform a simple cake into elegant, bite-sized treasures!
Part 1: The Cake Base
- Bake and Cool the Cake: Prepare and bake the red velvet cake mix according to the package directions for a 9×13-inch cake. Once baked, let the cake cool completely. This is a crucial step!
- Crumble the Cake: Once the cake is totally cool, crumble it into a very large bowl. Use your hands to break it down until it is in small, fine crumbs. If you wish, you can reserve a few spoonfuls of these dry crumbs to use as a garnish later.
Part 2: Mix, Roll, and Chill
- Mix the Truffle “Dough”: Add about three-fourths of the can of cream cheese frosting to the cake crumbs. Use a rubber spatula to mix everything together until it is well combined and very moist. The mixture should easily hold together when you squeeze it. If it seems too dry, add the remaining frosting.
- Scoop and Roll: Using a small cookie scoop for uniform size, scoop out balls of the cake mixture. Roll each one between your palms until it is smooth and round.
- Chill the Balls: Place the rolled cake balls on a baking sheet lined with foil or parchment paper. Refrigerate them until they are firm. This step is mandatory for clean dipping!

Part 3: Dip and Decorate
- Melt the Coating: While the cake balls chill, place the white candy coating in a medium microwave-safe bowl. Microwave it in 45-second intervals, stirring well after each one, until it is completely melted and smooth.
- Dip the Truffles: Place a chilled cake ball on a fork or dipping tool. Submerge it completely in the melted candy coating. Lift it out and gently tap the fork on the side of the bowl to allow all the excess coating to drip off.
- Decorate and Set: Carefully place the dipped truffle back on your foil-lined baking sheet. While the coating is still wet, immediately sprinkle the top with your reserved cake crumbs or other festive sprinkles.
- Final Chill: Repeat with all the remaining cake balls. Refrigerate the finished truffles for about 20 minutes, or until the candy coating is completely firm.

WiseRecipes’ Top Tips for Perfect Cake Truffles
These are the non-negotiable secrets to creating beautiful, bakery-quality cake truffles every time.
- Cool the Cake COMPLETELY. This is the most important rule. If you try to mix frosting into a cake that is even slightly warm, you will end up with a greasy, oily mess instead of a fudgy truffle mixture.
- Don’t Add Too Much Frosting. Start with ¾ of the can. The goal is a moist, play-doh-like consistency that holds its shape, not a wet or greasy one. You can always add more frosting, but you can’t take it away.
- Chill the Balls Before Dipping. This step is mandatory! Chilling the cake balls until they are firm is the secret to clean dipping. A firm, cold ball won’t fall apart in the warm coating.
- Use the Fork Trick. The best way to dip truffles is by placing one on the tines of a fork. This allows you to fully submerge it and lets the excess coating drip off cleanly through the tines for a neat finish.
- Work in Batches. To keep your cake balls firm, it’s best to work in small batches. Keep the main tray in the refrigerator and only take out a few at a time to dip.
Easy Red Velvet Cake Truffles
Ingredients
Equipment
Method
- Prepare and bake the red velvet cake mix according to the package directions for a 9×13-inch cake. Allow the cake to cool completely.
- Crumble the cooled cake into a large bowl until it is in small pieces.
- Spoon three-fourths of the frosting into the bowl and stir with a rubber spatula until the mixture is well combined and moist enough to hold a ball shape. Add more frosting if needed.
- Using a small cookie scoop, portion out small balls of cake and roll between your palms until round. Place the cake balls on a foil-lined baking sheet.
- Refrigerate the cake balls until firm.
- Place the candy coating in a microwave-safe bowl and microwave until melted, stirring after every 45 seconds to prevent overheating.
- Using a fork, submerge a chilled cake ball in the melted coating. Lift it out and tap the fork on the lip of the bowl to remove excess coating.
- Place the dipped truffle on the foil-lined baking sheet. Top with sprinkles or other decorations while the coating is still wet. Repeat with remaining cake balls.
- Refrigerate the truffles to set the coating completely, about 20 minutes.
Notes
Keep Them Fresh! Storing Your Truffles
These truffles are a fantastic make-ahead treat and store beautifully.
- Refrigerator: The finished truffles must be stored in the refrigerator due to the cream cheese. Place them in an airtight container, where they will stay fresh and delicious for up to a week. For the best flavor, let them sit at room temperature for about 15-20 minutes before serving.
FAQs: Your Cake Truffle Questions, Answered!
Can I use homemade cake and frosting?
Yes, of course! This method is the absolute best way to use up leftover cake and frosting from another project. Just make sure your cake-to-frosting ratio results in a moist, rollable consistency.
My candy coating is too thick. How can I fix it?
If your melted candy coating seems too thick for dipping, you can stir in a very small amount (start with just ½ teaspoon) of solid vegetable shortening or coconut oil. This will help to thin it out for a smoother, easier dipping consistency.
Can I use regular white chocolate instead of candy coating?
You can, but candy coating (or almond bark) is highly recommended for beginners. It is designed to melt smoothly and set up with a perfect, crisp shell. Real white chocolate can be trickier to melt without seizing and won’t set as hard unless it is properly tempered.
Can I make these into cake pops?
Absolutely! After rolling the cake balls and chilling them, simply insert a lollipop stick about halfway into each ball. Then proceed with the dipping process. They make fantastic and festive cake pops!
Final Thoughts: A Bite of Red Velvet Bliss
There is such a satisfying joy in transforming a simple cake into these elegant, bite-sized works of art. These Red Velvet Cake Truffles are a celebration of classic flavors and smart shortcuts, proving that you don’t need to be a pastry chef to create something truly special. I hope this easy and delicious recipe becomes a new favorite for all your celebrations. Happy dipping!