Shamrock Homemade Gummies with Jello
Discovering the Charm of Shamrock Gummies There’s something magical about homemade gummies, especially when they’re shaped like shamrocks! Every March, as St. Patrick’s Day approaches, I find myself pulling out my trusty shamrock cookie cutter and whipping up these delightful treats for family and friends. The recipe I adore is not just simple but also…
Discovering the Charm of Shamrock Gummies
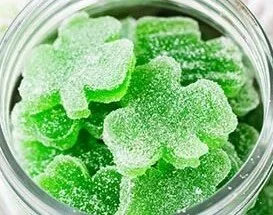
There’s something magical about homemade gummies, especially when they’re shaped like shamrocks! Every March, as St. Patrick’s Day approaches, I find myself pulling out my trusty shamrock cookie cutter and whipping up these delightful treats for family and friends. The recipe I adore is not just simple but also packs a vibrant lime flavor that dances on your taste buds. If you’ve never made Shamrock Homemade Gummies with Jello, you’re in for a real treat!
To start off, here is what you’ll need for this recipe: 1.5 cups of applesauce, 2.25 cups of sugar, 2 boxes of lime Jell-O (3 oz each), and 2 packs of unflavored gelatin. Oh, and don’t forget your shamrock cookie cutter! These ingredients create a perfect blend for a chewy, sweet delight. The applesauce adds a hint of freshness and moisture, making these gummies stand out. You may also find Creamy Shrimp Fettuccine Pasta With Homemade Alfredo Sauce 2 useful.
The Joy of Creating Gummies
Making these gummies is truly an enjoyable process. First, I combine the applesauce, sugar, lime Jell-O, and unflavored gelatin in a saucepan. It’s important to stir this mixture well until everything is thoroughly combined. The vibrant color of the lime Jell-O brightens up the mixture and gets me excited about the final product.
Next, I set the burner to medium-high heat. As it heats up, I stir constantly until it reaches a gentle boil. This bubbling moment is key! Once boiled, I leave it to bubble for just about one minute before removing it from the heat. It’s all about ensuring that the gelatin is well dissolved, providing the right texture for those chewy gummies.
Setting the Stage for Gummies
For an easy release later, I line a 13×9 baking dish with parchment paper. After that, I pour the mixture into the dish, smoothing it out so that it spreads evenly. The vibrant green color fills the dish beautifully, leaving me impatient for the next step. Now, for the hardest part—waiting! I usually place the dish in the refrigerator to chill for at least two hours, allowing the gummies to set completely.
While waiting, I can’t help but think about how I discovered this recipe at a friend’s gathering. They served these gummy shapes alongside other treats, and I was instantly hooked. As a result, I couldn’t resist asking for the recipe, which has since become a staple in my home.
Time for Cutting and Candy-Coating
The anticipation builds as I pull the forming gummy slab from the fridge. Carefully, I lift it using the parchment paper and place it on a clean cutting board. A light dusting of sugar over the top prevents the gummies from sticking together later. Then comes the fun part—using the shamrock cookie cutter to shape them! Each cutout, dipped in sugar before cutting, creates a charming treat that truly celebrates the spirit of St. Patrick’s Day.
Next, I love rolling each shamrock in sugar before placing them on a parchment-lined cookie sheet. The sugary coating adds a delightful crunch to the chewy texture of the gummies—truly a match made in heaven!
Sweet Variations to Try
What I’ve learned over the years is that this recipe is wonderfully versatile. While lime is my favorite flavor, you can easily switch things up using different Jell-O flavors; raspberry or orange could give your gummies a different personality!
Additionally, for those who might want a more tart flavor, adding a bit of lemon juice can elevate the taste. Some friends of mine even experiment by stirring in bits of fresh fruit or herbs for a unique twist—this creativity is what keeps the gummy-making process exciting every time!
Storing Your Homemade Gummies
If you’re making these for a gathering or party, you might be wondering how to store leftovers. I usually keep mine in an airtight container, although they rarely last long! Just make sure to separate layers with parchment paper to avoid sticking. They can last for about a week in the fridge, perfect for sneaking a sweet treat some days after you’ve made them.
Conclusion
As you can see, making Shamrock Homemade Gummies with Jello is a delightful experience filled with fun and creativity. They not only look festive but also taste amazing, making them a perfect addition to any St. Patrick’s Day celebration. If you’re looking for more fun ideas for holiday treats, check out this helpful resource. Happy cooking, and enjoy your sweet creations!