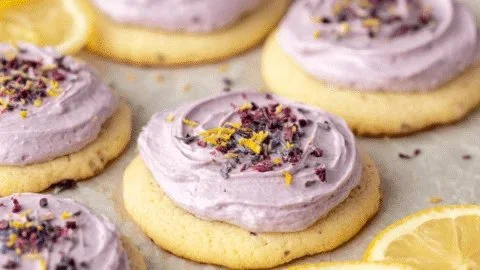
Springtime Crinkle Cookies
The Sweet Magic of Springtime Crinkle Cookies Spring has a way of stirring nostalgia in me—it’s that delightful season when everything bursts into color after the cold and dreary winter. Flowers bloom, the air is filled with the promise of warmer days, and my oven starts humming with the comforting sounds of baking. Among my…
The Sweet Magic of Springtime Crinkle Cookies
Spring has a way of stirring nostalgia in me—it’s that delightful season when everything bursts into color after the cold and dreary winter. Flowers bloom, the air is filled with the promise of warmer days, and my oven starts humming with the comforting sounds of baking. Among my beloved springtime traditions is baking a batch of Springtime Crinkle Cookies. Whenever I pull them out of the oven, my heart fills with joy, and I can’t help but share the happiness they bring.
The Secret Behind Perfect Springtime Crinkle Cookies
These cookies are a vibrant explosion of colors, making them perfect for any spring gathering. Their crinkly tops reveal an irresistible chewy interior that feels like a warm hug. To make them, you’ll need some essentials: 2 cups of all-purpose flour, 1 ½ teaspoons of baking powder, a pinch of salt, and ½ cup of softened unsalted butter to get things started.
At this point, your kitchen will start to smell as inviting as a garden in full bloom. Mixing the butter with 1 cup of granulated sugar for about 2-3 minutes until it turns light and fluffy is where the magic begins. You’ll simply love the feeling of the creamed butter and sugar slipping through your fingers. It’s such a simple pleasure, isn’t it?
A Few Things I’ve Learned About the Dough
Next up, we crack in two large eggs, one at a time. Each egg is like a tiny promise of richness. Stir in a teaspoon of vanilla extract (and if you’re feeling adventurous, go ahead and add half a teaspoon of almond extract for that delicate, nutty flavor). This is where I usually indulge in a little taste test; an inherent privilege of being both the baker and the taste tester!
After blending in the wet ingredients, we turn our attention to the dry ones. In a medium bowl, whisk together the flour, baking powder, and salt you set aside earlier. It’s crucial to combine these well—it ensures that the leavening agent distributes evenly throughout your batch. Slowly add the dry mix into the buttery goodness until it’s just combined. And here’s the part you’ll remember: the dough will be thick and slightly sticky, a little like the early spring mud that clings to your shoes after a jog through the park.
Getting Colorful
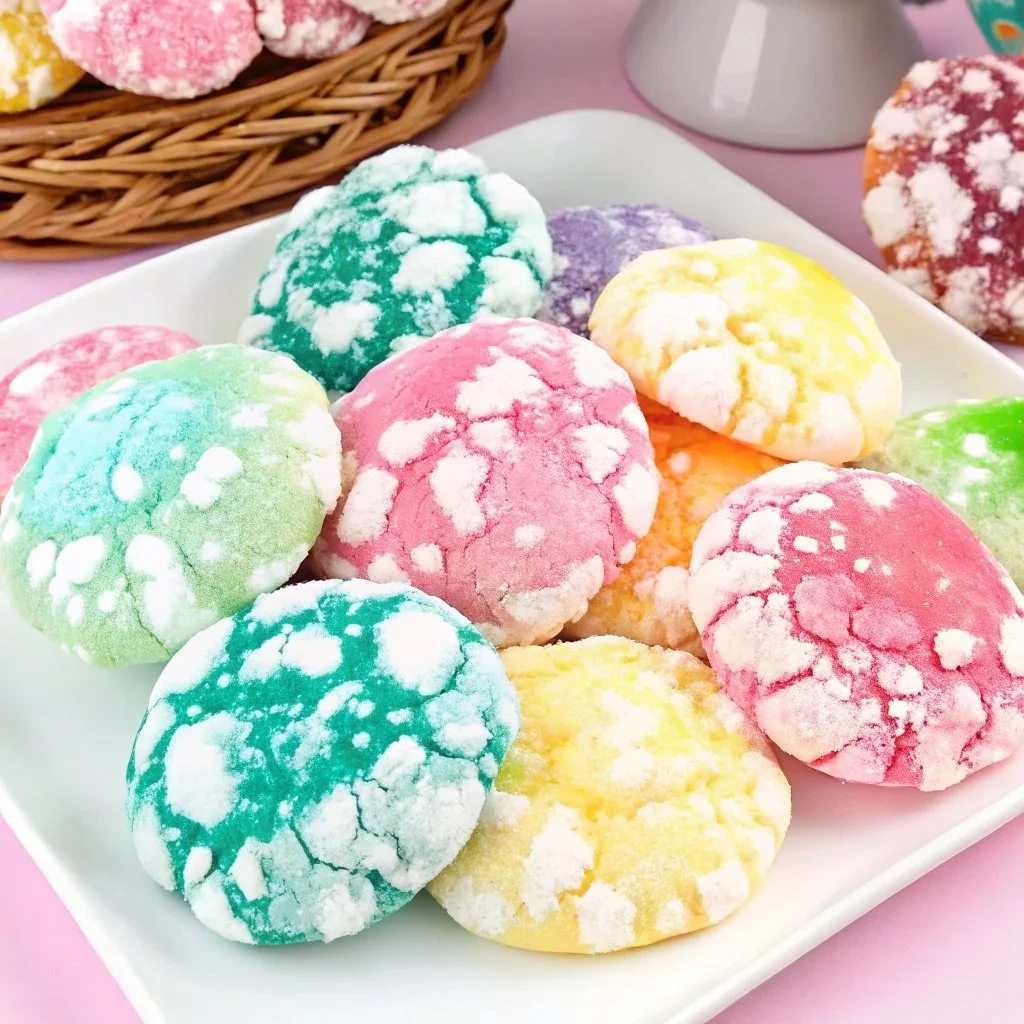
Now comes the fun bit! Divide the dough into several bowls based on the colors you want to create. I often go for soft pastels—think light pink, pale yellow, soft green, and lavender—which remind me of the blooms outside. Add your gel food coloring and mix until you achieve the desired shades. It’s like being an artist in a sweet little bakery!
After you’ve colored the dough, cover the bowls and pop them in the fridge for at least 30 minutes. This helps to firm up the dough, making it easier to roll into balls and giving those crinkles a chance to shine when they bake. I usually take this time to savor a cup of tea, letting the anticipation build.
The Rolling Question
Once your dough has chilled, preheat the oven to 350°F (175°C) and line a baking sheet with parchment paper. This is crucial; nobody wants their beautiful cookies to stick! Now, the best part—scoop out tablespoon-sized portions of dough and roll them into smooth balls, then generously coat each ball with powdered sugar. The sight of those bright sugar-coated balls feels like spring encapsulated!
Placing them on the lined baking sheet with enough space in between feels like setting up a colorful parade. As they bake for 10-12 minutes, you’ll witness them puffing up and cracking beautifully. Keep your eyes peeled, as the perfect timing is key to achieving that chewy texture on the inside while allowing the tops to crinkle just right.
How I Discovered This Recipe
I stumbled upon this recipe years ago while browsing through an old cookbook my grandmother passed down to me. It was her handwritten notes that caught my eye, filled with whimsical adjustments and musings on flavor. She always said baking is about love, and nothing encapsulates that sentiment quite like these cookies. When the aroma wafts through your kitchen, it feels like a warm embrace from family—reminding me of afternoons spent mixing flour and sugar with her.
What Makes These Cookies Special
One of the very best parts about these Springtime Crinkle Cookies is their versatility. You can play with flavors by switching up the extracts or even adding mini chocolate chips for extra indulgence. Or how about a lemon zesty kick? Just a teaspoon can elevate the whole batch! If you find yourself with leftovers, store them in an airtight container at room temperature for about a week. Although, I can almost guarantee they’ll disappear long before then!
The Best Part About the Timing
Once they come out of the oven, let them rest on the baking sheet for just a few minutes. This step helps them set before you transfer them to a wire rack. The thrill of watching those cracks deepen and open up sends shivers of excitement that few things can match. And then comes the taste test, which is arguably the most important part. The gentle crispiness of the exterior gives way to the soft and chewy center—a perfect balance!
Wrapping Up with a Flurry of Color
As you take your first bite, I dare you to not smile. Just the sight of their bright colors can lift your mood. These cookies have an incredible way of bringing people together—whether it’s a casual spring picnic or a cheerful gathering at home. They become a vibrant centerpiece, tempting everyone with their eye-catching charm.
Before I know it, I’m left with a kitchen filled with spring scents and colorful delights, and I can’t help but feel gratitude for such simple pleasures. I hope you try your hand at baking these Springtime Crinkle Cookies! They hold a special place in my heart, and I have a feeling they will in yours too. Here’s to creating beautiful memories, one colorful bite at a time!
Springtime Crinkle Cookies
Ingredients
Method
- Preheat the oven to 350°F (175°C) and line a baking sheet with parchment paper.
- In a mixing bowl, cream together the softened butter and granulated sugar for 2-3 minutes until light and fluffy.
- Add eggs one at a time, mixing well after each addition, then stir in the vanilla extract and optional almond extract.
- In a separate bowl, whisk together flour, baking powder, and salt.
- Gradually incorporate the dry ingredients into the wet mixture until just combined. The dough should be thick and slightly sticky.
- Divide the dough into several bowls based on the colors you wish to create.
- Add gel food coloring to each bowl and mix until the desired shades are achieved.
- Cover the bowls and refrigerate for at least 30 minutes to firm up the dough.
- Once chilled, scoop tablespoon-sized portions of dough and roll them into balls.
- Generously coat each ball with powdered sugar and place them on the lined baking sheet, leaving space between each cookie.
- Bake for 10-12 minutes, keeping an eye on them as they puff up and crack.
- Allow cookies to cool on the baking sheet for a few minutes before transferring to a wire rack.
- Enjoy the cookies warm, and savor their chewy center and crinkly tops.