Strawberry Fruit Roll Ups
The Sweetness of Strawberry Fruit Roll Ups There’s something magical about fruit roll ups, especially when they’re made from scratch with fresh strawberries. I remember the first time I had a homemade version; it was as if I had unlocked a hidden treasure in the world of snacks. The vibrant color, the bursting flavor, and…
The Sweetness of Strawberry Fruit Roll Ups
There’s something magical about fruit roll ups, especially when they’re made from scratch with fresh strawberries. I remember the first time I had a homemade version; it was as if I had unlocked a hidden treasure in the world of snacks. The vibrant color, the bursting flavor, and the satisfying chewiness were unlike the store-bought versions I had grown up with. Now, I whip up my own Strawberry Fruit Roll Ups, and they never fail to impress both kids and adults alike.
Let me share this delightful recipe so you can create these treats in your kitchen too. To get started, gather the following ingredients: 2 cups of fresh strawberries, hulled and washed, 1/4 cup of honey or maple syrup, 1 tablespoon of lemon juice, 2 tablespoons of water (you might add more for blending), and a pinch of salt. You’ll be enjoying these fruity rolls in no time!
Blending Flavors for the Perfect Roll Up
The first step is to preheat your oven to a low temperature—170°F (75°C) works wonders for drying out the fruit without cooking it. While that heats up, give your strawberries a rinse, hull them, and let them drain for a few minutes. This helps to ensure no excess water makes your fruit roll ups soggy.
Once your strawberries are ready, throw them into a blender with your sweetener of choice (honey or maple syrup), lemon juice, and a pinch of salt. If you’re feeling adventurous, the honey adds a floral note, while maple syrup lends a deeper, earthy sweetness. Blend until the mixture is smooth. At this point, don’t forget to taste it! You might prefer it a touch sweeter, so feel free to add more honey or syrup as needed.
As I was experimenting with this recipe, I discovered that adding just a tablespoon of water can significantly help the blending process, achieving that perfect consistency. If you’re looking for additional homemade snack options, you might also enjoy exploring other fruit roll up recipes.
Baking the Roll Ups
To prepare for baking, line a baking sheet with parchment paper. Pour your strawberry puree onto the lined sheet and spread it into an even layer about 1/8 to 1/4 inch thick. Getting the thickness just right is crucial; too thick, and it won’t dry properly; too thin, and it may turn out crispy instead of chewy.
Now, pop it in the oven and let it bake for 6-8 hours. Yes, I know that seems like a long time, but trust me—it’s well worth the wait! Keep an eye on it; you’re aiming for a texture that feels dry but retains some flex. Once you take it out, let it cool completely, which also helps the texture settle.
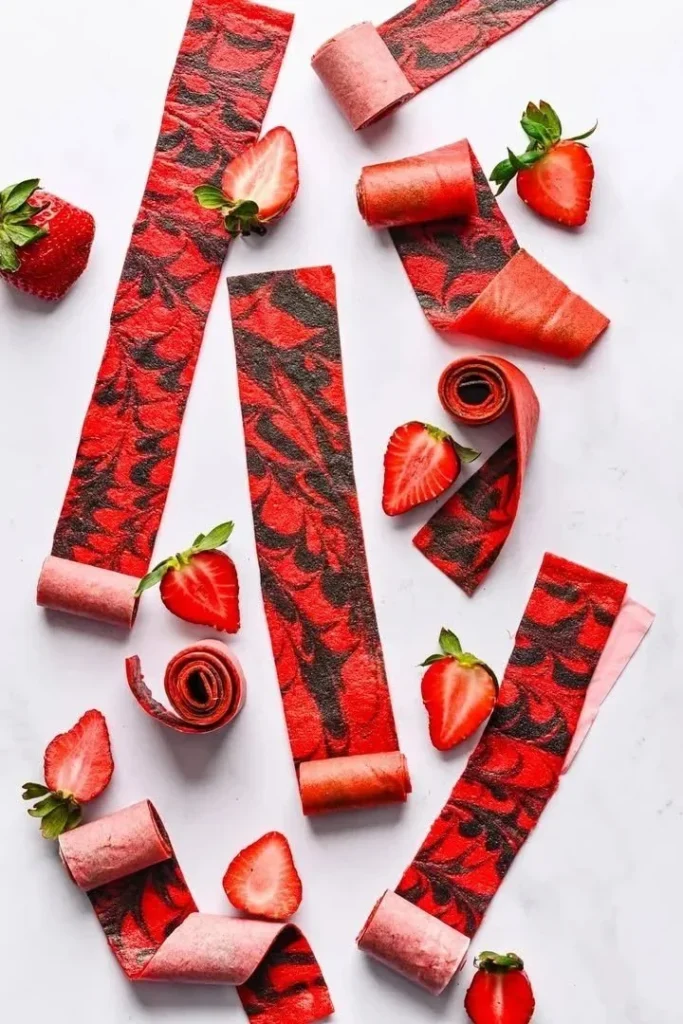
The Joy of Rolling and Storing
With your strawberry leather now cooled, it’s time for the fun part: slicing and rolling! Using kitchen scissors, cut the fruit leather into strips. I like to make mine about an inch wide, which makes for perfect snacking sizes. Roll them tightly and secure them with a small piece of parchment paper if you’re storing them individually.
Speaking of storage, these rolls can keep at room temperature in an airtight container for about a week. If you want to store them for longer, just pop them in the freezer. I often make a double batch so I can have some on hand for quick snacks or grab-and-go lunches. For inspiration on how to incorporate fruit roll ups into creative dishes, check out this guide on variations and ideas.
When to Make These Sweet Treats
I can’t emphasize enough how great it is to have these strawberry fruit roll ups in your arsenal. They’re not just a snack; they can be a delicious touch to lunch boxes, a whimsical addition to a party platter, or even a sweet treat after dinner. I’ve found that these rolls delight my family’s taste buds no matter the occasion.
One tip I’ve found helpful is to use slightly overripe strawberries, which may not be aesthetically pleasing but pack an unbelievable amount of sweetness and flavor. A mix of different berries can also add complexity to your rolls if you want to experiment a bit more.
Conclusion
Making homemade Strawberry Fruit Roll Ups is a simple yet rewarding process that fills your kitchen with the sweet aroma of fresh fruit. If you want to refine your techniques or see variations of the dish, you can find an excellent resource at this detailed guide on strawberry fruit roll ups. So why not try your hand at making these delightful snacks today? You’ll be amazed at how much better they taste than anything you can buy at the store!
Strawberry Fruit Roll Ups
Ingredients
Method
- Preheat your oven to 170°F (75°C).
- Rinse and hull the strawberries, then let them drain for a few minutes.
- In a blender, combine the strawberries, honey or maple syrup, lemon juice, and salt. Blend until smooth.
- Taste the mixture and adjust sweetness if necessary.
- Line a baking sheet with parchment paper.
- Pour the strawberry puree onto the lined sheet and spread it into an even layer about 1/8 to 1/4 inch thick.
- Bake in the oven for 6-8 hours, checking for a texture that feels dry but retains some flex.
- Once done, let the fruit leather cool completely.
- Using scissors, cut the cooled fruit leather into strips about an inch wide.
- Roll the strips tightly and secure with parchment paper if storing individually.
- Store rolls at room temperature in an airtight container for up to a week or in the freezer for longer storage.