The Ultimate Sugar Cookie Hot Cocoa Bombs (with a Surprise Inside!)
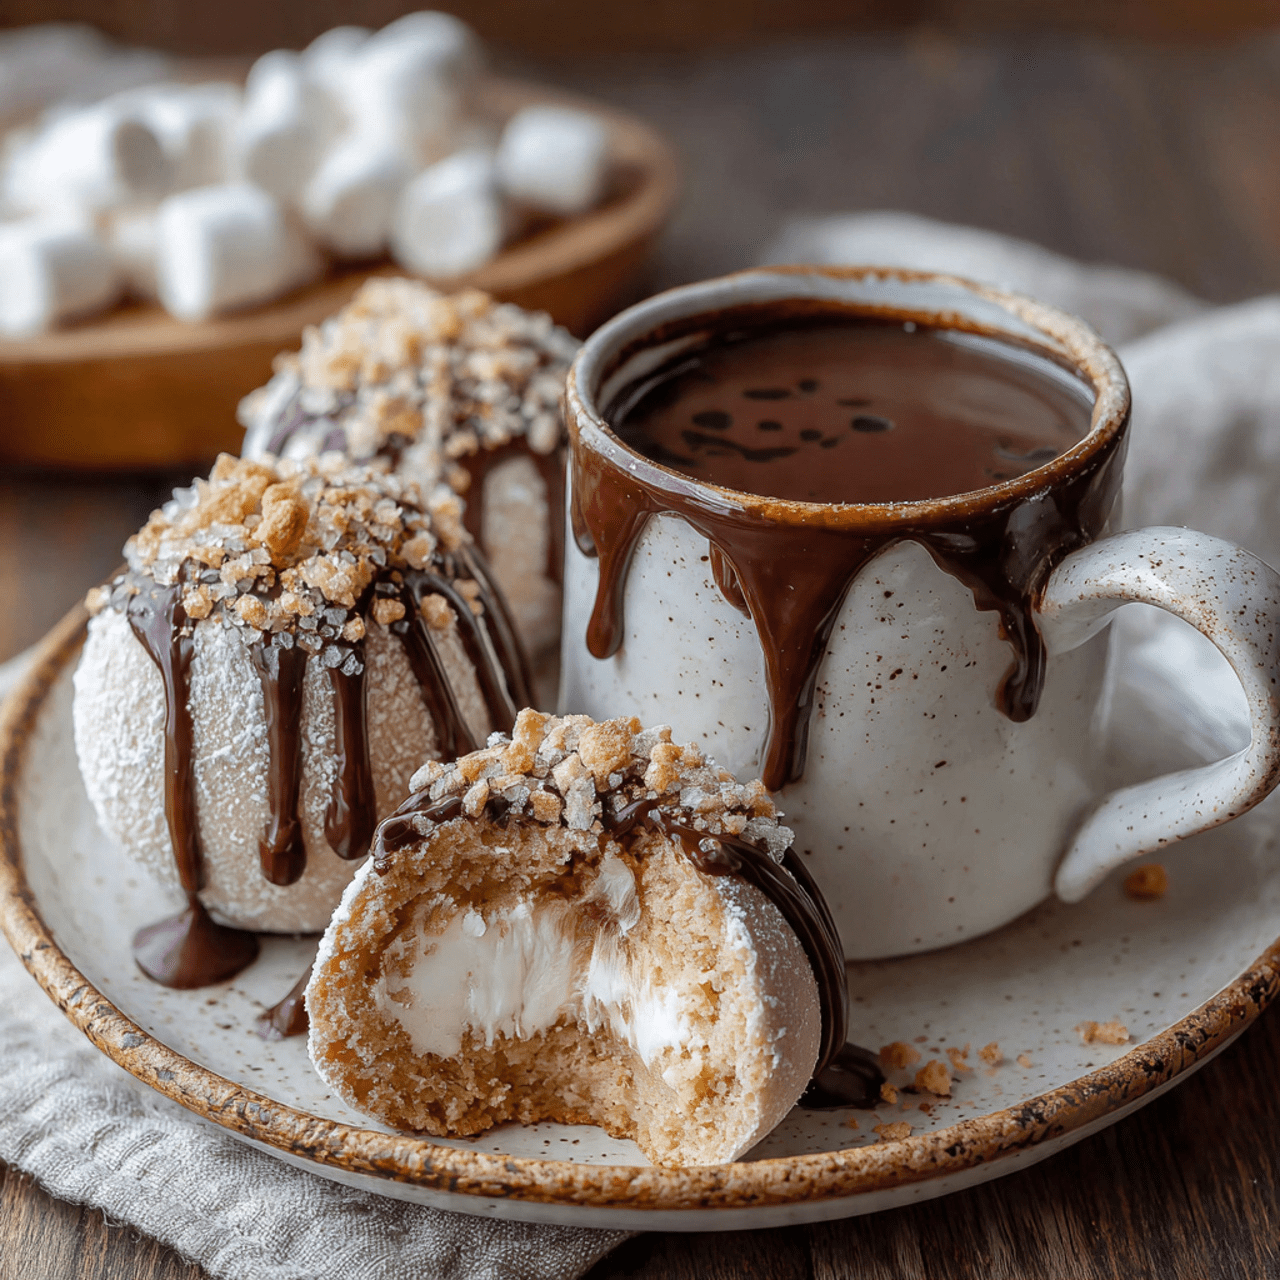
Imagine a chilly evening, a cozy blanket, and a warm mug in your hands. You pour steaming hot milk over a beautiful, decorated white chocolate sphere, and then the magic happens. The shell cracks, melts away, and a burst of marshmallows and rich cocoa powder erupts to the surface, followed by a secret, sweet surprise….
Imagine a chilly evening, a cozy blanket, and a warm mug in your hands. You pour steaming hot milk over a beautiful, decorated white chocolate sphere, and then the magic happens. The shell cracks, melts away, and a burst of marshmallows and rich cocoa powder erupts to the surface, followed by a secret, sweet surprise. That, my friends, is the pure, delightful fun of these Sugar Cookie Hot Cocoa Bombs.
I promise you, there is no greater joy than handing one of these to a loved one and watching their face light up as the surprise is revealed. The smooth, sweet white chocolate, the rich cocoa, the fluffy marshmallows, and that final melt of the sugar cookie kiss create the most decadent and comforting cup of hot chocolate you’ve ever had.
Get ready to master the art of the hot cocoa bomb. This is a recipe for creating sweet, magical moments.

Why These Will Be Your New Favorite Winter Treat!
You are going to have an absolute blast making (and drinking!) these magical cocoa bombs. They are a must-make for so many reasons:
- A Fun and Magical Experience: The best part is the big reveal! Watching the chocolate shell melt and release all the goodies is incredibly fun for kids and adults alike.
- A Delicious Surprise Inside: This isn’t just a standard hot cocoa bomb! The hidden Sugar Cookie Hershey’s Kiss adds a unique, creamy, and sweet surprise at the end.
- Perfect for Gifting: Beautifully packaged, these homemade hot cocoa bombs make the most thoughtful and impressive gifts for holidays, birthdays, or just because.
- Incredibly Easy to Make: Don’t be intimidated! With silicone molds and a few simple tricks, creating those perfect chocolate spheres is surprisingly easy and fun.
- The Ultimate Cozy Treat: There is nothing more comforting on a cold day than a rich, decadent cup of hot cocoa, and this recipe takes it to a whole new level.
Recipe Snapshot
| Prep Time | 15 minutes |
| Setting Time | 40 minutes |
| Total Time | 55 minutes |
| Servings | 6 hot cocoa bombs |
| Calories | ~411 kcal per bomb* |
| Course | Dessert, Beverage |
| Cuisine | American |
| Difficulty/Method | Easy / No-Bake |
*Nutrition information is an estimate and should only be used as an approximation.
Your Shopping List for This Magical Project
This recipe uses a handful of fun, easy-to-find ingredients to create a truly special treat.

→ For the Hot Cocoa Bombs
- 12 oz. white chocolate → Melting wafers or a good quality white chocolate bar will give you the smoothest, easiest result.
- 2 packets hot cocoa mix → About 2-3 tablespoons total.
- 1 package Sugar Cookie Hershey’s Kisses → The secret surprise hidden inside!
- 1 cup mini marshmallows → An essential for any great cup of hot cocoa.
- Festive sprinkles → Optional, for decorating the outside.
- 6 cups hot water or milk → For serving. Milk will create the richest, creamiest hot chocolate.
→ Special Equipment
- Silicone sphere molds → Typically 2.5-inch diameter. You’ll need a mold that makes at least 12 half-spheres.
Let’s Make Magic! Your Step-by-Step Guide
Ready to create the most impressive cup of hot cocoa ever? Let’s break it down into simple, fun steps.
Part 1: The White Chocolate Shells
- Melt the Chocolate: Place your white chocolate in a microwave-safe bowl. Microwave in 30- to 45-second intervals, stirring well after each one, until the chocolate is completely melted and smooth.
- Coat the Molds: Spoon a generous amount of the melted chocolate into each half-sphere cavity of your silicone mold. Use the back of a small spoon to spread the chocolate evenly up the sides, creating a thick, even coating. Make sure you can’t see the color of the mold through the chocolate.
- Chill to Set: Place the molds in the refrigerator and let the chocolate set completely, for about 30 minutes. If the shells look thin in spots, you can add a second coat of chocolate and chill again.

Part 2: Fill, Seal, and Decorate
- Unmold the Shells: Once the chocolate is firm, carefully remove the chocolate half-spheres from the silicone molds. Arrange 6 of the shells, open-side up, on a clean surface.
- Fill ‘Em Up!: Place one Sugar Cookie Hershey’s Kiss in the bottom of each of the 6 shells. Add about 1 tablespoon of hot cocoa mix on top, followed by 5-6 mini marshmallows.
- The Sealing Trick: Heat a small, empty skillet over low heat for just a moment, then remove it from the heat. Take one of the empty chocolate half-spheres and briefly touch its rim to the warm pan to melt the edge.
- Seal the Bomb: Immediately place the melted-edge shell on top of a filled shell to seal them together into a perfect sphere. Let it set. Repeat for the remaining bombs.
- Decorate: If you have leftover melted chocolate, you can drizzle it over the top of the finished bombs and immediately add some festive sprinkles. Let them stand for about 10 minutes for the drizzle to set.
Part 3: The Big Reveal!
- Serve and Enjoy: To serve, place one finished hot cocoa bomb in a large mug. Pour one cup of very hot milk or water directly over the top and watch the magic happen! As the chocolate melts, the marshmallows and surprise kiss will burst out. Stir well and enjoy the best cup of hot cocoa ever!
Sugar Cookie Hot Cocoa Bombs
Ingredients
Equipment
Method
- Place your chocolate in a bowl and melt in the microwave in 30-45 second intervals, stirring until smooth.
- Spoon the melted chocolate into your silicone molds. Use the back of a spoon to spread the chocolate evenly up the sides to create a thick, even shell.
- Place the molds in the fridge and let them set for 30 minutes until completely firm. Apply a second coat if needed.
- Carefully remove the 12 chocolate half-spheres from the molds. Place 1 sugar cookie kiss, 1 tablespoon of cocoa powder, and 5-6 mini marshmallows into 6 of the shells.
- Heat a small, empty skillet over low heat and then remove from heat. Take an empty chocolate shell and briefly touch the rim to the warm pan to melt it.
- Immediately place the melted-edge shell onto a filled shell to seal them together into a sphere. Repeat for all bombs.
- Drizzle with remaining melted chocolate and top with sprinkles, if desired. Let stand for 10 minutes to fully set.
- To serve, place a bomb in a mug and pour 1 cup of very hot milk or water over it. Stir and enjoy.
Notes
WiseRecipes’ Top Tips for Perfect Hot Cocoa Bombs
These simple secrets will ensure your creations are beautiful, sturdy, and magical every time.
- Use Good Quality Melting Chocolate. For the easiest and best results, use white chocolate melting wafers or almond bark. They are designed to melt smoothly and set up hard and shiny. Regular white chocolate chips can be trickier to work with.
- Make Your Shells Thick Enough. A common mistake is making the chocolate shells too thin, which causes them to crack. After your first coat, hold the mold up to the light. If you see any thin spots, add a second layer of melted chocolate and chill again.
- The Warm Plate Sealing Method. An alternative to a skillet is to warm a ceramic plate in the microwave for a minute. You can then use the warm plate to melt the rim of the empty shell. It’s a very clean and easy method.
- Handle with Care (or Gloves). The chocolate shells will melt from the heat of your fingertips, leaving smudges. Try to handle them as little as possible. You can even wear food-safe gloves for a perfectly clean, professional finish.
- Use VERY Hot Milk. For the most dramatic and satisfying “explosion,” your milk or water needs to be steaming hot. This ensures the chocolate shell melts quickly and releases all the goodies inside.
Keep Them Fresh! Storing Your Cocoa Bombs
These are a fantastic make-ahead gift! Here’s how to store them properly.
- Room Temperature or Refrigerator: Store your finished hot cocoa bombs in an airtight container in a cool, dry place. If your home is warm, the refrigerator is the best choice to prevent them from melting. They will stay fresh for several weeks.
- Packaging for Gifts: For gifting, placing each bomb in a cupcake liner is a perfect way to keep them stable and present them beautifully in a box.
FAQs: Your Hot Cocoa Bomb Questions, Answered!
Why did my chocolate shells crack when I took them out of the mold?
Cracking is usually due to the chocolate layer being too thin. It’s always a good idea to apply two thin coats of chocolate (chilling in between) rather than one thick one. This creates a much stronger, more durable shell.
Can I use a different kind of chocolate?
Absolutely! This recipe is fantastic with milk chocolate or semi-sweet chocolate as well. You can customize them completely to your preference.
I don’t have silicone sphere molds. What else can I use?
Silicone sphere molds are really the best and easiest tool for this job. They are inexpensive and widely available online. You could try using a very well-greased plastic Easter egg as a mold in a pinch, but the results are not as reliable.
Can I put sprinkles inside the hot cocoa bombs?
Yes, that’s a fantastic idea! Adding some festive sprinkles inside along with the marshmallows adds an extra burst of color and fun when the bomb melts.
Final Thoughts: A Mug Full of Magic
There is nothing quite as delightful as a recipe that is also an experience. These Sugar Cookie Hot Cocoa Bombs are a celebration of cozy moments, sweet surprises, and the pure fun of creating something magical. They are the perfect way to make any chilly day feel a little more special. I hope you have a blast making and sharing them! Happy sipping!