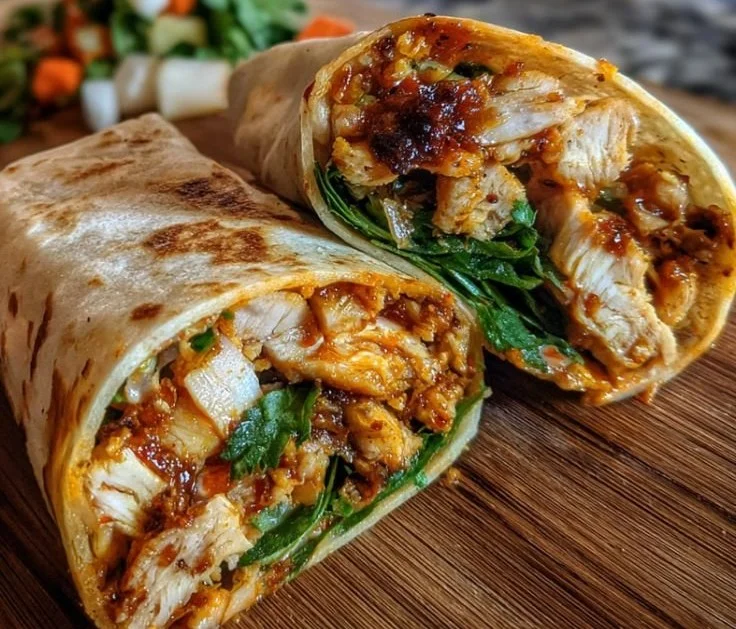
10 Summer Dinner Recipes Perfect for Meal Prep
As summer sizzles, I find myself craving fresh, light meals that don’t keep me tethered to the kitchen. That’s why I’ve gathered a list of my top 10 summer dinner recipes that are not only perfect for meal prep but also bursting with seasonal flavors. From a vibrant Grilled Chicken Orzo Salad to an elegant…
As summer sizzles, I find myself craving fresh, light meals that don’t keep me tethered to the kitchen. That’s why I’ve gathered a list of my top 10 summer dinner recipes that are not only perfect for meal prep but also bursting with seasonal flavors. From a vibrant Grilled Chicken Orzo Salad to an elegant Grilled Shrimp and Pesto Pasta Stack, each recipe is designed to be delicious, easy to make, and ideal for anyone looking to enjoy more time outdoors. Join me as I explore these mouthwatering dishes that will surely elevate your summer dining experience while keeping your meal prep effortless and enjoyable!
1. Grilled Chicken Orzo Salad – A Vibrant Summer Meal You’ll Crave
That first summer evening when everything clicked
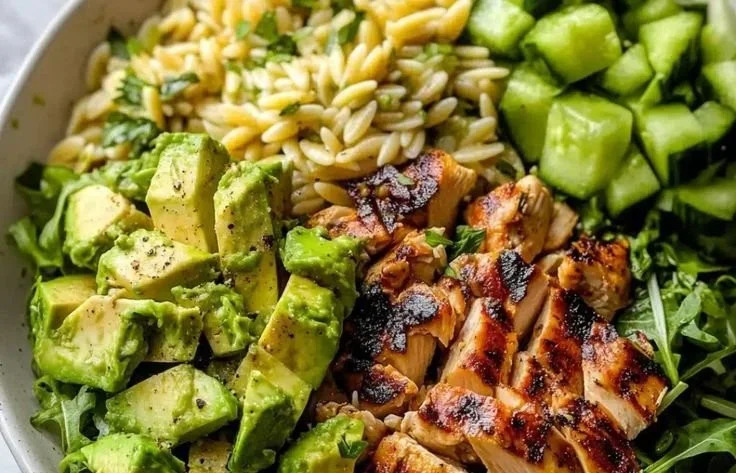
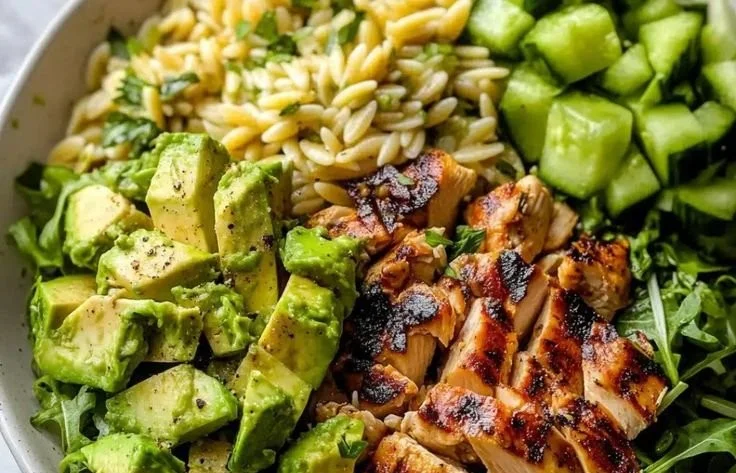
The first time I made this Grilled Chicken Orzo Salad – A Vibrant Summer Meal You’ll Crave, it was raining loudly outside but felt like summer because of the colors and smells coming from my kitchen. Grilled chicken sizzling with a little olive oil, the bright pop of cherry tomatoes when I halved them, and the soft, pillowy bite of orzo cooling in a bowl brought a tiny bit of sunshine to a gray night. If you like light bowls with bold flavors, the same way I like the lemon-chili bowls I make, you might enjoy this too; it shares some of those fresh contrasts like the ones in lemon chili grilled chicken bowls with fresh cucumber salad.
I always say this is a pantry-and-fridge rescue as much as it is a celebration. You’ll want 1 cup uncooked orzo, two grilled chicken breasts sliced after resting, one ripe avocado diced, half a cup of cherry tomatoes halved, a third cup of feta cheese crumbled, a quarter cup of red onion thinly sliced, and about two tablespoons of chopped fresh cilantro or parsley for brightness. For the chicken I use a tablespoon of olive oil for grilling and salt and pepper to taste. For the dressing I reach for a quarter cup of extra virgin olive oil, two tablespoons red wine vinegar, a tablespoon lemon juice, one teaspoon Dijon mustard, one teaspoon honey or maple syrup, one garlic clove finely minced, and salt and pepper to taste.
The flavor team and why they work
What I love about this salad is the way textures and temperatures play against each other. Creamy avocado meets slightly nutty orzo; salty feta meets acidic red wine vinegar and lemon; warm-sliced chicken meets the cool crunch of red onion and the juicy burst of halved cherry tomatoes. When you toss everything, the herbs—cilantro or parsley—lift the whole thing like a bright exclamation point.
A trick I learned is to add the avocado at the very end so it keeps its shape and color. If you dice it early and let it sit in the vinaigrette too long, it becomes mushy and loses that lovely pale green sheen that makes the salad Instagram-ready and, more importantly to me, satisfying to bite into.
The simple method, exactly how I do it
There is a straightforward sequence that makes this one of my go-to weeknight meals. Boil salted water and cook orzo according to package instructions (8–10 minutes). Drain, rinse with cold water, and set aside. Season chicken with olive oil, salt, and pepper. Grill over medium heat for 5–6 minutes per side or until fully cooked. Let rest, then slice. Whisk together olive oil, red wine vinegar, lemon juice, Dijon, honey, garlic, salt, and pepper until emulsified. In a large bowl, combine orzo, grilled chicken, avocado, tomatoes, onion, feta, and herbs. Pour over the dressing and gently toss to combine. Refrigerate for 20–30 minutes for enhanced flavor or serve immediately.
A few embedded tips here: when the orzo is done, rinse with cold water not only to cool it but to stop the cooking so it stays al dente. While the chicken is grilling, resist the urge to press it down with your spatula; that squeezes out juices. Letting the chicken rest for a few minutes before slicing keeps it moist. When whisking the dressing, I start with the wet ingredients and then slowly add the oil while whisking to get a nice emulsion. If you only have maple syrup instead of honey, it plays nicely with the lemon and Dijon.
Getting the finish right without fuss
You’ll know it’s done right by texture and smell. The orzo should be tender with a little bite, not mushy. The chicken should no longer be pink in the center and the juices should run clear, or you can check that it’s reached a safe internal temperature. The dressing should smell garlicky and bright, not overly sharp, and the first forkful should give you a little snap from the onion, a creamy mouthful from avocado, and a salty, tangy note from the feta.
If you want to amp up the char flavor without a grill, I sometimes use a cast-iron pan and crank it hot until the chicken gets a nice brown crust. It gives that satisfying sizzle and a slightly smoky aroma that pairs beautifully with the herbs.
A few changes I make, and what to serve it with
Sometimes I switch up the greens and add a handful of arugula for pepperiness, or toss in some cucumber to stretch the salad for guests. If you want to push this even further toward leafy greens, try mixing in elements from a dressing-forward salad like the one I keep coming back to; it balances wonderfully with orzo and chicken and is something I reference when I’m experimenting with herbs from the garden, as in a green goddess salad style approach.
I usually serve this with something simple: warm pita or crusty bread and a cold glass of white wine or iced tea. For a picnic, it stands up well in a bowl and is portable. If I’m feeding kids, I cut the chicken into smaller pieces and leave the red onion on the side for picky eaters.
Leftovers, variations, and the little memories
Leftovers are one of the reasons this recipe is a keeper. I store it in an airtight container in the refrigerator for up to three days. If I know I’ll be saving portions, I sometimes keep the dressing separate and toss it on just before serving to keep everything bright. The avocado will brown a bit over time, so either add it later or squeeze a little extra lemon juice over it to slow that process.
Variations you might like: swap the chicken for grilled shrimp for a seafood twist, or use chickpeas instead of chicken to make it vegetarian. You can trade parsley for basil in summer for a sweeter herbal note, or add some roasted corn for a summer barbecue vibe. I also enjoy making the salad with smoked chicken when I want a deeper, smokier flavor.
A final personal note: my grandmother used to bring me a similar cold pasta salad when I came home from camp, and that memory is part of why I am so sentimental about this dish. Making the dressing and hearing the whisk against the bowl evokes those afternoons of sun and salt-sticky skin. Food is memory in motion, and this salad does that for me—fresh, a little tangy, and full of summer sounds and smells.
Conclusion
If you want a slightly different spin on fruit and herb combinations with chicken and orzo, take a look at this Peach & Basil Chicken Orzo Salad with Hot Honey Vinaigrette for inspiration; it’s a lovely variation that highlights seasonal fruit and a sweet-spicy dressing Peach & Basil Chicken Orzo Salad with Hot Honey Vinaigrette.
Grilled Chicken Orzo Salad
Ingredients
Method
-
Boil salted water and cook the orzo according to package instructions (8–10 minutes).
-
Drain and rinse the orzo with cold water. Set aside.
-
Season the chicken with olive oil, salt, and pepper. Grill over medium heat for 5–6 minutes per side or until fully cooked.
-
Let the chicken rest for a few minutes, then slice it.
-
Whisk together the olive oil, red wine vinegar, lemon juice, Dijon mustard, honey, minced garlic, salt, and pepper until emulsified.
-
In a large bowl, combine orzo, grilled chicken, diced avocado, halved cherry tomatoes, sliced red onion, crumbled feta, and chopped herbs.
-
Pour the dressing over the salad and gently toss to combine.
-
Refrigerate for 20–30 minutes for enhanced flavor or serve immediately.
Notes
2. Summer Berry and Peach Cheesecake

How I stumbled on Summer Berry and Peach Cheesecake
One humid July evening, when the peaches at the farmer’s market smelled like perfume and raspberries were piled in a cardboard cup, I decided to try something that felt like summer in a slice. I wanted something creamy, bright, and a little bit rustic — not fussy, just full of fruit. That impulse became my Summer Berry and Peach Cheesecake, a recipe I now pull out for backyard dinners and lazy Sunday afternoons. If you like the idea of pairing stone fruit sweetness with a tart berry pop, this is for you. If you want a slightly different spin, I once riffed on a similar berry and peach cheesecake recipe and learned a few tricks that stuck.
The ingredient lineup that actually matters
I always say the list is short but the payoff is big. For this cheesecake you’ll want 8 oz cream cheese as the creamy base, 1 cup fresh raspberries for tartness, and 2 ripe peaches, diced, to give it that juicy peach note. Sweetness comes from 1/2 cup sugar and 1 teaspoon vanilla extract. The richness is rounded out with 1 cup heavy cream whipped into clouds. Underneath, the crust is simple and buttery: 1 cup crushed butter cookies and 1/4 cup unsalted butter, melted. Every time I say those ingredients out loud I can almost smell the cookies warming in the oven and the ripe peach perfume that will fill the kitchen.
The rhythm of making it — why the order matters
When I make this cheesecake I move through the steps like a little ritual rather than a checklist. I always start by remembering the one thing that saves me time: get the crust going first so it can cool while you assemble the filling. So I follow the basic beat: 1. Preheat the oven to 350°F (175°C). In a bowl, mix the crushed butter cookies with melted butter and press into the bottom of a cheesecake pan to form the crust. Bake for 10 minutes and let cool. While that bakes, I bring the cream cheese to room temperature so it blends silky. Then the other steps fall into place: 2. In a large mixing bowl, beat the cream cheese and sugar until smooth. Add the vanilla extract and mix until well combined. 3. In another bowl, whip the heavy cream until stiff peaks form and then fold it gently into the cream cheese mixture. 4. Gently fold in the diced peaches and raspberries. 5. Pour the cheesecake filling over the cooled crust and spread evenly. 6. Chill in the refrigerator for at least 4 hours or overnight until set. 7. Serve chilled and enjoy your delicious summer cheesecake!
I know that reads like a script, but in practice I hum to myself and move through each sentence. A tip that always helps: when you beat the cream cheese and sugar, scrape the bowl well so no lumps survive. Also, fold the whipped cream in with a light hand so the texture stays airy; overmixing will make the whole filling dense.
The small touches that make it sing
There are a few things I do differently depending on my patience level. If I have time, I chill the assembled cheesecake overnight. It firms up in a way that gives clean slices and those glossy, fruit-tucked cross sections everyone admires. If I am serving it the same day, four hours is usually enough, but give it the extra time if you can. I know it’s done right when the edges feel slightly firm to the touch and the center is set but still has the tiniest bit of give — not wobbly like a Jell-O, just a gentle jiggle. If you’d like a stronger fruit presence, reserve a few extra raspberries and peach slices to press lightly into the top before chilling; they thaw and settle into the filling beautifully.
One trick I learned from a long-ago bake: warm the peaches briefly in a pan with a teaspoon of sugar if they are not super ripe. It concentrates the flavor and keeps the fruit from releasing too much liquid into the filling. Another thing I do is press the cookie crust fairly firmly into the pan with the base of a measuring cup; it helps the crust hold together when you slice. And if you want a crisper crust, give it the full 10 minutes in the oven — the smell of the butter cookies toasting is worth it.
What I serve it with and how I store the extras
This cheesecake is a guest at casual meals. I like to serve it with a simple mint sprig, maybe a dollop of extra whipped cream, and a pitcher of iced tea or something bubbly for contrast. For a summer lunch, a crisp salad balances the richness — I enjoy pairing it with lighter sides like a peach-forward salad to echo the flavors, similar in spirit to this peach and watermelon summer salad I make on hot days.
Leftovers keep beautifully. Wrap the pan tightly with plastic wrap or store individual slices in an airtight container in the refrigerator for up to four days. If you need to freeze slices, wrap each piece in parchment and then foil; they will keep for about a month. Thaw in the fridge overnight and give them a gentle hour to come to serving temperature so the texture returns to its silky best.
Ways to make it yours and some memories
I’ve adapted this cake for different crowds. Sometimes I swap the butter cookie crust for graham crackers and add a teaspoon of lemon zest into the filling for a brighter note. Other times I mix in a handful of blueberries with the raspberries for added color and a milder sweetness; that idea reminded me of a lovely lemon-blueberry tart I admired online and it worked well when I wanted a citrus lift, much like in this lemon and blueberry cheesecake tarts. If you want to push the floral side, a whisper of rosewater goes beautifully with raspberry, inspired by a pastry I once read about in a piece on raspberry and rose cheesecake buns.
On a personal note, this cheesecake is the one I made for my neighbor’s moving party last summer. The sound of plates clinking and our laughter as kids ran through sprinklers made the kitchen smell like peaches and toasted butter cookies. A few people came back for seconds and one friend declared it her "official summer dessert." That moment made me keep the recipe free of fuss — it’s meant to be shared.
Conclusion
If you’re curious to see other fruit-forward cheesecake ideas before you dive in, I like comparing different takes and work in elements I love from others. A lovely variant that swaps peaches for blueberry notes can be found in the Blueberry Peach Cheesecake – Frolic and Fare, and for a berry-focused inspiration that leans into a glossy topping, take a look at this Summer Berry Cheesecake – My Pocket Kitchen. Give this one a try the next sunny weekend and tell me what you changed — I love hearing about your twists.
Summer Berry and Peach Cheesecake
Ingredients
Method
-
Preheat the oven to 350°F (175°C).
-
In a bowl, mix the crushed butter cookies with melted butter and press into the bottom of a cheesecake pan to form the crust.
-
Bake for 10 minutes and let cool.
-
Bring the cream cheese to room temperature.
-
In a large mixing bowl, beat the cream cheese and sugar until smooth.
-
Add the vanilla extract and mix until well combined.
-
In another bowl, whip the heavy cream until stiff peaks form and then fold it gently into the cream cheese mixture.
-
Gently fold in the diced peaches and raspberries.
-
Pour the cheesecake filling over the cooled crust and spread evenly.
-
Chill in the refrigerator for at least 4 hours or overnight until set.
-
Serve chilled and enjoy your delicious summer cheesecake!
Notes
3. Chicken Shawarma Crispy Rice Salad – Easy Middle Eastern Dinner Recipe
The First Time I Made Chicken Shawarma Crispy Rice Salad – Easy Middle Eastern Dinner Recipe
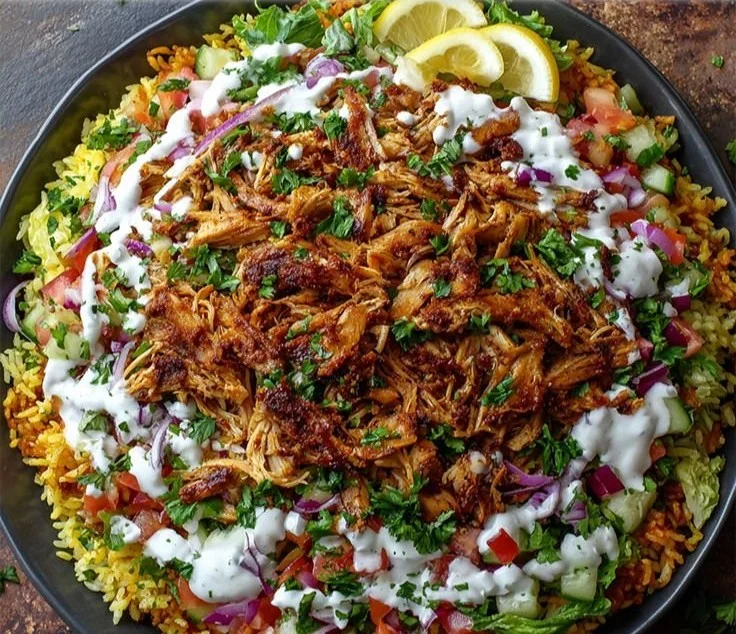
There are recipes that feel like they’ve been in your family forever and others that sneak in and become favorites overnight. This Chicken Shawarma Crispy Rice Salad – Easy Middle Eastern Dinner Recipe did the latter for me. I remember the evening I wanted something bright and different: I had 1 lb chicken thighs or breasts on hand, and a bowl of leftover rice that had sat in the fridge all day. If you love quick, comforting chicken dinners, you might also enjoy these slow cooker chicken ideas for nights when you want hands-off cooking. The first time I combined warm, spiced chicken with crunchy rice and a lemony tahini drizzle, my kitchen smelled like a market in the afternoon—cumin, paprika, a whisper of turmeric—and I was hooked.
The Secret Behind Perfect Chicken Shawarma Crispy Rice Salad – Easy Middle Eastern Dinner Recipe
When I tell people what goes into it, they expect a long list, but it’s actually simple: 1 lb chicken thighs or breasts, 2 tbsp olive oil, 2 tsp cumin, 1 tsp paprika, 1 tsp garlic powder, ½ tsp turmeric, Salt & pepper to taste, 2 cups cooked rice (cooled), 1 cucumber, diced, 2 tomatoes, chopped, ½ red onion, sliced, Fresh parsley or cilantro, ¼ cup tahini, Juice of 1 lemon, 1 garlic clove, minced, 2 tbsp olive oil, Water to thin dressing. Those ingredients read like a promise: juicy chicken, crunchy rice, crisp cucumber and tomato, and a creamy lemon-tahini that ties it all together.
I usually start by marinating the chicken because that marriage of spice and olive oil is what gives the dish its soul. Marinate Chicken: Mix olive oil, cumin, paprika, garlic powder, turmeric, salt, and pepper. Coat chicken and marinate for 30 minutes. I’ll often toss the chicken in a zip-top bag and let it sit while I prep everything else. If you have time, longer is better, but 30 minutes gets you a noticeable lift in flavor.
Getting the Texture Just Right
Texture is everything here. Cook Chicken: Grill or pan-sear until cooked through. Rest 5 minutes, then slice. I like thighs for moisture, but breasts work fine if you don’t mind slicing them a little thinner. Use a hot skillet so the exterior browns and the spices bloom; you’ll hear that satisfying sizzle and smell the air fill with warm, toasty cumin and paprika.
The rice needs to be the counterpoint to the tender chicken. Crisp Rice: Heat skillet with 1 tbsp oil. Add cooled rice and cook until golden and crunchy, or crisp in air fryer at 400°F for 10 minutes. Day-old rice is ideal because it’s drier and crisps up faster. I learned the hard way that wet rice steams instead of browns. I sometimes press the rice into the pan and let it sit without stirring for a few minutes, so a golden crust can form; then I flip it like a giant pancake to get both sides crunchy.
While the rice is getting happily golden, I prepare the vegetables. Prepare Vegetables: Dice cucumber, tomatoes, onion, and chop herbs. The colors alone make this bowl sing—deep red tomato, bright cucumber, purple onion, speckled green parsley. The freshness cools the warm spices and adds a crisp snap with each bite.
A Few Things I’ve Learned Cooking This Dish
Make Dressing: Whisk tahini, lemon juice, garlic, olive oil, and water until creamy. Chill for 15 minutes. Tahini can seize up if it’s cold or too thick, so whisk slowly and add water a teaspoon at a time until you reach a creamy pourable texture. I always taste and add a pinch more salt or lemon because acidity wakes up the tahini. If the dressing is too thick after chilling, thin it with a bit more water and whisk again.
Assemble Salad: Layer crispy rice, top with chicken, vegetables, and herbs. Drizzle with dressing. Garnish with pickles if desired. I like to build mine in layers so every forkful gets rice, chicken, and veg. If you’re serving a crowd, place components in separate bowls and let everyone assemble their own—you’ll be amazed at how everyone customizes it.
You’ll know it’s done right when the rice is golden and gives that satisfying crunch, the chicken juices run clear and it registers about 165°F if you use a thermometer, and the dressing is creamy and bright, not bitter. One of my tricks is to let the chicken rest for 5 minutes after cooking; it keeps the meat juicy when you slice it thin.
I sometimes change this recipe depending on what’s in the pantry. For a weeknight shortcut, I’ll use pre-cooked rotisserie chicken and crisp it in the pan briefly to pick up spice. If you want a recipe for crunchy, quick chicken tenders with a similar flavor profile, try this Mediterranean chicken tenders recipe—it’s become a fast favorite in our house.
Small Changes That Make a Big Difference
When I talk about variations, I mean small swaps that change the mood of the dish without losing its essence. Swap chicken for crispy tofu or roasted chickpeas to make it vegetarian; add a sprinkle of sumac or extra lemon for tang; swap white rice for brown or even quinoa for nuttier flavor. If you love bold heat, add a drizzle of harissa or a pinch of cayenne to the marinade.
Leftovers are another part of the magic. Store the components separately if possible; keep the crispy rice in an airtight container and the dressing tucked away in the fridge. The chicken and vegetables will last about three days refrigerated. To revive the rice, spread it on a baking sheet and warm at 400°F until it re-crisps, or pan-fry briefly in a splash of oil. The tahini dressing keeps for three to five days, though the flavor mellows a bit over time. If I’m packing lunches, I assemble everything in a jar with dressing on the bottom and rice at the top to minimize sogginess.
A memory to close this section: the first time I brought this to a potluck, a friend called it “summer in a bowl.” The crunch, the warm spices, and the cool lemon-tahini were the kind of thing people return to again and again. If you ever need inspiration for other easy chicken salads that travel well, the 3-ingredient curry chicken salad is a brilliant, no-fuss option.
Conclusion
If you want another version to compare notes with, there’s a lovely write-up called Chicken Shawarma Crispy Rice Salad with Lemon-Tahini Dressing that highlights the same flavor ideas. For a slightly different take and plating inspiration, see Juicy Chicken Shawarma Crispy Rice Salad – Dished by Kate.
Chicken Shawarma Crispy Rice Salad
Ingredients
Method
-
Mix olive oil, cumin, paprika, garlic powder, turmeric, salt, and pepper to create a marinade.
-
Coat the chicken with the marinade and let it sit for 30 minutes.
-
Grill or pan-sear the chicken until cooked through.
-
Let it rest for 5 minutes before slicing.
-
Heat 1 tablespoon of oil in a skillet.
-
Add the cooled rice and cook until golden and crunchy, or crisp it in an air fryer at 400°F for 10 minutes.
-
Dice the cucumber, tomatoes, onion, and chop the herbs.
-
Whisk together tahini, lemon juice, garlic, olive oil, and water until creamy.
-
Chill for 15 minutes and adjust thickness with water if necessary.
-
Layer crispy rice in a bowl.
-
Top with chicken, vegetables, and herbs.
-
Drizzle with the dressing and garnish with pickles if desired.
Notes
4. Refreshing Summer Peach Salad
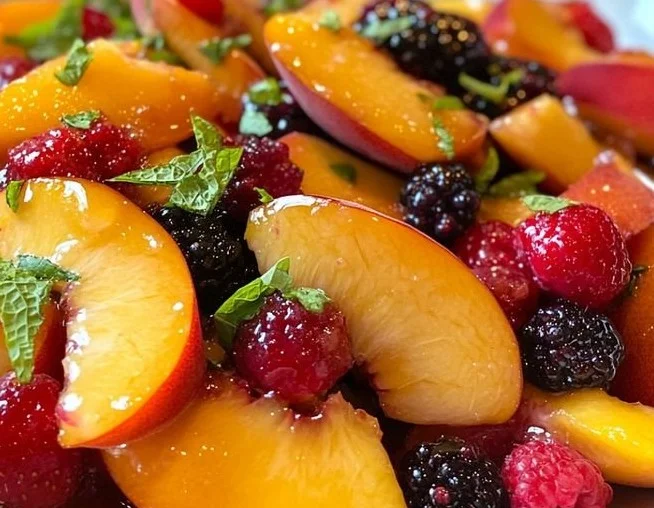
On a sunny afternoon, nothing beats the vibrant, inviting essence of a Refreshing Summer Peach Salad. It’s the perfect dish to embrace the sweet, juicy nature of summer’s best fruits. Fresh peaches beautifully sliced and paired with mixed greens create a colorful canvas, all while the creamy feta and crunchy walnuts add delightful textures to every bite. This salad not only tantalizes your taste buds but also provides a burst of refreshment that beckons you to slow down and savor the summer sun.
Here’s Why You’ll Be Captivated by This Salad
-
Juicy Goodness: The ripe peaches offer a sweet, luscious flavor that’s synonymous with summer. Their natural sweetness pairs perfectly with savory elements of the salad, making for a delightful contrast.
-
A Symphony of Textures: The combination of crispy salad greens, creamy feta, and crunchy walnuts creates a delightful medley of textures that keeps every bite interesting.
-
Quick and Easy: This salad comes together in just a few minutes, making it an ideal choice for a quick lunch, a light dinner, or a potluck offering.
-
Adaptable Delight: You can easily customize this salad according to your preferences or whatever ingredients you have on hand, ensuring that it fits perfectly into your summer menu.
-
Guilt-Free Indulgence: With its fresh produce and wholesome ingredients, this salad offers a nutritious pathway to satisfy those midday cravings without compromising your healthy eating goals.
Gather Your Essentials
To create this colorful dish, you’ll need a handful of fresh ingredients. Here’s what to grab:
- 2 ripe peaches, sliced: The stars of the show! Look for peaches that yield slightly to pressure for optimal juiciness.
- 4 cups mixed salad greens: Choose a blend that suits your palate—baby spinach, arugula, or even a spring mix works beautifully.
- 1/4 cup red onion, thinly sliced: This adds a sharp bite that complements the sweetness of the peaches.
- 1/4 cup feta cheese, crumbled: This creamy, tangy cheese introduces richness and a delicious contrast to the fruits.
- 1/4 cup walnuts, chopped (optional): This crunchy addition can elevate the texture; feel free to omit them if you’re not a fan or substitute with another nut.
- 1/4 cup balsamic vinaigrette: A drizzle of this dressing brings the flavors together and adds a gentle acidity to balance the sweetness.
- Salt and pepper to taste: Simple seasonings are crucial to enhance the flavors of the fresh ingredients.
Crafting Your Perfect Refreshing Summer Peach Salad
Now that you have everything laid out, let’s dive into the steps of creating this delicious salad.
- In a large salad bowl, combine the mixed salad greens, sliced peaches, red onion, feta cheese, and walnuts. Feel free to layer it—the sight of all these colors mingling together is half the joy!
- Drizzle with balsamic vinaigrette and toss gently to combine. Be sure not to overmix; we want those beautiful layers to stay visible.
- Season with salt and pepper to taste. Taste as you go—you want to ensure the balance is just right!
- Serve immediately, or chill in the refrigerator for about 15 minutes before serving. Chilling allows the flavors to meld together and enhances the refreshing quality of the salad.
Pro Tips for Perfection
-
Choose Quality Peaches: Fresh, ripe peaches are non-negotiable. If they’re overripe, they might become mushy, and we want that lovely texture.
-
Make It in Advance: If you have a gathering, feel free to prep your ingredients ahead of time! Just keep the salad greens separate from the dressing until you’re ready to serve to prevent sogginess.
-
Additional Flavor Layering: Adding a pinch of crushed red pepper or a sprinkle of herbs like basil can introduce a subtle depth to the flavors. Don’t be afraid to experiment!
-
Go for Toasted Walnuts: If you have time, toasting the walnuts for a few minutes can enhance their flavor beautifully. Just be careful not to let them burn!
-
Vinaigrette Variety: If balsamic isn’t your favorite, try swapping it for a lemon vinaigrette or a yogurt-based dressing. Each option will create a unique twist!
Discover Fun Twists
This salad is delightful as-is, but if you’re itching to get creative, here are a few variations to consider:
- Berry Bliss: Add a handful of fresh berries like blueberries or raspberries for an extra burst of flavor and color.
- Grilled Peaches: For a smoky twist, try grilling your sliced peaches before tossing them in the salad. The caramelization gives them an incredible depth of flavor!
- Herbed Variations: Incorporate fresh basil or mint for an aromatic freshness that complements summer flavors beautifully.
- Protein Boost: Grilled chicken, shrimp, or chickpeas can turn this salad into a hearty meal, making it a perfect lunch option.
- Cheese Swap: If feta isn’t your style, try goat cheese or even a sharp cheddar for a different taste experience.
How to Present Your Colorful Dish
Serving your Refreshing Summer Peach Salad is part of the fun! Consider using a large wooden serving bowl to display the vibrant colors and textures beautifully. Toss the salad gently to maintain those lovely layers of peach, greens, and crumbles of feta. For a whimsical touch, you could sprinkle extra nuts or herbs on top just before serving. This salad is best enjoyed fresh, making it the perfect centerpiece for a sunny picnic or gathering with friends. Picture yourself in a lush backyard, a light breeze ruffling through the leaves, and your loved ones gathered around, partaking in this bright, joyful dish.
Keeping It Fresh for Later
If you happen to have remnants of this delicious salad, storing it properly ensures you get to enjoy it again!
-
Refrigerate: Store any leftover salad in an airtight container in the fridge. It’s best consumed within a day or two for freshness, especially since peaches can brown and salad greens wilt quickly once combined.
-
Avoid Freezing: This salad doesn’t particularly lend itself well to freezing due to the texture of fresh greens and fruits after thawing.
-
Separate Components: If you know you want leftovers, consider keeping the dressing separate from the salad until you’re ready to eat to keep everything crisp and delightful!
Your Questions Answered
-
Can I use canned peaches?: While fresh peaches are ideal for that juicy crunch, you can use canned peaches in a pinch! Just make sure to drain and rinse them to avoid excess syrup.
-
Do I need to peel the peaches?: That’s entirely up to you! The skin adds color and texture, plus it contains additional nutrients. But if you prefer a cleaner look, feel free to peel them.
-
Is this salad good for meal prep?: Yes! Just keep the dressing and greens separate until you’re ready to eat to maintain that fresh, crisp quality.
-
Can I add other fruits?: Absolutely! Sliced strawberries, nectarines, or even citrus segments can offer delightful variations that keep things interesting.
Whether you’re soaking up the sun with a good book or celebrating with family and friends, this Refreshing Summer Peach Salad is bound to uplift your spirits. It’s light, flavorful, and incredibly satisfying—a true tribute to the joys of summer dining. Give it a try, and let the vibrant flavors transport you to sunny days spent in great company!
Refreshing Summer Peach Salad
Ingredients
Method
-
In a large salad bowl, combine the mixed salad greens, sliced peaches, red onion, feta cheese, and walnuts.
-
Drizzle with balsamic vinaigrette and toss gently to combine.
-
Season with salt and pepper to taste.
-
Serve immediately, or chill in the refrigerator for about 15 minutes before serving.
Notes
5. Elegant Grilled Shrimp and Pesto Pasta Stack (An Impressive Dinner!)

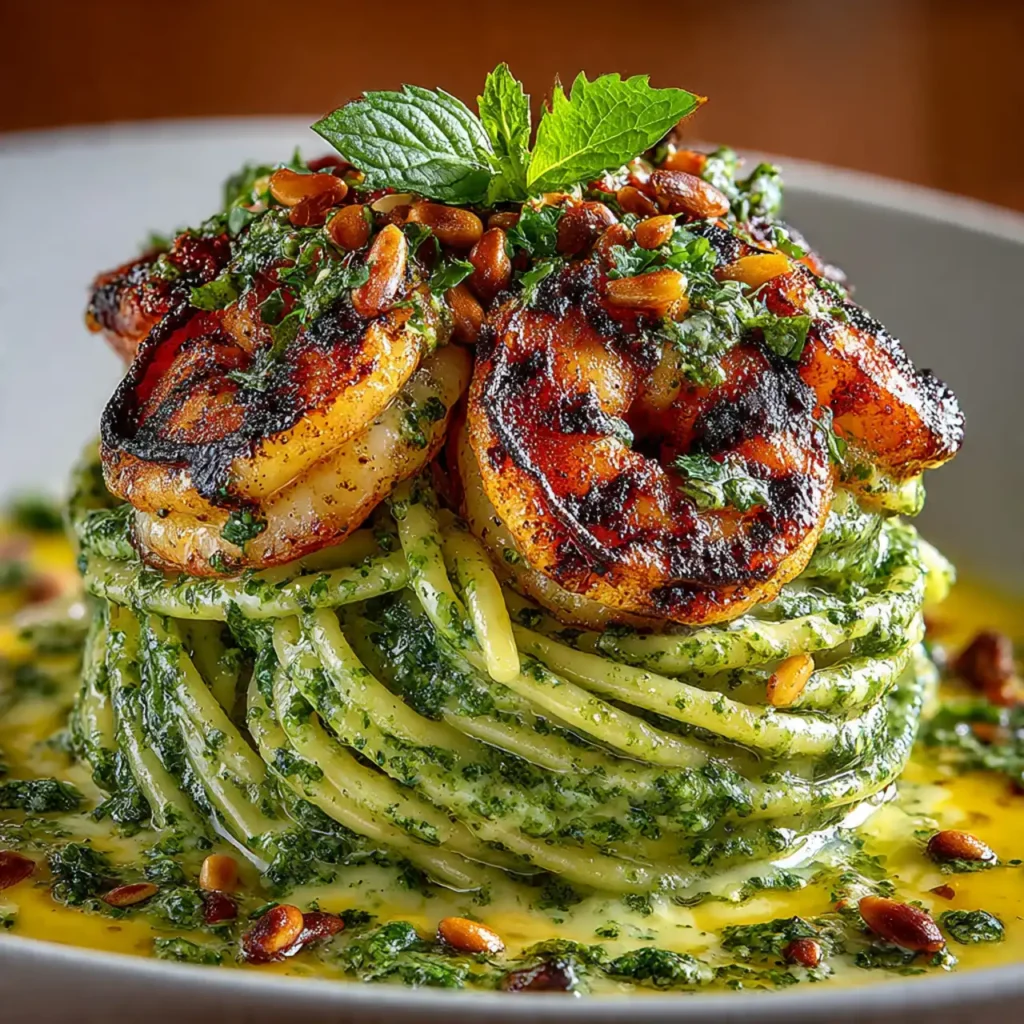
There are some dishes that just look and taste like a special occasion. They’re elegant, vibrant, and feel like something you’d order at a high-end restaurant on a beautiful spring evening. This Grilled Shrimp and Pesto Pasta Stack is exactly that kind of meal, but I’m going to let you in on a little secret: it’s surprisingly simple to make right in your own kitchen.
Get ready to create a truly stunning and delicious shrimp recipe that looks like it took hours, but comes together in under 40 minutes.
Why This Shrimp and Pesto Pasta is a Must-Make
You are going to be so proud of the beautiful and delicious dish you create with this recipe. Here’s why it’s destined to become a favorite:
- A True Show-Stopping Presentation: The “stacked” plating is incredibly elegant and makes any meal feel like a special occasion, but it’s surprisingly easy to do.
- Packed with Fresh, Vibrant Flavors: The combination of homemade basil pesto, smoky grilled shrimp, and bright lemon is the absolute taste of spring and summer.
- Restaurant-Quality at Home: This is a sophisticated and impressive meal that is completely achievable for a home cook, perfect for impressing guests.
- Quick and Efficient: While the pasta boils, you can make the pesto and grill the shrimp, making this a surprisingly fast meal to assemble.
- A Perfect Balance of Textures: From the tender pasta and juicy shrimp to the creamy pesto and crunchy pine nuts, every bite is a delight.
Recipe Snapshot
| Prep Time | 20 minutes |
| Cook Time | 10 minutes |
| Total Time | 30 minutes |
| Servings | 4 servings |
| Calories | 450 kcal per serving |
| Course | Dinner, Main Course |
| Cuisine | Italian-Inspired, Mediterranean |
| Difficulty/Method | Easy / Grilling |
Your Shopping List for This Elegant Dish
This recipe uses fresh, high-quality ingredients to create its signature vibrant flavor.
→ For the Grilled Shrimp
- 1 lb. large shrimp, peeled and deveined → The star of the show.
- 1 tbsp olive oil → To help them grill perfectly.
- 1 clove garlic, minced → For a savory kick.
- Zest of 1 lemon → For a bright, aromatic flavor.
- Salt and black pepper → To taste.
→ For the Fresh Basil Pesto
- 2 cups fresh basil leaves, packed → The heart of our vibrant green sauce.
- 1/3 cup pine nuts, toasted → Toasting them brings out their nutty flavor.
- 2 cloves garlic, peeled
- Juice of 1 lemon (about 2 tbsp) → For brightness and to keep the pesto green.
- 1/2 cup extra virgin olive oil → Use a good quality one for the best taste.
→ For the Pasta
- 12 oz. linguine or fettuccine → Long pasta works beautifully for creating the stack.
Let’s Get Cooking! Your Step-by-Step Guide
This elegant meal comes together through simple multitasking. Let’s build this beautiful dish!
Part 1: The Vibrant Basil Pesto
- Toast the Pine Nuts: In a small, dry skillet over medium heat, toast the pine nuts for 2-3 minutes, tossing frequently, until they are fragrant and lightly golden. Watch them carefully as they can burn quickly!
- Blend the Pesto: In a food processor or blender, combine the toasted pine nuts, fresh basil, garlic, Parmesan cheese, and lemon juice. Pulse a few times to chop everything up. Then, with the processor running on low, slowly stream in the olive oil until the pesto is smooth and emulsified. Season with salt and pepper to taste.
Part 2: Cook the Pasta and Grill the Shrimp
- Cook the Pasta: Bring a large pot of heavily salted water to a boil. Add the linguine and cook until al dente according to package directions. Before draining, reserve about 1 cup of the starchy pasta water.
- Marinate and Grill the Shrimp: While the pasta is cooking, toss the peeled and deveined shrimp in a bowl with 1 tablespoon of olive oil, the minced garlic, lemon zest, salt, and pepper. Thread them onto skewers if you like. Heat a grill or grill pan over medium-high heat. Grill the shrimp for 2-3 minutes per side, until they are pink, opaque, and have beautiful char marks.
Part 3: Assemble the Stack and Serve
- Toss the Pasta: In a large bowl, toss the hot, drained pasta with about half of the fresh pesto, adding a few tablespoons of the reserved pasta water to help create a creamy, luscious sauce that coats every strand.
- Create the Stack: To plate, you can use a stacking ring (about 4 inches wide) or simply create a neat, freeform pile. Place the mold in the center of a plate. Use tongs to twirl a portion of the pesto pasta and place it inside the mold, pressing down gently.
- Finish and Garnish: Arrange several of the grilled shrimp on top of the pasta. Carefully lift the mold off. Drizzle with a little extra pesto, sprinkle with a few toasted pine nuts, and garnish with fresh herbs. Serve immediately with lemon wedges on the side.
Grilled Shrimp and Pesto Pasta Stack
Ingredients
Equipment
Method
-
Prepare the pesto: In a food processor, combine toasted pine nuts, basil, garlic, Parmesan cheese, and lemon juice. Pulse to combine. With the processor running, slowly stream in the olive oil until smooth. Season with salt and pepper.
-
Cook the pasta: In a large pot of boiling salted water, cook pasta until al dente. Reserve about 1 cup of pasta water before draining.
-
Grill the shrimp: While pasta cooks, toss shrimp with olive oil, minced garlic, lemon zest, salt, and pepper. Grill on a hot grill or grill pan for 2-3 minutes per side, until pink and lightly charred.
-
Combine: In a large bowl, toss the hot pasta with about half of the pesto, adding reserved pasta water a few tablespoons at a time to create a creamy sauce.
-
Assemble the stack: Using a stacking ring or freeform, place a neat pile of pesto pasta in the center of a plate. Arrange several grilled shrimp on top.
-
Garnish with extra toasted pine nuts, a drizzle of pesto, and fresh herbs if desired. Serve immediately with lemon wedges.
Notes
Don’t Overcook the Shrimp: For juicy, tender shrimp, watch them closely. They cook in just a few minutes, so pull them from the grill as soon as they turn pink and opaque.
Storage: Store leftover components separately in the fridge for up to 3 days for the best results.
WiseRecipes’ Top Tips for a Perfect Pasta Stack
These simple pointers will help you nail this impressive dish every time.
- Toast Your Pine Nuts. This is a small step with a huge flavor payoff. Toasting the pine nuts before blending them into the pesto awakens their oils and gives the sauce a much deeper, nuttier, more complex flavor.
- Don’t Overcook the Shrimp. The golden rule of seafood! Shrimp cook in a matter of minutes. As soon as they turn pink and opaque, they are done. Pull them from the grill immediately to ensure they are juicy and tender, not tough.
- The Magic of Pasta Water. Never dump all your pasta water! That starchy, salty water is the key to a perfect pesto sauce. It helps emulsify the oil and cheese, creating a creamy sauce that clings to the pasta instead of separating.
- Grate Your Own Parmesan. For the smoothest, most flavorful pesto, always buy a wedge of Parmesan cheese and grate it yourself. The pre-shredded kind has anti-caking agents that can give your pesto a gritty texture.
- No Stacking Ring? No Problem! Don’t be intimidated by the “stack.” If you don’t have a mold, simply use tongs to create a tall, neat nest of the pesto pasta in the center of the plate and arrange the shrimp beautifully on top. It will look just as rustic and delicious.
Keep It Fresh! Storing Your Leftovers
For the best results, it’s ideal to store the components of this dish separately.
- Refrigerator: Store the leftover pesto, cooked pasta, and grilled shrimp in separate airtight containers in the fridge for up to 3 days. To keep the pesto extra green, press a piece of plastic wrap directly onto its surface.
- Reheating: Gently reheat the pasta and shrimp separately before tossing them together. You may need to add a splash of water to the pasta to loosen up the pesto.
FAQs: Your Shrimp and Pesto Questions
Can I use store-bought pesto?
You can in a pinch, but for a dish this simple, the flavor of homemade pesto is truly superior and worth the extra five minutes. If you do use store-bought, look for a high-quality, refrigerated brand for the best flavor and color.
What if I don’t have a grill or grill pan?
No problem! You can get a beautiful sear on the shrimp in a hot cast-iron or stainless steel skillet. Heat the skillet over medium-high heat with a little oil and cook the shrimp for 1-2 minutes per side until pink and cooked through.
Can I make the pesto ahead of time?
Yes, absolutely! The pesto can be made up to 3 days in advance. Store it in an airtight container in the refrigerator with a thin layer of olive oil or a piece of plastic wrap pressed directly on the surface to prevent it from browning.
What other types of pasta work well?
While long pastas like linguine or fettuccine are great for twirling into a stack, this dish is also delicious with short pasta shapes that have nooks and crannies to catch the pesto, like fusilli, rotini, or orecchiette.
Final Thoughts: A Plate of Edible Art
There is such a rewarding feeling in creating a meal that is a true feast for the eyes as well as the palate. This Grilled Shrimp and Pesto Pasta Stack is the perfect way to bring a touch of elegance to your dinner table. It’s a celebration of fresh ingredients, bold flavors, and beautiful presentation, proving that a show-stopping meal can be both simple and incredibly delicious. Enjoy!
6. The Best Grill-Poached Tomato Butter Halibut (An Elegant Summer Meal!)
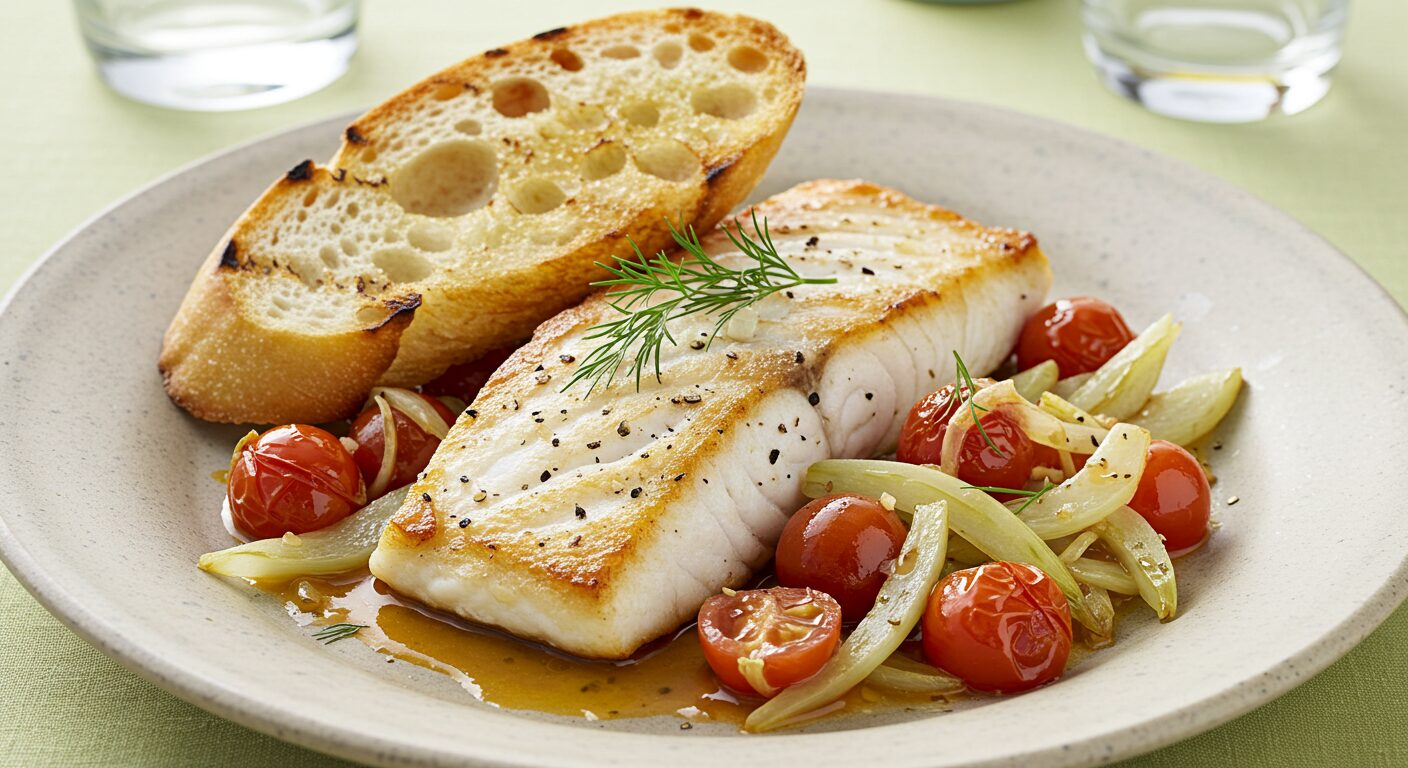
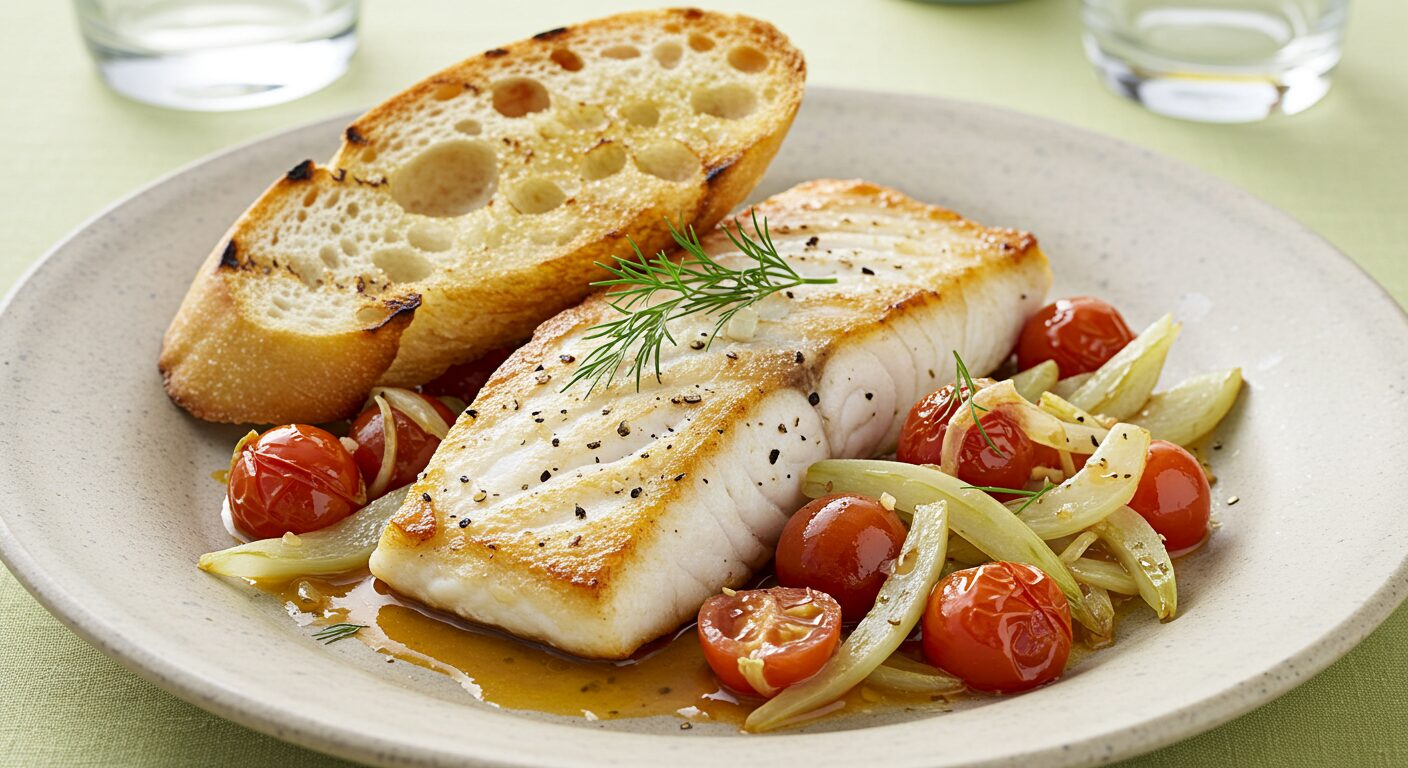
Hello, my friends, and get ready to discover one of the most elegant, flavorful, and surprisingly easy meals you will ever make on your grill. If you’re looking for a dish that is light, sophisticated, and absolutely bursting with the fresh flavors of summer, then you are going to fall in love with this incredible Grill-Poached Tomato Butter Halibut.
This isn’t your average grilled fish. We use a cast-iron skillet right on the grill to create a luscious, fragrant sauce of bursting cherry tomatoes, sweet fennel, white wine, and butter. Then, we gently nestle beautiful halibut fillets into this amazing sauce to poach them in all that flavor. The result is impossibly tender, moist, and flaky fish. Served with crusty bread grilled alongside to soak up every last drop of the sauce, this is a true showstopping meal that is perfect for a special summer evening or for impressing guests.
Why You’ll Be Absolutely Obsessed With This Recipe
This is more than just a recipe; it’s a complete, elegant dining experience made easy.
- Incredibly Tender & Moist Fish: Poaching the halibut directly in the sauce on the grill is a foolproof method that gently cooks the fish, keeping it unbelievably moist and tender.
- A Luxurious, Flavor-Packed Sauce: The combination of sweet burst tomatoes, licorice-y fennel, savory shallots, and a rich white wine butter sauce is a true taste of the Mediterranean.
- The Magic of the Grill: Cooking everything in a skillet on the grill infuses the entire dish with a subtle, wonderful smokiness that you just can’t get on the stovetop.
- A Complete, One-Pan Style Meal: With the fish, the sauce, and the grilled bread all coming together at the same time, this is a beautifully cohesive and impressive meal with surprisingly easy cleanup.
Gather Your Fresh & Elegant Ingredients: What You’ll Need
This impressive meal comes together with a handful of fresh, high-quality ingredients.
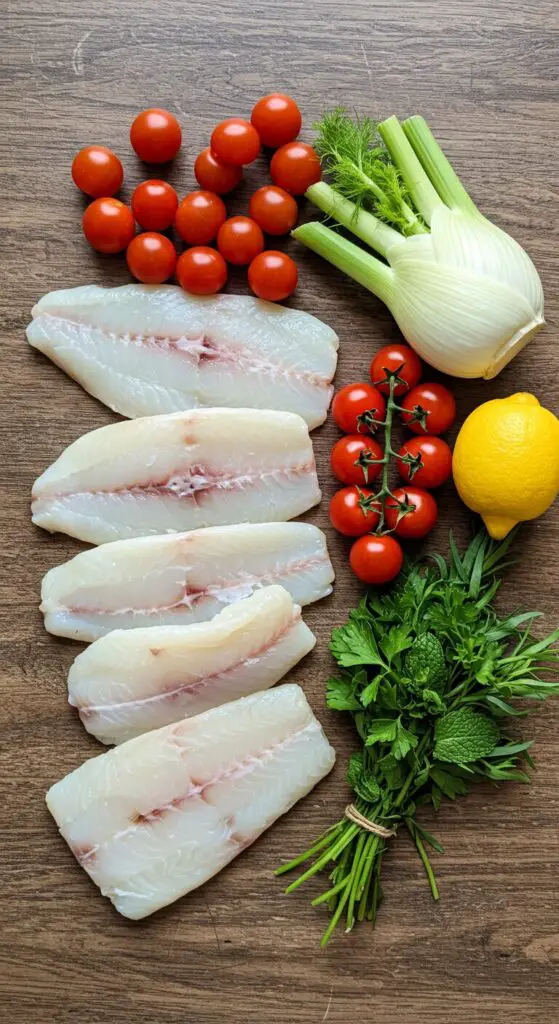
- Four 6-ounce skinless halibut fillets
- 7 tablespoons extra-virgin olive oil, divided
- Kosher salt and freshly cracked black pepper
- 1 baguette, halved lengthwise and cut into 4 pieces
- 1 lemon, halved
- 2 tablespoons each of chopped fresh mint, parsley, and tarragon
- 1 small bulb fennel, thinly sliced, fronds reserved
- 2 medium shallots, thinly sliced
- 24 ounces multi-colored cherry or grape tomatoes
- 1 cup dry white wine (like Pinot Grigio)
- 2 tablespoons unsalted butter
Crafting Your Grill-Poached Halibut: Step-by-Step Guide
Let’s build this beautiful and delicious meal right on the grill. The process is simple, and the results are spectacular.
- Prep the Grill and Skillet: First, prepare your grill for medium-high heat. Place a large, 12-inch cast-iron skillet directly on the grill grates to preheat for about 10 minutes until it’s very hot.
- Prep the Components: While the skillet heats, prepare your ingredients. Drizzle the halibut fillets with 2 tablespoons of olive oil and season with salt and pepper. Drizzle the cut sides of the baguette pieces with 2 tablespoons of oil and the cut sides of the lemon halves with 1 tablespoon of oil. In a small bowl, toss together the chopped fresh mint, parsley, and tarragon. Finely chop enough of the reserved fennel fronds to yield 2 tablespoons and add them to the herb mixture.
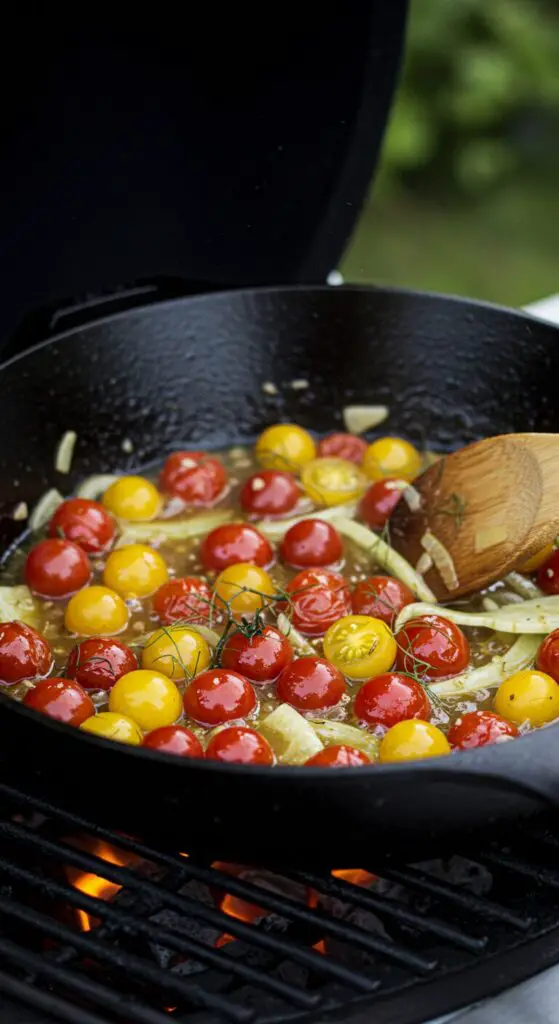
- Build the Sauce on the Grill: Carefully drizzle the remaining 2 tablespoons of oil into the hot skillet on the grill. Add the sliced shallots and fennel. Cover the grill and cook, stirring occasionally, for 3 to 5 minutes, until the vegetables are softened and getting brown on the edges. Stir in the cherry tomatoes, season with salt and pepper, cover the grill again, and cook for another 3 to 5 minutes until the tomatoes are starting to burst. Pour in the white wine and use a wooden spoon to scrape up any delicious browned bits from the bottom of the skillet. Stir in the butter and bring the sauce to a simmer. Sprinkle in half of your fresh herb mixture.
- Poach the Halibut: Gently nestle the seasoned halibut fillets into the simmering tomato mixture in the skillet. Cover the grill and let the fish poach for about 4 minutes.
- Grill the Bread and Finish: Uncover the grill. Place the baguette pieces and the lemon halves directly on the grill grates, cut-side down. Cover the grill again and continue to cook everything for another 5 minutes. The dish is done when the tops of the halibut are opaque and the bread and lemons are lightly charred.
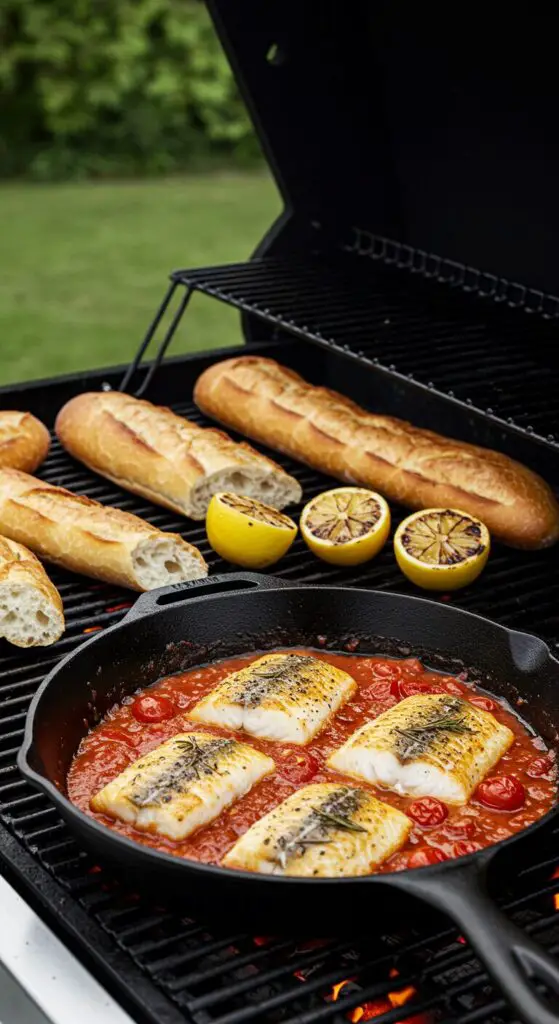
- Serve and Enjoy: Carefully remove the skillet, bread, and lemons from the grill. Squeeze the warm, charred lemon juice all over the halibut fillets. Sprinkle the entire dish with the remaining fresh herb mixture. Serve immediately, with the grilled bread for soaking up every last drop of that incredible sauce.
Wise Tips for Perfect Grill-Poached Fish
- A Hot Skillet is Key: Preheating the cast-iron skillet on the grill is crucial. It helps to get a good, quick sear on the vegetables and builds the flavor foundation for your sauce.
- Don’t Overcook the Halibut: Halibut is a lean fish that can dry out if overcooked. Poaching is a gentle method, but still watch it closely. It’s done the moment it turns from translucent to opaque and flakes easily.
- The Grilled Bread is a Must! Don’t skip this step. The smoky, charred bread is the absolute perfect vehicle for sopping up the delicious, buttery tomato and wine sauce.
- Fresh Herbs Make a Difference: The combination of mint, parsley, and tarragon is a classic, beautiful pairing for fish. Using fresh herbs provides a bright, vibrant flavor that dried herbs can’t match.
Grill-Poached Tomato Butter Halibut
Ingredients
Equipment
Method
-
Prepare a grill for medium-high heat. Place a 12-inch cast-iron skillet on the grill to preheat for 10 minutes.
-
Meanwhile, prep your ingredients: Drizzle halibut with 2 tbsp oil and season. Drizzle baguette with 2 tbsp oil. Drizzle lemon halves with 1 tbsp oil. Toss the chopped herbs and fennel fronds together.
-
Drizzle remaining 2 tbsp oil into the hot skillet. Add shallots and fennel; cover grill and cook for 3-5 minutes until softened. Stir in tomatoes, season, cover, and cook 3-5 minutes more until tomatoes burst.
-
Add wine, scraping up browned bits. Add butter and bring to a simmer. Sprinkle with half the herb mixture.
-
Nestle the halibut fillets into the tomato mixture, cover the grill, and cook for 4 minutes. Add the baguette and lemon halves to the grill grates, cut-side down. Cover and cook for another 5 minutes, until fish is opaque.
-
Squeeze the charred lemon juice over the fillets and sprinkle with the remaining herb mixture. Serve immediately with the grilled bread.
Notes
Frequently Asked Questions (FAQ) – Grill-Poached Halibut
Can I use a different kind of fish?
Yes! This poaching method is fantastic for other firm, white fish fillets like cod, sea bass, or even swordfish. You may need to adjust the cooking time based on the thickness of the fillets.
What if I don’t have a grill?
You can make this entire dish on your stovetop and in your oven! Follow all the steps for making the sauce in a large, oven-safe skillet on your stove over medium-high heat. When it’s time to poach the fish, nestle it in, and then transfer the entire skillet to a 400°F oven to cook through. You can toast the bread under the broiler.
Can I make this ahead of time?
This dish is definitely at its best when served immediately, fresh off the grill. You can, however, chop all of your vegetables and make the herb mixture a few hours in advance to save on prep time.
Conclusion
This Grill-Poached Tomato Butter Halibut is a truly special meal that celebrates the best of summer cooking. It’s elegant, incredibly flavorful, and a wonderfully fun and interactive way to use your grill. I hope you and your loved ones enjoy this stunning dish!
7. The Best Grilled Shrimp Piccata Skewers (An Elegant Summer Meal!)
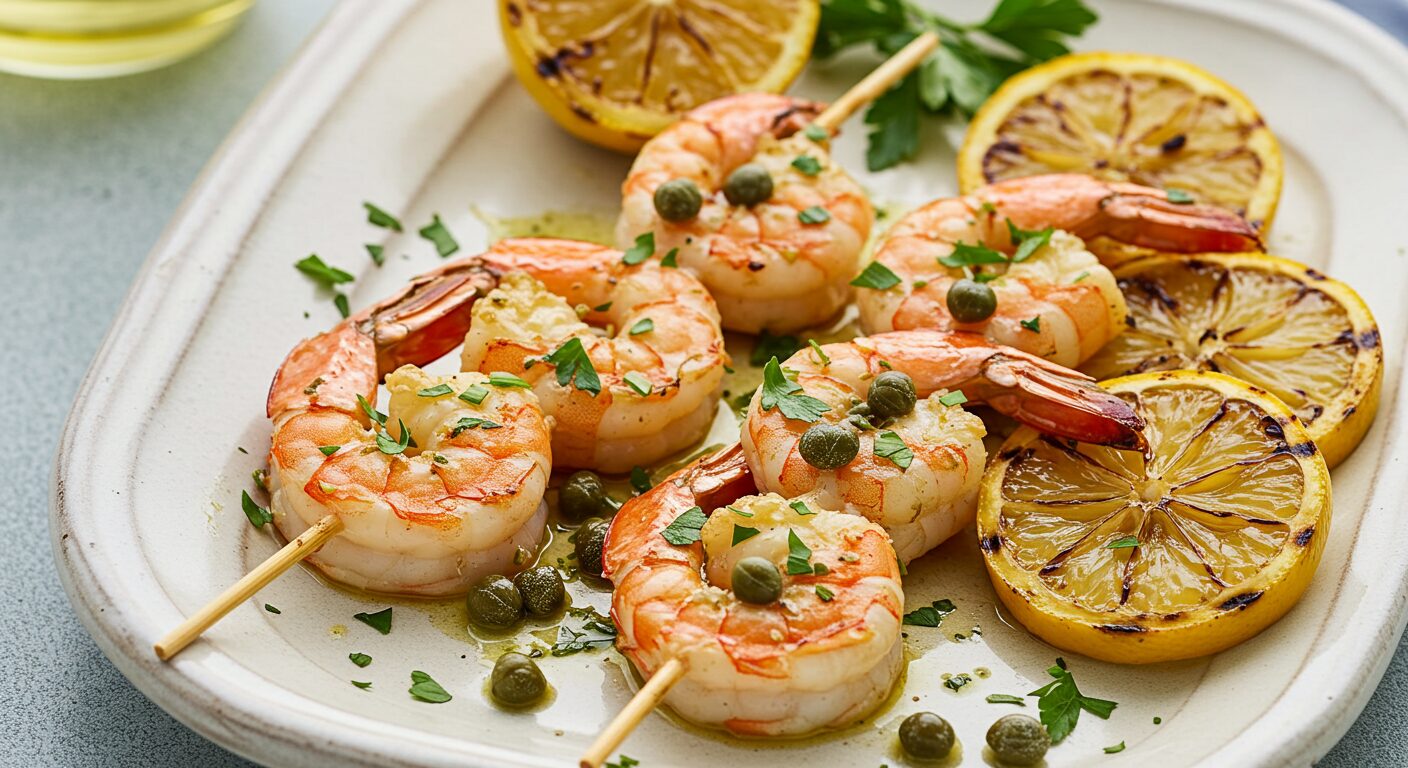
Hello, my fellow grill masters! Get ready for a recipe that will completely elevate your summer grilling game. If you love the bright, zesty, and savory flavors of a classic chicken piccata, you are going to be obsessed with this incredible grilled shrimp version. These Grilled Shrimp Piccata Skewers are a true showstopper—they’re elegant, packed with incredible flavor, and surprisingly simple to make.
Imagine plump, juicy shrimp, marinated in a fragrant blend of rosemary, garlic, and lemon zest, then grilled to charred perfection. These beautiful skewers are then served on a platter and generously drizzled with a luxurious, buttery piccata sauce, brimming with tangy capers and white wine. It’s a light, sophisticated, and unbelievably delicious meal that is perfect for a summer evening, a backyard barbecue, or any time you want to impress your guests.
Why You’ll Be Absolutely Obsessed With This Recipe
This isn’t just a recipe; it’s a ticket to a perfect summer meal. Here’s why it’s so amazing:
- Incredible Depth of Flavor: The combination of the rosemary-garlic marinade on the shrimp and the tangy, buttery, briny piccata sauce creates a truly spectacular, multi-layered flavor experience.
- Perfectly Charred & Juicy Shrimp: Grilling the shrimp on skewers is the perfect method for cooking them quickly, giving them a beautiful char on the outside while keeping them perfectly tender and juicy on the inside.
- A Truly Elegant, Restaurant-Quality Dish: This is the kind of impressive meal you’d expect to find at a fancy seaside restaurant, but it’s so easy to create on your own grill.
- Quick and Perfect for Entertaining: The components come together quickly, and the grilling itself takes less than 5 minutes, making it a fantastic, low-stress option for entertaining.
Gather Your Fresh & Zesty Ingredients: What You’ll Need
This impressive dish comes together with a handful of fresh, high-impact ingredients.
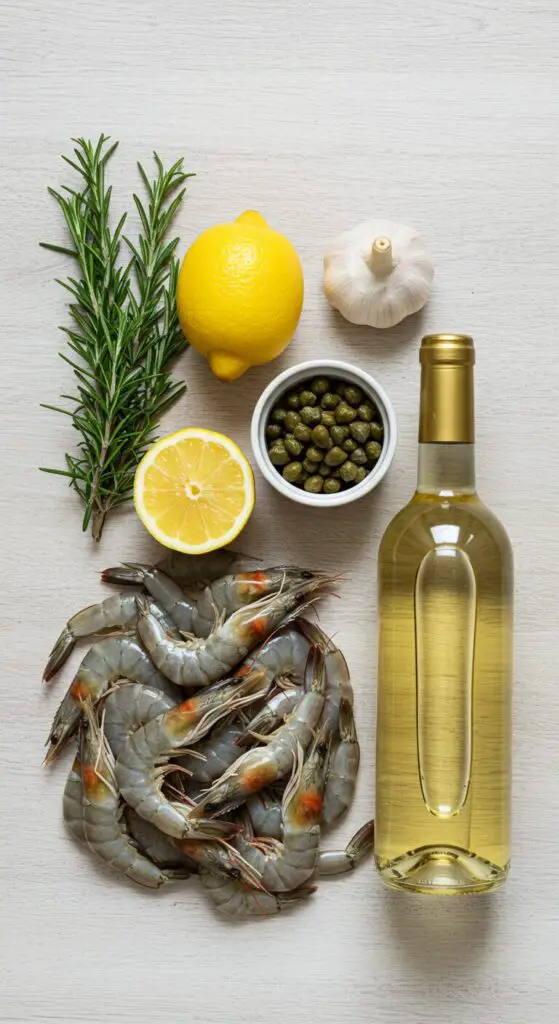
- 1 1/2 lb. large tail-on shrimp, cleaned
- 1 Tbsp. chopped fresh rosemary
- 1/2 tsp. crushed red pepper flakes
- 3 cloves garlic, finely chopped, divided
- 1/4 cup plus 1 tbsp. extra-virgin olive oil, divided
- 2 lemons
- 1 1/4 tsp. kosher salt, divided
- 1 shallot, finely chopped
- 2 Tbsp. capers, drained
- 1/2 cup dry white wine (like Pinot Grigio or Sauvignon Blanc)
- 1/2 cup low-sodium chicken broth
- 3 Tbsp. unsalted butter
- 2 Tbsp. chopped fresh parsley
- 2 Tbsp. finely grated Parmesan
- 6 to 7 (12″) wooden or metal skewers
Crafting Your Shrimp Piccata Skewers: Step-by-Step Guide
Let’s build this beautiful and delicious meal. The components come together easily while the shrimp marinates.
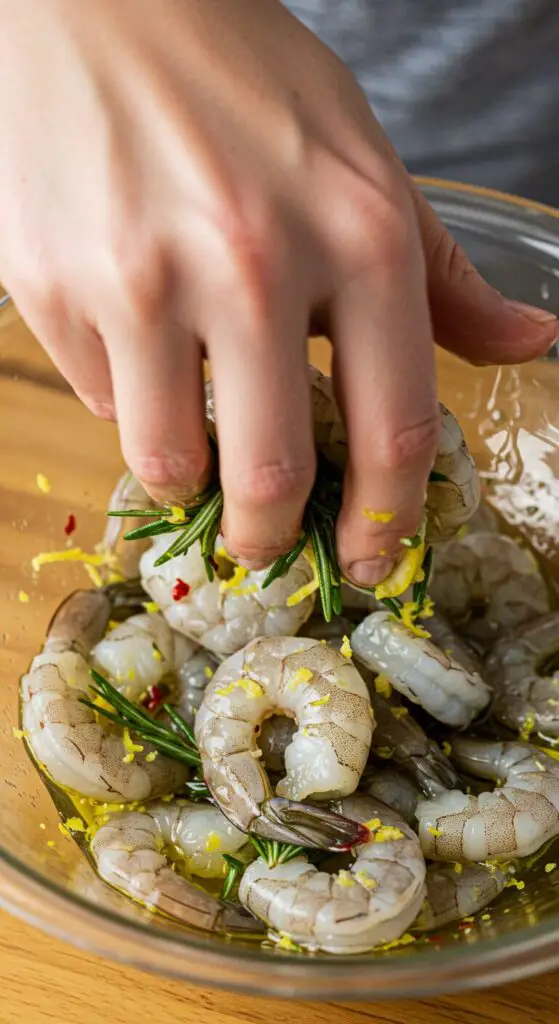
- Marinate the Shrimp: If you’re using wooden skewers, be sure to soak them in warm water for at least 15 minutes to prevent them from burning on the grill. Pat your shrimp completely dry and place them in a large bowl. Add the chopped rosemary, red pepper flakes, half of the minced garlic, 1/4 cup of the olive oil, the zest of one lemon, and 1 teaspoon of salt. Toss everything to coat and let the shrimp marinate for 15 minutes.
- Make the Piccata Sauce: While the shrimp marinates, make the sauce. In a large skillet over medium heat, heat the remaining 1 tablespoon of olive oil. Add the chopped shallot and the remaining 1/4 teaspoon of salt and cook until softened, about 2 minutes. Add the capers and the remaining garlic and cook, stirring, for 2 more minutes until the garlic is fragrant.
- Reduce and Emulsify: Increase the heat to medium-high and pour in the white wine. Let it bubble and cook, stirring, until the wine has reduced by about two-thirds. Add the chicken broth and continue to cook until it has reduced by about three-quarters. Remove the pan from the heat and stir in the butter, fresh parsley, and the juice of half a lemon until the sauce is smooth and emulsified. Keep it warm over very low heat.
- Grill the Shrimp and Lemons: Prepare your grill for medium-high heat. Clean and oil the grates well. Thread the marinated shrimp onto your skewers. Grill the skewers for 3 to 4 minutes total, turning them halfway through, until the shrimp are pink, opaque, and have beautiful char marks.
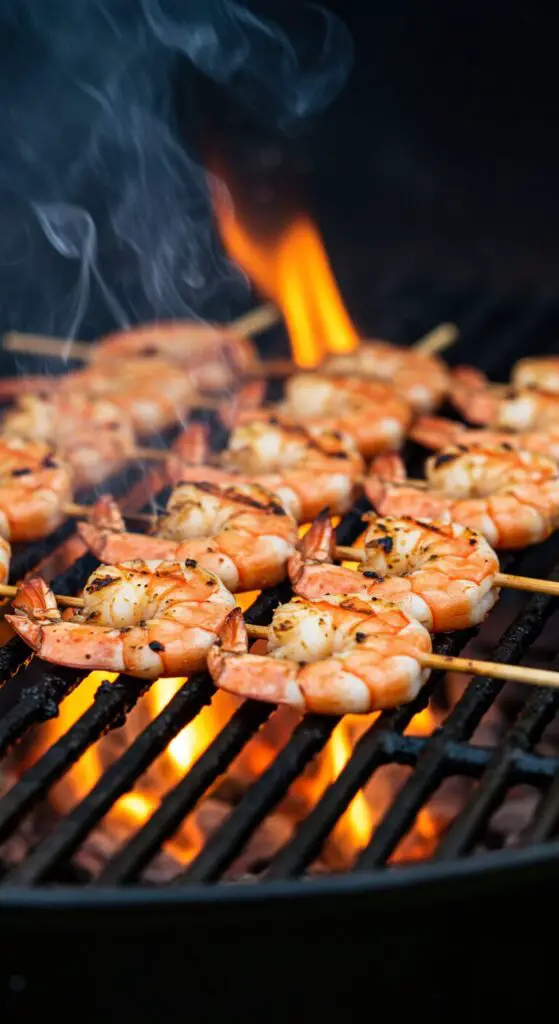
- Grill the Lemons and Serve: While the shrimp cook, slice the remaining 1 1/2 lemons. Place the lemon slices directly on the grill and cook for 1 to 2 minutes per side, until charred.
- Assemble and Garnish: Transfer the hot shrimp skewers to a large platter. Add the grilled lemon slices to the platter. Drizzle everything generously with the warm piccata sauce and finish with a sprinkle of grated Parmesan cheese.
Wise Tips for the Best Grilled Shrimp
- Don’t Over-Marinate: Shrimp is delicate! A 15-minute marinade is all it needs to pick up the flavor. Marinating it for too long in the acidic lemon zest can start to “cook” the shrimp and affect its texture.
- Hot and Fast Grilling: The key to perfectly cooked shrimp is a hot grill and a quick cooking time. This ensures they get a nice char on the outside without becoming tough and rubbery.
- Oil Your Grates: A well-oiled grill grate is essential to prevent the delicate shrimp from sticking.
- The Grilled Lemons are a Must! Grilling the lemon slices caramelizes their sugars and makes them extra juicy and flavorful. A final squeeze over the shrimp is a fantastic finishing touch.
Grilled Shrimp Piccata Skewers
Ingredients
Equipment
Method
-
If using wooden skewers, soak them in water. Pat shrimp dry. In a large bowl, combine shrimp, rosemary, red pepper, half of the garlic, 1/4 cup oil, zest of one lemon, and 1 teaspoon salt. Toss to coat and marinate for 15 minutes.
-
Meanwhile, prepare the sauce: In a large skillet over medium heat, heat 1 tbsp oil. Add shallots and remaining 1/4 tsp salt; cook until softened, about 2 minutes. Add capers and remaining garlic; cook until fragrant, about 2 minutes more.
-
Increase heat to medium-high and add wine. Cook, stirring, until reduced by about two-thirds. Add broth and cook until reduced by about three-quarters.
-
Remove sauce from heat and stir in butter, parsley, and the juice of half a lemon until emulsified. Keep warm over low heat.
-
Prepare a grill for medium-high heat. Thread marinated shrimp onto skewers. Grill, turning once, until charred and cooked through, 3 to 4 minutes total.
-
Slice the remaining 1 1/2 lemons and grill for 1-2 minutes per side until charred. Place skewers and grilled lemons on a platter. Drizzle with piccata sauce and sprinkle with Parmesan.
Notes
Delicious Variations & Creative Twists
- Serve over Pasta: This dish is incredible served over a bed of angel hair or linguine pasta to soak up all that delicious piccata sauce.
- Add Some Veggies: Thread some cherry tomatoes, zucchini chunks, or bell pepper pieces onto the skewers in between the shrimp.
- Pan-Seared Version: No grill? No problem! You can sear the shrimp in a hot skillet for 2-3 minutes per side instead of grilling them.
Frequently Asked Questions (FAQ) – Grilled Shrimp Piccata
What kind of white wine is best for the sauce?
A dry, crisp white wine like a Pinot Grigio, Sauvignon Blanc, or an unoaked Chardonnay is perfect. Avoid sweet wines like Moscato.
Can I use frozen shrimp?
Yes. For the best results, make sure the shrimp are completely thawed and patted very dry before you marinate them.
What should I serve with these skewers?
They are fantastic with a side of creamy polenta, crusty bread for dipping in the sauce, a simple orzo salad, or roasted asparagus.
Conclusion
These Grilled Shrimp Piccata Skewers are a truly special dish that brings a touch of elegance to your summer table. It’s a bright, flavorful, and incredibly satisfying meal that is sure to become a new favorite for your family and friends. Enjoy!
8. The Best Caprese Orzo Pasta Salad (Your New Summer Favorite!)
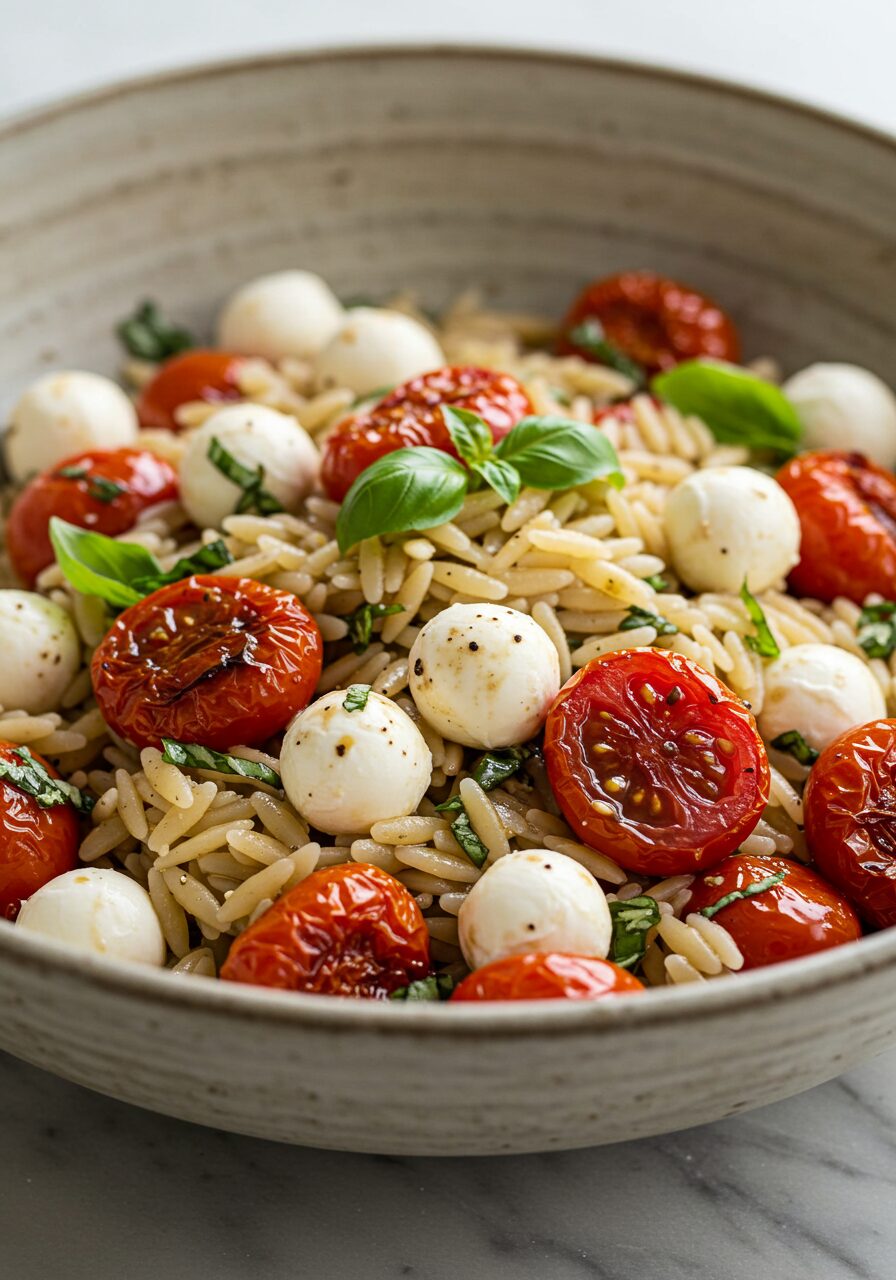
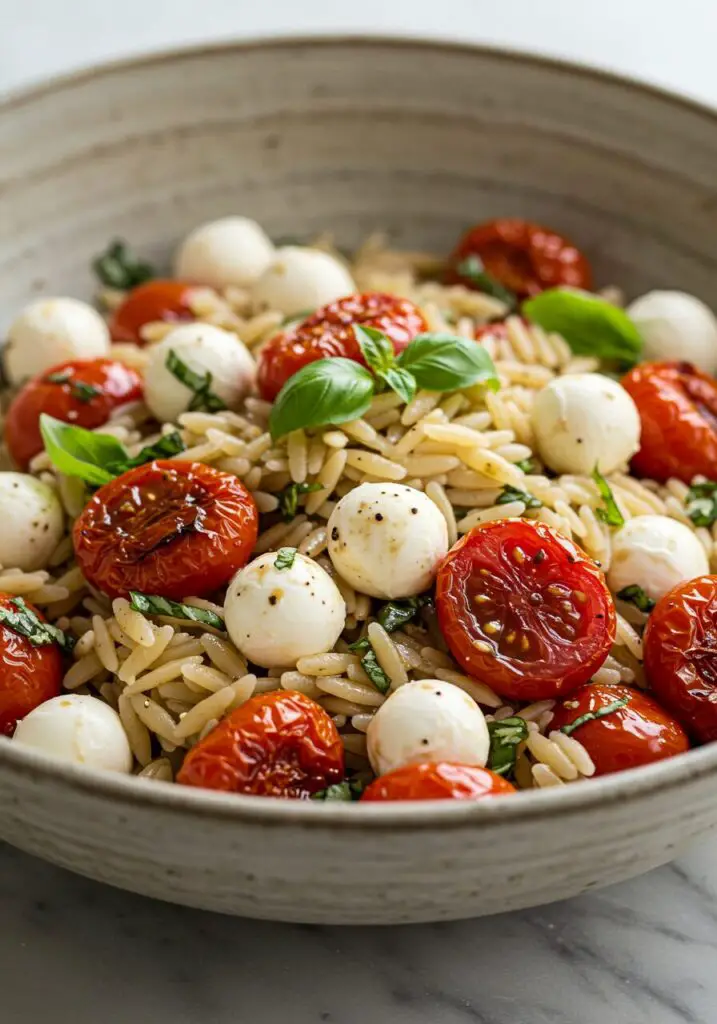
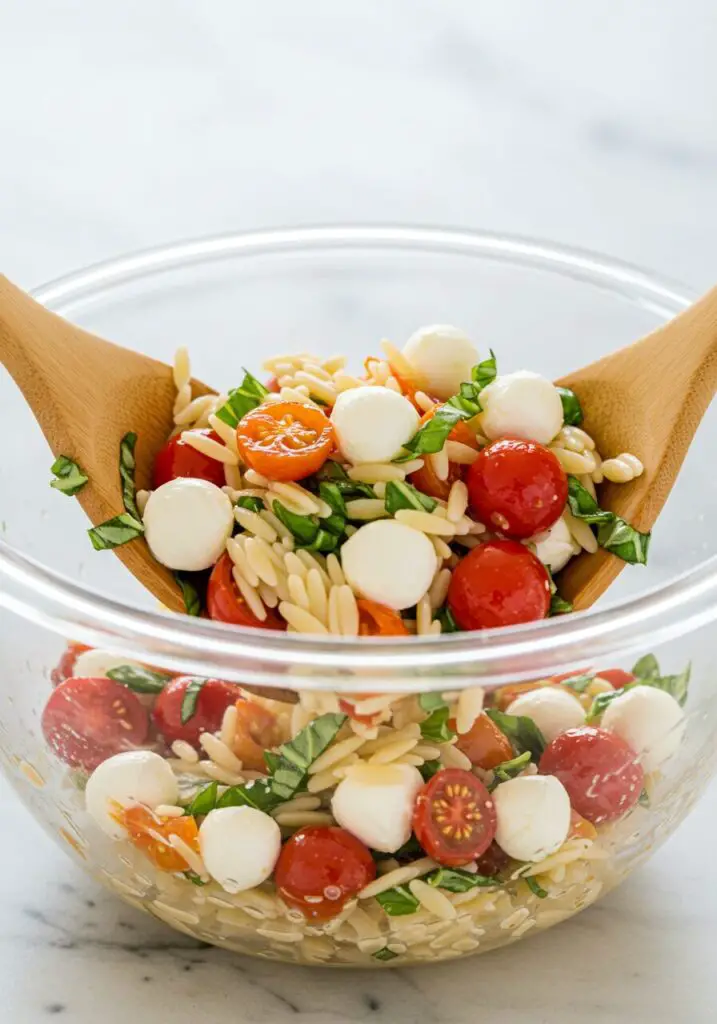
Hello, my friends! What happens when you take the fresh, elegant simplicity of a Caprese salad and combine it with the satisfying, crowd-pleasing nature of a great pasta salad? You get pure magic. Today, I am so excited to share a recipe that does exactly that, and it might just be the best pasta salad you’ll make all summer: this incredible Caprese Orzo Pasta Salad. But we’re not just stopping there. We have a secret weapon that elevates this dish to a whole new level of deliciousness—we’re using both fresh and roasted cherry tomatoes.
Imagine tender, pearl-like orzo pasta, creamy little balls of fresh mozzarella, and a festival of fresh herbs, all tossed in a zesty homemade balsamic vinaigrette. The addition of slow-roasted tomatoes brings a deep, sweet, and concentrated flavor that perfectly complements the juicy pop of the fresh ones. It’s a dish that is bursting with the bright, vibrant flavors of the season, and it’s perfect for everything from easy weeknight lunches to being the star of your next backyard BBQ.
Why This is The Ultimate Summer Pasta Salad
This recipe is a true showstopper, a perfect harmony of textures and flavors that feels both familiar and excitingly new. Here’s why it’s a guaranteed hit.
- The Roasted Tomato Game-Changer: This is the secret to the incredible depth of flavor. Roasting half of the tomatoes concentrates their sweetness and adds a wonderful jammy texture that is absolutely divine.
- A Celebration of Summer Flavors: This salad is a beautiful showcase for peak-season tomatoes and fresh, fragrant basil. It truly tastes like sunshine in a bowl.
- The Perfect Make-Ahead Dish: This is a potluck and meal-prep dream. The flavors actually get better as they sit, allowing the pasta and mozzarella to soak up all that delicious vinaigrette.
- Incredibly Easy & Elegant: While it looks and tastes sophisticated, the process is incredibly simple. It’s a low-effort dish with a huge flavor payoff.
- A Versatile Crowd-Pleaser: It’s wonderful served warm, at room temperature, or chilled. It’s a universally loved flavor combination that is perfect for any gathering.
Gather Your Fresh & Vibrant Ingredients
Let’s get our beautiful, Italian-inspired ingredients ready to create this masterpiece.
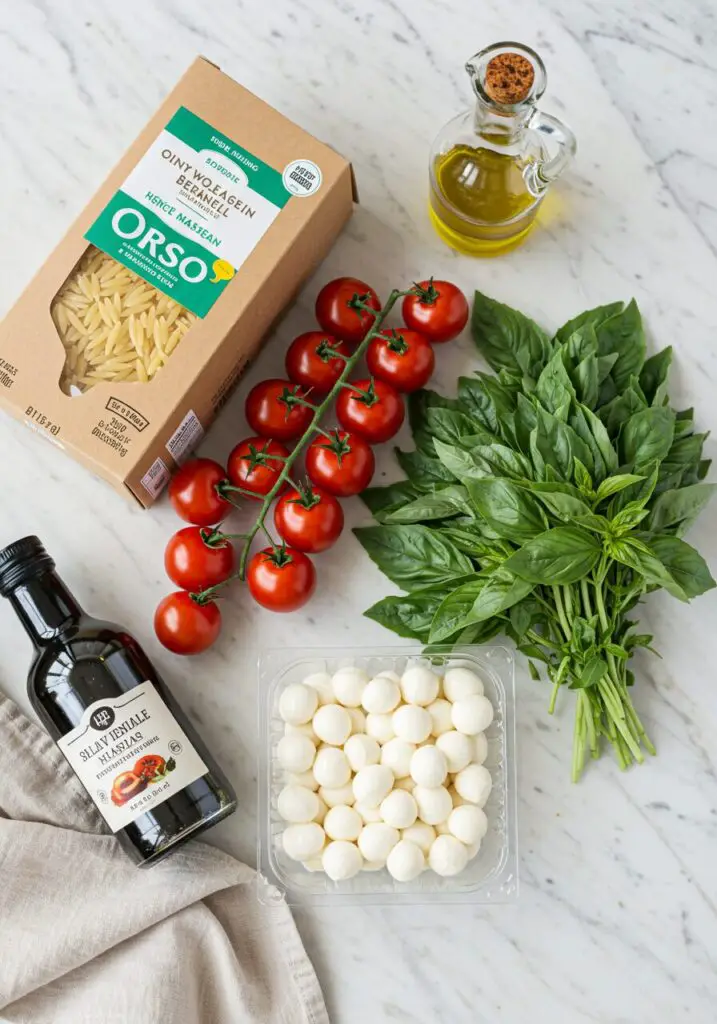
- 8 ounces Orzo Pasta: Or another small pasta shape you love.
- 2 pints Cherry Tomatoes, halved and divided
- 8 ounces Fresh Mozzarella Pearls: These little balls are the perfect size!
- ½ cup Fresh Basil Leaves, torn
- 2 tablespoons Fresh Parsley, minced
- 2 tablespoons Fresh Chives, minced
For the Balsamic Vinaigrette:
- ⅓ cup Olive Oil: A good quality extra-virgin olive oil will shine here.
- 3 tablespoons Balsamic Vinegar
- 2 cloves Garlic, minced
- Kosher Salt and Freshly Cracked Black Pepper, to taste
Crafting Your Pasta Salad: Step-by-Step Guide
Let’s build this beautiful, flavor-packed salad together.
- Roast the Tomatoes: First, let’s build that deep, sweet flavor. Preheat your oven to 400°F. On a baking sheet, toss one pint of your halved cherry tomatoes with a little drizzle of olive oil. Spread them out in a single layer and roast for 25-30 minutes, until the tomatoes have softened, blistered, and started to caramelize beautifully. Once they’re done, remove them from the oven and let them cool slightly. Sprinkle them with a little flaky salt, pepper, and the minced parsley and chives.
- Make the Dressing & Cook the Pasta: While the tomatoes are roasting, you can make the dressing. In the bottom of a very large serving bowl (the one you’ll mix the whole salad in!), whisk together the olive oil, balsamic vinegar, and minced garlic. Season with salt and pepper. Now, get a large pot of generously salted water boiling and cook your orzo according to the package directions until it’s al dente.
- Combine and Toss: Drain the cooked orzo and let it cool just slightly for a minute or two (you want it to be warm, not hot). Transfer the warm orzo directly to the large bowl with the vinaigrette and toss to dress. Dressing the pasta while it’s warm allows it to absorb all that delicious flavor.
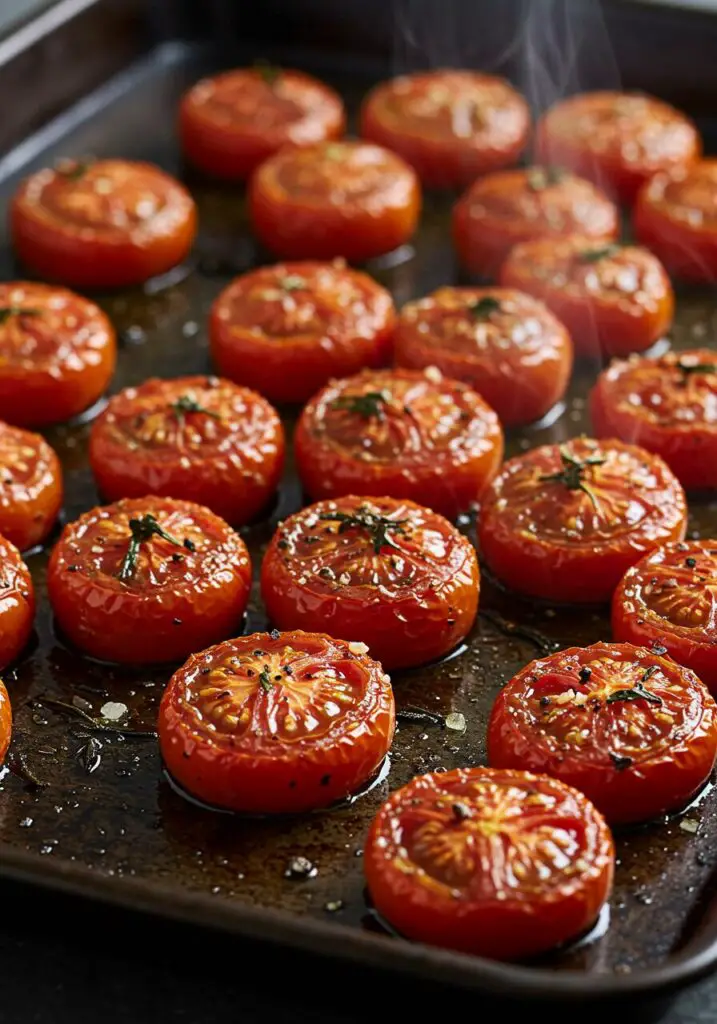
- The Final Assembly: To the bowl with the dressed orzo, add the beautiful roasted tomatoes, the remaining pint of fresh halved tomatoes, the mozzarella pearls, and the torn basil leaves. Gently toss everything together until it’s all combined. Give it a final taste and adjust the salt and pepper if needed.
- Serve and Enjoy: You can serve this salad immediately while it’s still slightly warm, or let it cool to room temperature. It’s also fantastic chilled!
Wise Tips for the Best Orzo Salad
- Don’t Overcook the Orzo: Orzo is a small pasta and can overcook quickly. Keep a close eye on it and drain it as soon as it’s al dente (tender with a slight bite) to prevent it from becoming mushy in your salad.
- Roast Your Tomatoes Well: Don’t be afraid to let your tomatoes get a little bit of color in the oven. Those slightly browned, caramelized spots are where all the deep, sweet flavor comes from.
- The Warm Pasta Trick: Tossing the pasta with the vinaigrette while it’s still warm is a pro move. The warm pasta acts like a sponge and soaks up the dressing beautifully, making the entire salad more flavorful.
Caprese Orzo Pasta Salad with Roasted Tomatoes
Ingredients
Method
-
Preheat oven to 400°F. Toss 1 pint of halved tomatoes with a drizzle of olive oil on a baking sheet and roast for 25-30 minutes until blistered. Let cool, then sprinkle with salt, pepper, parsley, and chives. Meanwhile, cook orzo according to package directions until al dente. Drain and let it cool slightly.
-
In a large serving bowl, add the 1/3 cup olive oil, balsamic vinegar, and minced garlic. Whisk together until well mixed. Season with salt and pepper.
-
Transfer the warm orzo pasta to the bowl with the vinaigrette and toss to dress. Add both the roasted and the remaining fresh tomatoes, the mozzarella pearls, and torn basil leaves to the pasta bowl. Toss until combined. Adjust salt and pepper if needed and serve.
Notes
Serving Temp: You can serve this salad at any temperature—warm, room temperature, or cold!
Pasta Shape: Feel free to use your favorite pasta shape in this recipe. Fusilli, cavatappi, farfalle, or orecchiette would all work well.
Frequently Asked Questions (FAQ) – Caprese Orzo Pasta Salad
- Can I make this ahead of time?
Yes! This is a fantastic make-ahead salad. You can roast the tomatoes, cook the pasta, and make the dressing up to a day in advance. For the best result, store them in separate containers in the fridge and toss everything together with the fresh mozzarella and basil just before serving. - What if I can’t find mozzarella pearls?
No problem at all! You can buy a larger ball of fresh mozzarella and simply chop it into small, bite-sized cubes. - Can I add a protein to this salad?
This salad would be absolutely incredible with some grilled chicken, shredded rotisserie chicken, or even a can of rinsed and drained chickpeas to make it a more substantial main course. - What other pasta shapes could I use?
As the recipe notes suggest, this salad is very forgiving! Any small or medium pasta shape would work wonderfully. Fusilli, cavatappi, farfalle (bow ties), or ditalini are all great choices.
Conclusion
This Caprese Orzo Pasta Salad is a true celebration of summer’s best flavors. The simple but brilliant technique of using both roasted and fresh tomatoes creates a dish with an incredible depth and brightness that is truly special. It’s a versatile, beautiful, and ridiculously delicious salad that is destined to become the star of all your summer gatherings. I hope you love it as much as I do!
9. The Best Classic Caprese Salad (Summer on a Platter!)
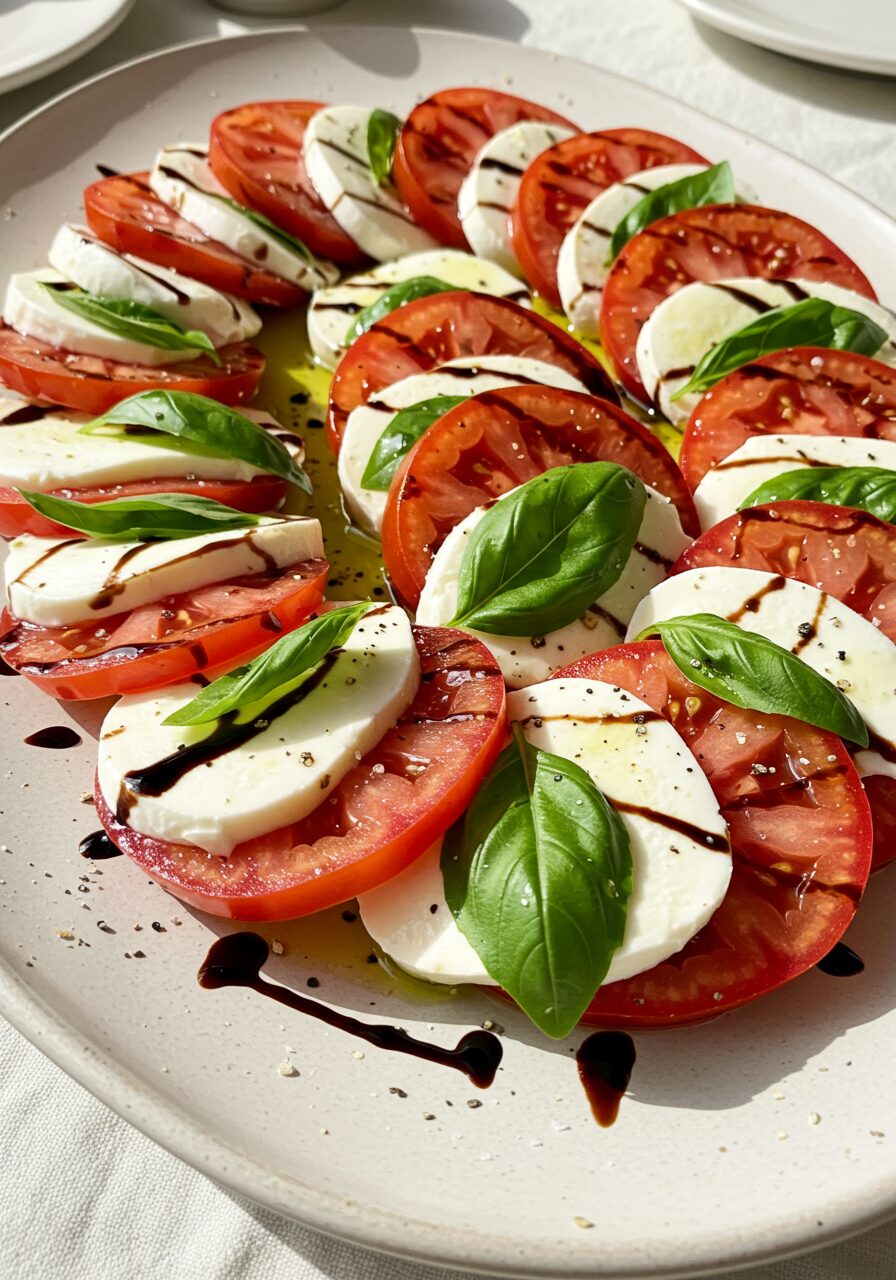
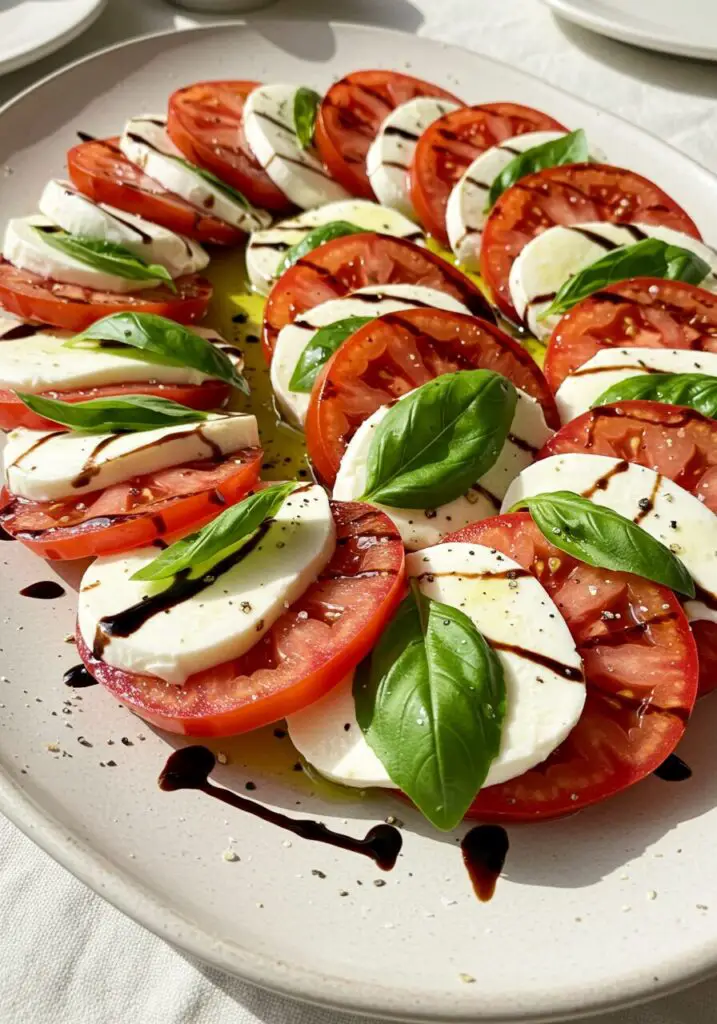
Hello, my friends! There are few dishes in this world that so perfectly capture the essence of a sun-drenched summer day like a Classic Caprese Salad. It is the definition of simple elegance, a tribute to the beauty of fresh, high-quality ingredients. I want you to imagine a platter of vibrant, juicy, sun-ripened tomatoes, layered with slices of creamy, milky fresh mozzarella. Tucked between each layer are fragrant, peppery basil leaves. The entire masterpiece is then finished with a generous drizzle of good olive oil, a sweet and tangy balsamic glaze, and a final shower of flaky sea salt.
This isn’t a recipe with a long list of instructions or complicated techniques. This is a guide to honoring perfect ingredients. It’s a no-cook, five-minute wonder that is elegant enough for a dinner party, yet simple enough for a Tuesday night. It is, quite simply, summer on a platter, and I’m going to show you how to make it perfectly, every single time.
Why This is The Perfect Italian Salad
This recipe is a timeless classic for a reason. It’s a pure, simple, and perfect celebration of flavor. Here’s why you will love it.
- A True Celebration of Summer: This salad is the absolute best way to showcase those beautiful, ripe, seasonal tomatoes from your garden or farmer’s market.
- Effortlessly Elegant: There is something so visually stunning about the simple, layered colors of the Italian flag on a platter. It’s a showstopper appetizer that takes only minutes to assemble.
- A True No-Cook Wonder: On a hot day, a beautiful and satisfying meal that requires zero cooking is an absolute gift.
- It’s All About the Ingredients: The beauty of a Caprese salad is its simplicity, which allows the quality of each component—the sweet tomatoes, the creamy cheese, the fragrant basil—to truly shine.
- Incredibly Versatile: It’s the perfect appetizer, a wonderful light lunch with some crusty bread, or a beautiful side dish for grilled chicken or steak.
Gather Your Simple, Perfect Ingredients
For a recipe this simple, the quality of your ingredients is everything. This is the time to use the good stuff!
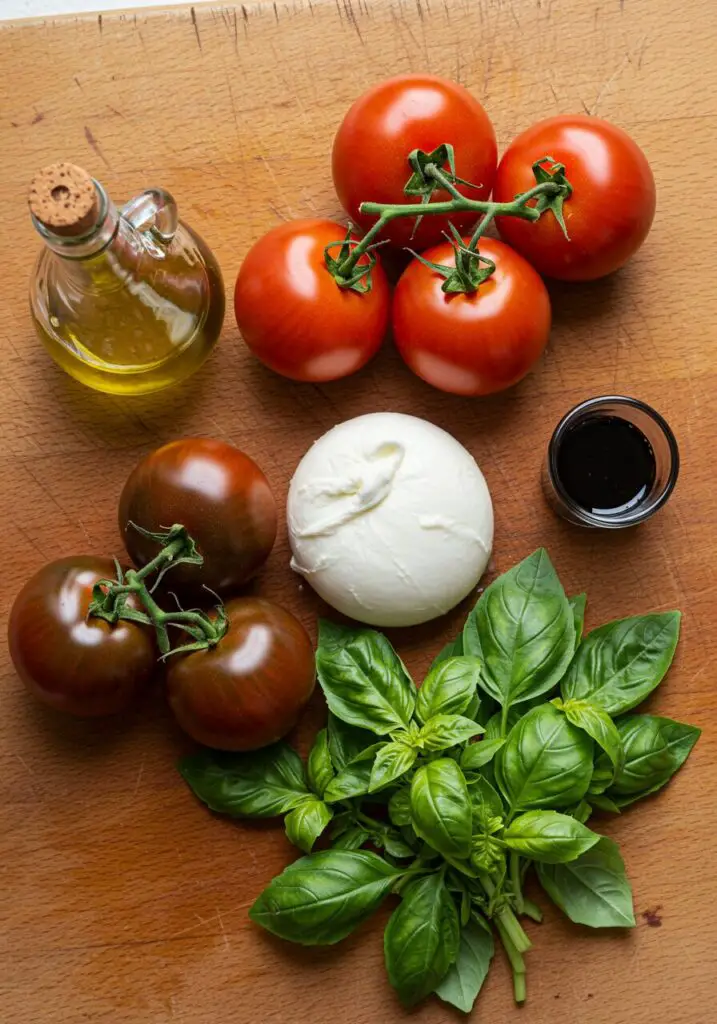
- 1 pound Ripe Tomatoes (3-4 medium), sliced ¼-inch thick: This is the most important part! Use the best, most flavorful tomatoes you can find. Heirlooms, beefsteak, or beautiful vine-ripened tomatoes are all perfect.
- 8-10 ounces Fresh Mozzarella, sliced ¼-inch thick: Look for the fresh mozzarella balls packed in water, not the low-moisture block. The texture should be soft and milky.
- ½ to ⅔ bunch Fresh Basil: You’ll want about ⅓ cup of whole basil leaves.
- 2 tablespoons Good Quality Extra-Virgin Olive Oil: Since you’ll be tasting it, use a flavorful, fruity olive oil.
- 1-2 tablespoons Balsamic Glaze: A thick, syrupy glaze is best here.
- Flaky Sea Salt (like Maldon) and Freshly Cracked Black Pepper
Crafting Your Caprese: Step-by-Step Guide
Let’s assemble this beautiful, simple work of art.
- Slice Your Ingredients: The first step is to carefully slice your beautiful tomatoes and fresh mozzarella into uniform, ¼-inch thick rounds. Pro Tip: A serrated knife works wonders for slicing through ripe tomatoes without squishing them!
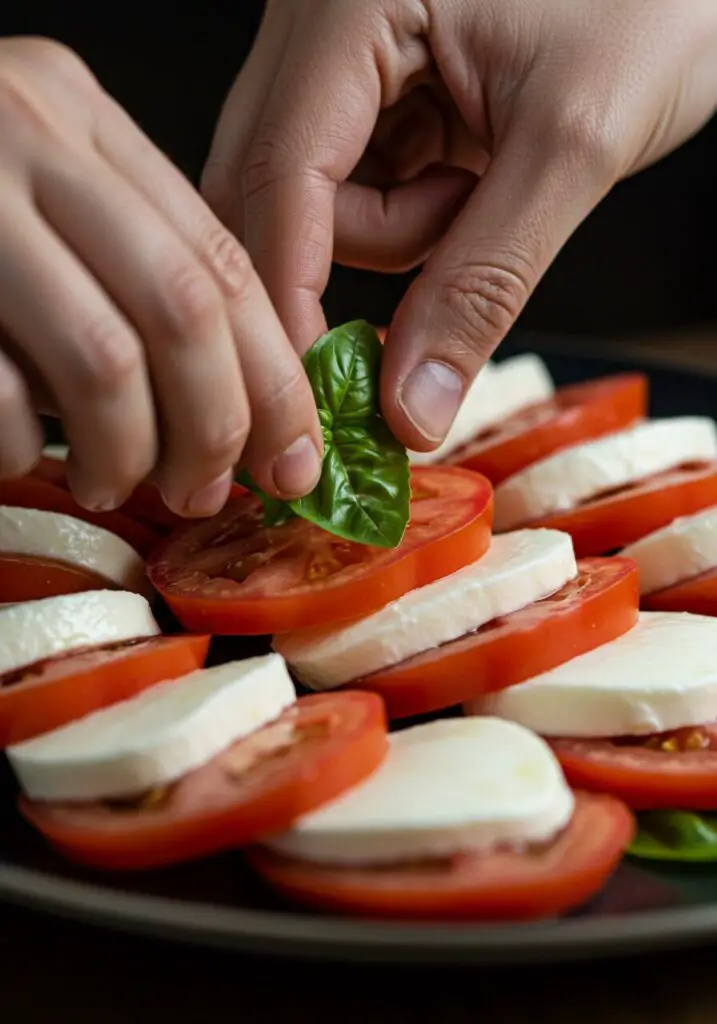
- Arrange Your Platter: This is the fun, artistic part! On a large serving platter, begin layering your ingredients. Shingle the slices of tomato and fresh mozzarella, alternating them to create a beautiful pattern. Gently tuck a whole fresh basil leaf between each layer of cheese and tomato. Arrange the slices so you can see every beautiful, colorful layer.
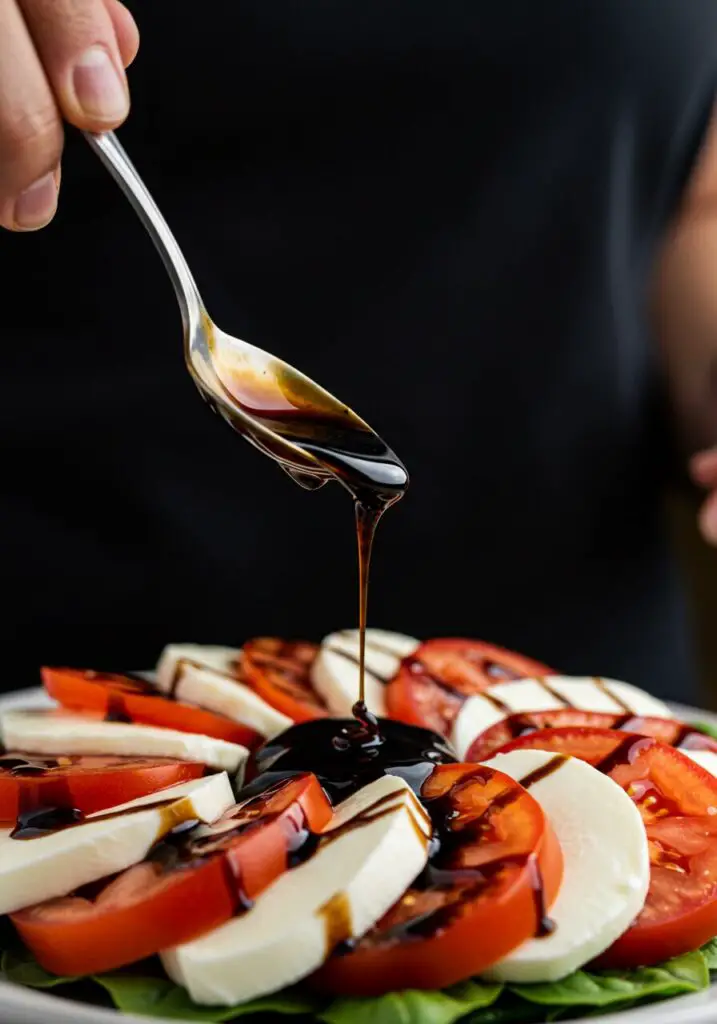
- The Finishing Touches: Now for the grand finale. Season the entire platter generously with flaky sea salt and a good few grinds of fresh black pepper. Drizzle the extra-virgin olive oil all over the top, followed by a beautiful, artistic drizzle of the balsamic glaze.
- Serve and Enjoy: Serve the Caprese salad immediately, preferably with some crusty bread for soaking up all the delicious juices and oils at the bottom of the plate.
Wise Tips for the Perfect Caprese
- The Tomato is King: I cannot say this enough—the quality of your tomatoes will make or break your Caprese salad. This is the time to use the best, ripest, most flavorful tomatoes you can find.
- Fresh Mozzarella Only: Do not use the hard, low-moisture block of mozzarella that you would use for pizza. The magic of a Caprese is in the soft, creamy, milky texture of fresh mozzarella.
- Serve at Room Temperature: This is a crucial, often-overlooked tip! Cold mutes flavor. For the best tasting Caprese, let your tomatoes and mozzarella sit out on the counter for about 20-30 minutes before you assemble and serve.
- Don’t Drown It: A good Caprese is drizzled, not drenched. A light hand with the high-quality oil and glaze is all you need to complement the fresh ingredients.
The Best Classic Caprese Salad
Ingredients
Method
-
Start by layering slices of tomatoes on a serving platter. Tuck slices of fresh mozzarella between each tomato so both are visible. Gently tuck whole basil leaves between the cheese and tomatoes. Arrange the slices so you can see every layer.
-
Season generously with flaky sea salt and freshly cracked black pepper. Drizzle all over with extra-virgin olive oil and then with the balsamic glaze to taste. Serve immediately.
Frequently Asked Questions (FAQ) – Classic Caprese Salad
- Can I make Caprese salad ahead of time?
A Caprese salad is at its absolute peak of freshness when it is assembled right before serving. If you must prep ahead, you can slice your tomatoes and mozzarella and store them in separate airtight containers in the fridge, but be sure to let them come to room temperature before assembling. - What’s the difference between balsamic vinegar and balsamic glaze?
Balsamic glaze is simply balsamic vinegar that has been cooked down (reduced) until it becomes thick, sweet, and syrupy. You can buy it pre-made, or easily make your own by simmering balsamic vinegar in a small saucepan until it has thickened. - Can I use cherry or grape tomatoes?
Absolutely! For a different presentation, you can make a “deconstructed” Caprese by tossing halved cherry or grape tomatoes with small mozzarella balls (bocconcini) and torn basil leaves. - What’s the best way to slice fresh mozzarella?
Fresh mozzarella is very soft. A long, thin, sharp knife is your best tool. Some people even find that unflavored dental floss can be a great trick for getting super clean, even slices!
Conclusion
This Classic Caprese Salad is a true tribute to the beauty of simple, perfect food. It’s a dish that needs no fancy techniques or complicated steps—it just asks for the best ingredients you can find. It’s a taste of Italian sunshine, a celebration of summer, and one of the most delicious and refreshing things you can eat. I hope you love it!
10. The Best Grilled Nectarine & Cheese Crostini (The Ultimate Summer Appetizer!)
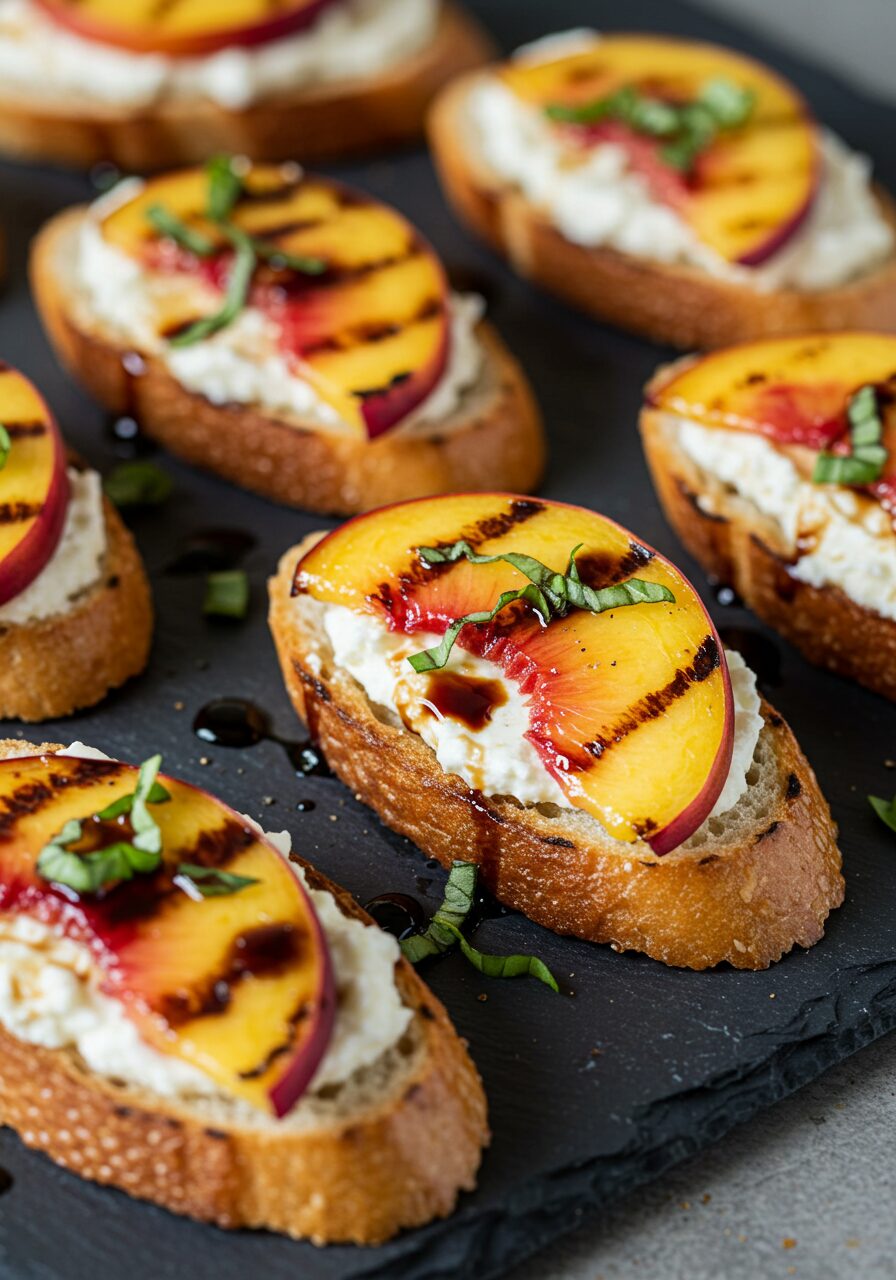
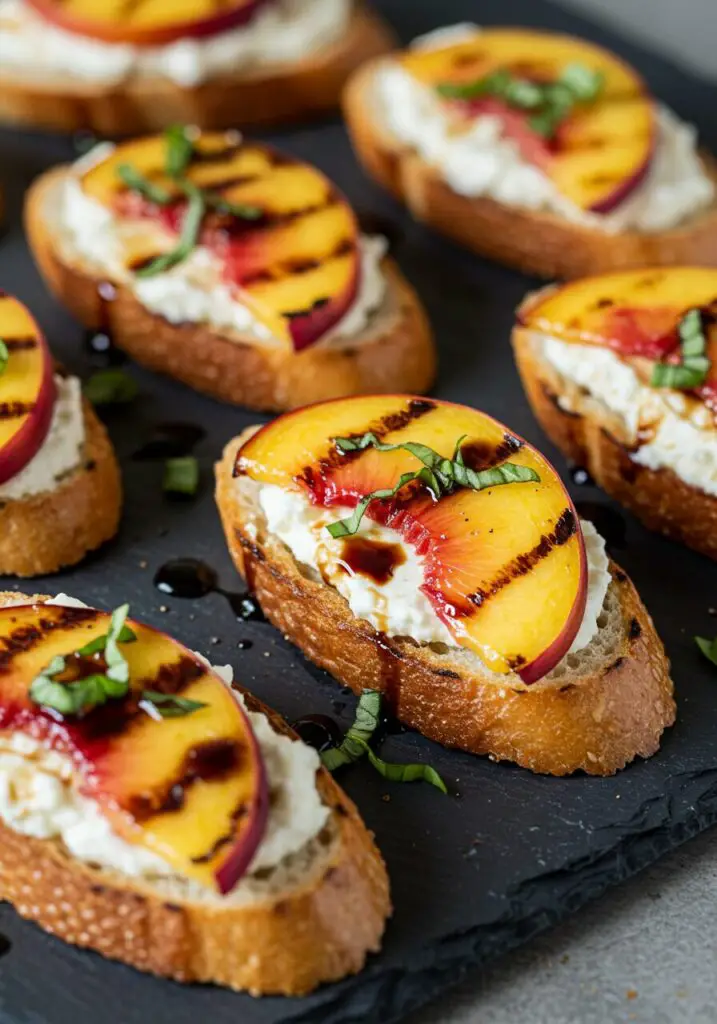
Hello, my friends! There is a special kind of magic that happens in the summer when fresh, sweet fruit meets the smoky char of the grill. Today, we are harnessing that magic to create what might just be the most perfect summer appetizer I know: this beautiful and incredibly delicious Grilled Nectarine & Cheese Crostini. Imagine a slice of rustic baguette, grilled until it’s perfectly crisp and golden. That perfect toast is then slathered with creamy, tangy goat cheese, topped with warm, sweet, and smoky grilled nectarine slices, and finished with a drizzle of a rich, homemade balsamic glaze and a sprinkle of fresh basil.
It is, in a word, perfection. It’s the ultimate harmony of sweet, savory, tangy, and smoky in one single, elegant bite. It looks like it belongs on the menu of a fancy wine bar, but I’m going to let you in on a secret: it is so unbelievably easy to make. This is the recipe that will make you the star of your next backyard barbecue or summer gathering.
Why This is the Perfect Party Starter
This recipe is simple elegance at its finest. It’s a guaranteed hit that will have everyone asking for the recipe. Here’s why.
- A Celebration of Summer Flavors: This is the best way to showcase beautiful, peak-season nectarines. Grilling them brings out their natural sweetness and adds a wonderful smoky depth.
- Incredibly Easy, Utterly Impressive: This appetizer looks so sophisticated and beautiful, but it comes together in under 30 minutes with very little effort.
- The Perfect Flavor Combination: The sweet and smoky nectarine, the tangy goat cheese, the rich and syrupy balsamic glaze, and the fresh basil create a truly unforgettable flavor profile.
- The Magic of Homemade Balsamic Glaze: Don’t be intimidated! A simple balsamic glaze is just vinegar reduced on the stove. It takes a few minutes and elevates this dish from great to absolutely spectacular.
- The Perfect Bite-Sized Appetizer: It’s an ideal, easy-to-eat finger food for any party, picnic, or pre-dinner snack with a glass of wine.
Gather Your Fresh, Simple Ingredients
Let’s get our beautiful, summery ingredients ready to go.
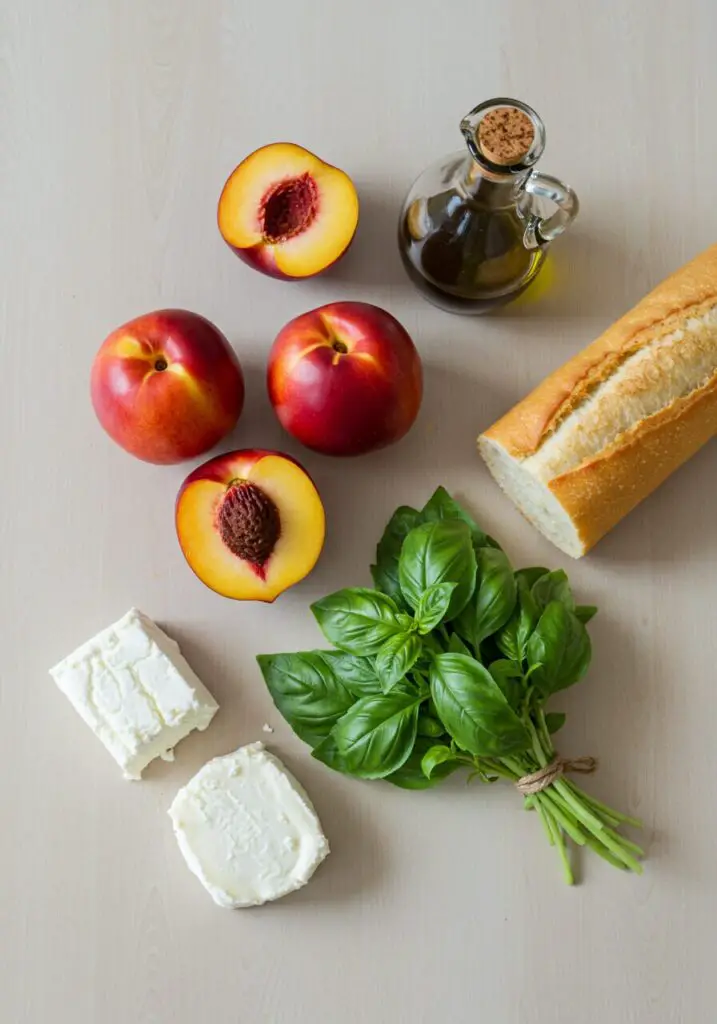
- 1/2 cup Balsamic Vinegar
- 1 tablespoon Olive Oil
- 12 slices French Bread Baguette (about 1/4 inch thick)
- 2 Medium Nectarines, halved and pitted: Look for ones that are ripe but still firm.
- 1/4 cup Fresh Goat Cheese, softened: Also known as chèvre.
- 1/4 cup Loosely Packed Basil Leaves, thinly sliced
Crafting Your Crostini: Step-by-Step Guide
Let’s build these beautiful bites of summer.
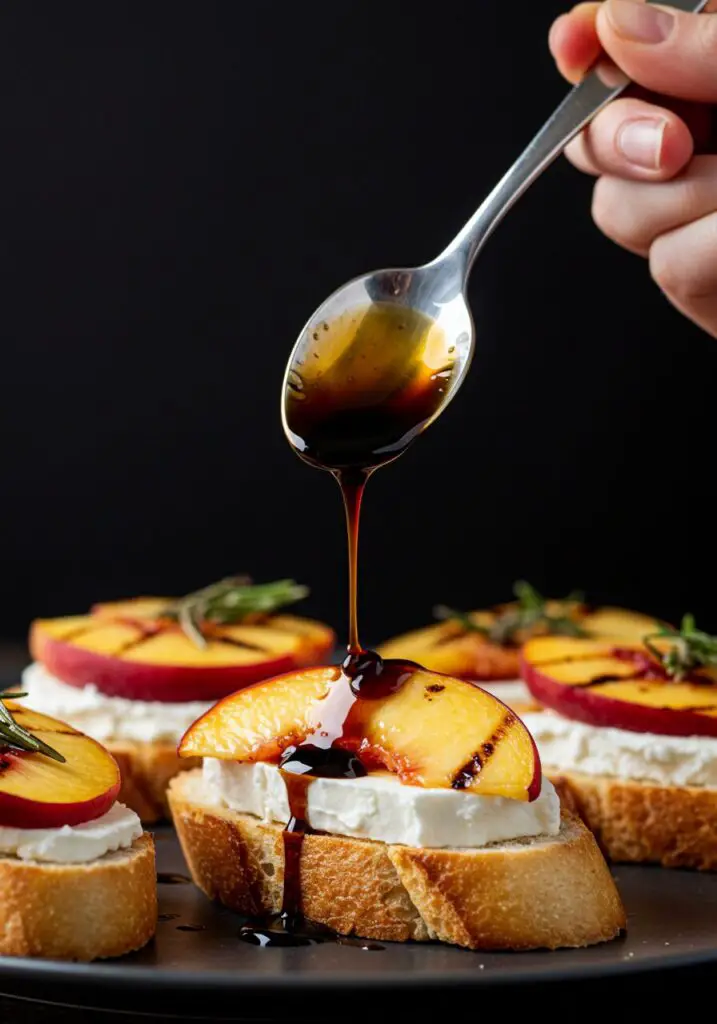
- Make the Balsamic Glaze: This is the first step to incredible flavor. Pour the balsamic vinegar into a small saucepan and bring it to a boil over medium-high heat. Once it’s boiling, reduce the heat to a steady simmer and let it cook for 10-15 minutes. You’re watching for it to reduce and thicken into a syrupy consistency that can coat the back of a spoon. Be sure to watch it carefully, as it can burn quickly once it thickens. Remove it from the heat to cool.
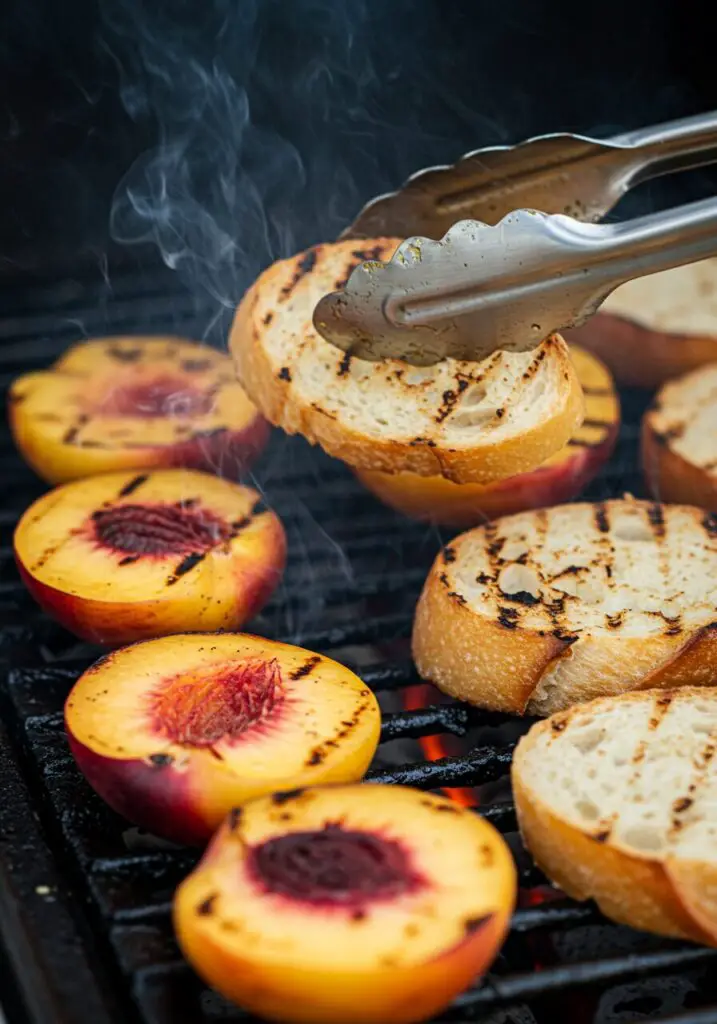
- Grill the Bread: While the glaze reduces, preheat your grill to a medium heat. Brush both sides of your baguette slices with olive oil. Place them on the grill and cook, uncovered, for a minute or two per side, until they are beautifully golden brown with nice grill marks.
- Grill the Nectarines: Place the nectarine halves, cut-side down, on the hot grill. Grill for just 45-60 seconds on each side. You’re just looking to get some nice char marks and make them warm and tender, not mushy. Once they’re done, remove them from the grill and let them cool just enough to handle before cutting them into thick slices.
- Assemble and Serve: Now for the best part! Spread the softened goat cheese generously over each slice of grilled toast. Arrange a few slices of the warm, grilled nectarine on top of the cheese. Drizzle with your beautiful balsamic glaze and finish with a sprinkle of fresh, sliced basil. Serve immediately and enjoy the applause!
Wise Tips for the Perfect Crostini
- Choose Firm-Ripe Nectarines: You want nectarines that are sweet and ripe, but still firm to the touch. If they are too soft or overripe, they will turn to mush on the hot grill.
- Watch Your Glaze! A balsamic reduction can go from perfect to burnt in a matter of seconds. Stay by the stove, and as soon as it’s thick enough to coat a spoon, take it off the heat. It will continue to thicken as it cools.
- Clean Your Grill Grates: For those beautiful, clean grill marks on your bread and fruit, make sure your grill grates are clean and nicely preheated.
Grilled Nectarine & Goat Cheese Crostini
Ingredients
Method
-
In a small saucepan, bring vinegar to a boil; cook for 10-15 minutes or until the liquid has reduced to about 3 tablespoons and is syrupy. Remove from heat.
-
Brush oil over both sides of baguette slices. Grill over medium heat until golden brown. Grill nectarine halves for 45-60 seconds on each side until tender and lightly browned. Cool slightly.
-
Spread goat cheese over the toasted bread slices. Cut nectarines into thick slices and arrange them over the cheese. Drizzle with the balsamic glaze and sprinkle with fresh basil. Serve immediately.
Frequently Asked Questions (FAQ) – Grilled Nectarine Crostini
- Can I use peaches instead of nectarines?
Yes, absolutely! Ripe but firm peaches would be a fantastic and equally delicious substitute. You don’t even need to peel them. - What if I don’t have a grill?
No problem! You can easily make this recipe indoors using a stovetop grill pan. It will give you those same beautiful char marks and smoky flavor. - Can I use a different kind of cheese?
Goat cheese is wonderful here for its tangy flavor, but this would also be delicious with a smear of creamy ricotta, mascarpone, or even a slice of fresh mozzarella or creamy Brie. - Can I make this ahead of time?
This appetizer is definitely at its best when served fresh and warm from the grill. However, you can make the balsamic glaze up to a week in advance and toast the bread a few hours ahead. Just grill the nectarines and assemble right before serving.
Conclusion
This Grilled Nectarine & Cheese Crostini is the absolute embodiment of simple, elegant, summer entertaining. It’s a dish that celebrates the season’s best produce and the magic of the grill. That perfect bite of smoky-sweet fruit, tangy cheese, and rich balsamic is a true taste of sunshine. I hope this becomes your new go-to appetizer for all of your warm-weather gatherings!


![Hero shot of a vibrant bowl of Creamy Cajun Chicken Pasta, with pasta and chicken coated in a rich, orange-tinted cream sauce, garnished with fresh parsley and grated Parmesan cheese.]](https://wiserecipes.com/wp-content/uploads/2025/05/Image_fx-2025-05-18T135129.071-768x419.jpg)