10 Summer Dinner Ideas Better Than Takeout
When the summer heat waves hit, I often find myself craving delicious meals without the hassle of takeout. Luckily, I’ve discovered ten fantastic dinner ideas that are not only easy to whip up but also bursting with fresh flavors. From juicy steak kebabs to light summer salads and even a few delightful desserts, this listicle…
When the summer heat waves hit, I often find myself craving delicious meals without the hassle of takeout. Luckily, I’ve discovered ten fantastic dinner ideas that are not only easy to whip up but also bursting with fresh flavors. From juicy steak kebabs to light summer salads and even a few delightful desserts, this listicle offers a variety of recipes that will help me beat the takeout temptation and elevate my summer dining experience. Join me as we explore these mouthwatering dishes that promise to satisfy my cravings while keeping my kitchen cool and inviting!
1. Ultimate Summer Salad
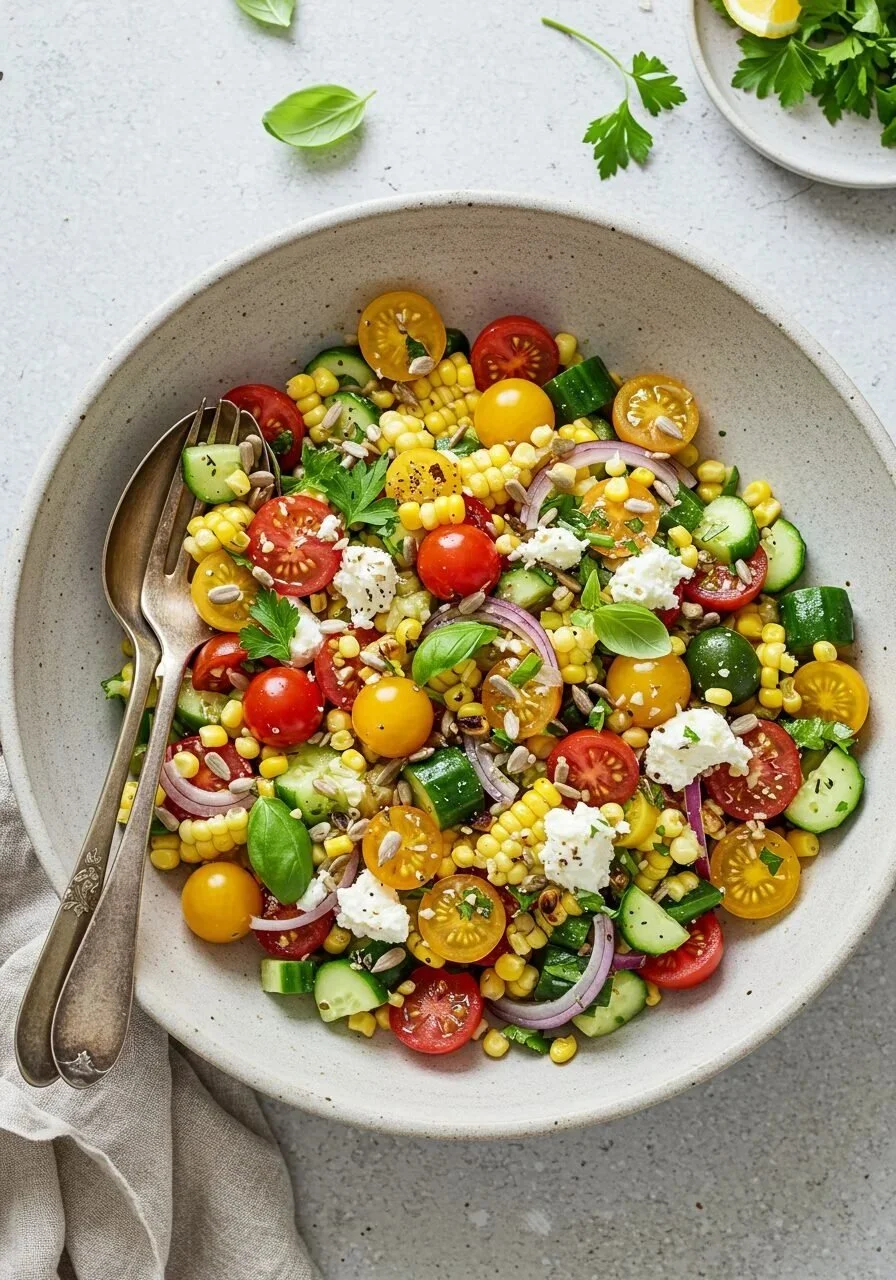
A Salad for the Sunkissed Days
As summer approaches, there’s something about the warmth of the sun and the laughter of friends that makes me crave fresh, vibrant flavors. That’s when the Ultimate Summer Salad comes into play—a dish that is just as delightful to make as it is to enjoy. It feels like a celebration on a plate, bursting with color and packed with textures that make every bite exciting.
Let me take you through why this salad has become my go-to during those sun-drenched days. Not only is it easy to prepare, but it also allows you to be creative, mix and match ingredients based on what’s fresh at the market, and who doesn’t love a dish that can easily feed a crowd?
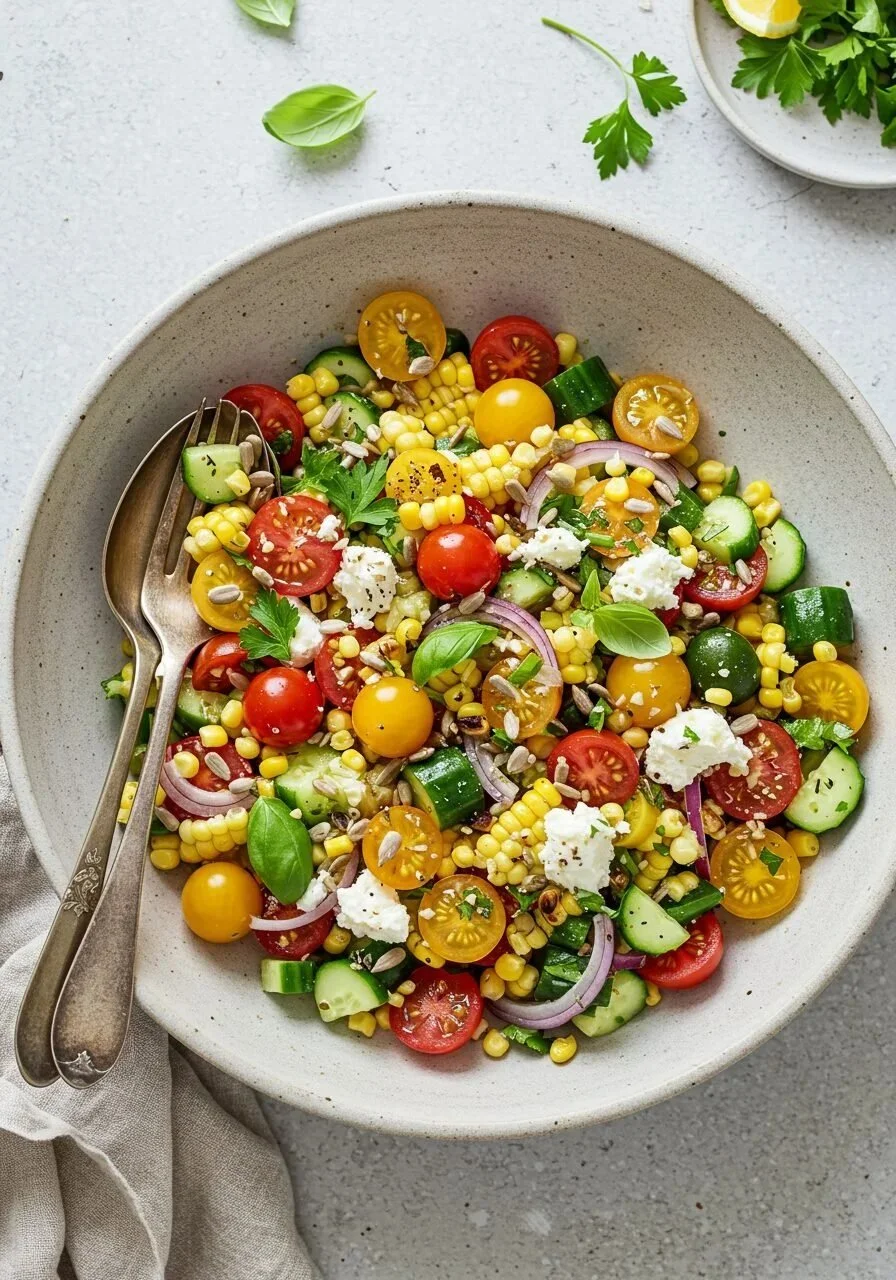
The Secret Behind Perfect Ultimate Summer Salad
At its core, this Ultimate Summer Salad features a mix of fresh vegetables, crunchy textures, and protein, all tied together with a simple yet flavorful dressing. It showcases the delightful sweetness of juicy cherry tomatoes and the satisfying crunch of cucumbers. You’ll need about a pint of halved cherry tomatoes, one medium cucumber chopped into bite-sized bits, and a colorful bell pepper diced up to brighten things up.
As I prepare this salad, I can’t help but think about the first time I made it. I tossed it together for a potluck, and it was an instant hit. Friends were grabbing seconds before I even filled my own plate!
Getting the Texture Just Right
The texture of this salad is what truly sets it apart. Beyond the tomatoes, cucumber, and bell pepper, I love throwing in some snap peas—about a cup—sliced thin for that extra crunch. They add a sweet snap that balances beautifully with the more tender veggies. If you’re looking for something truly dynamic in your dish, take advantage of in-season corn—either fresh if you can find it, or canned works just as well. One cup of corn kernels adds both sweetness and color to the mix.
To elevate this salad, I use crumbled soft goat cheese, about three-quarters of a cup, which creates a creamy texture that’s a lovely contrast to the crunchiness around it. Sprinkling half a cup of roasted sunflower seeds on top introduces an enjoyable nutty flavor and an extra layer of crunch.
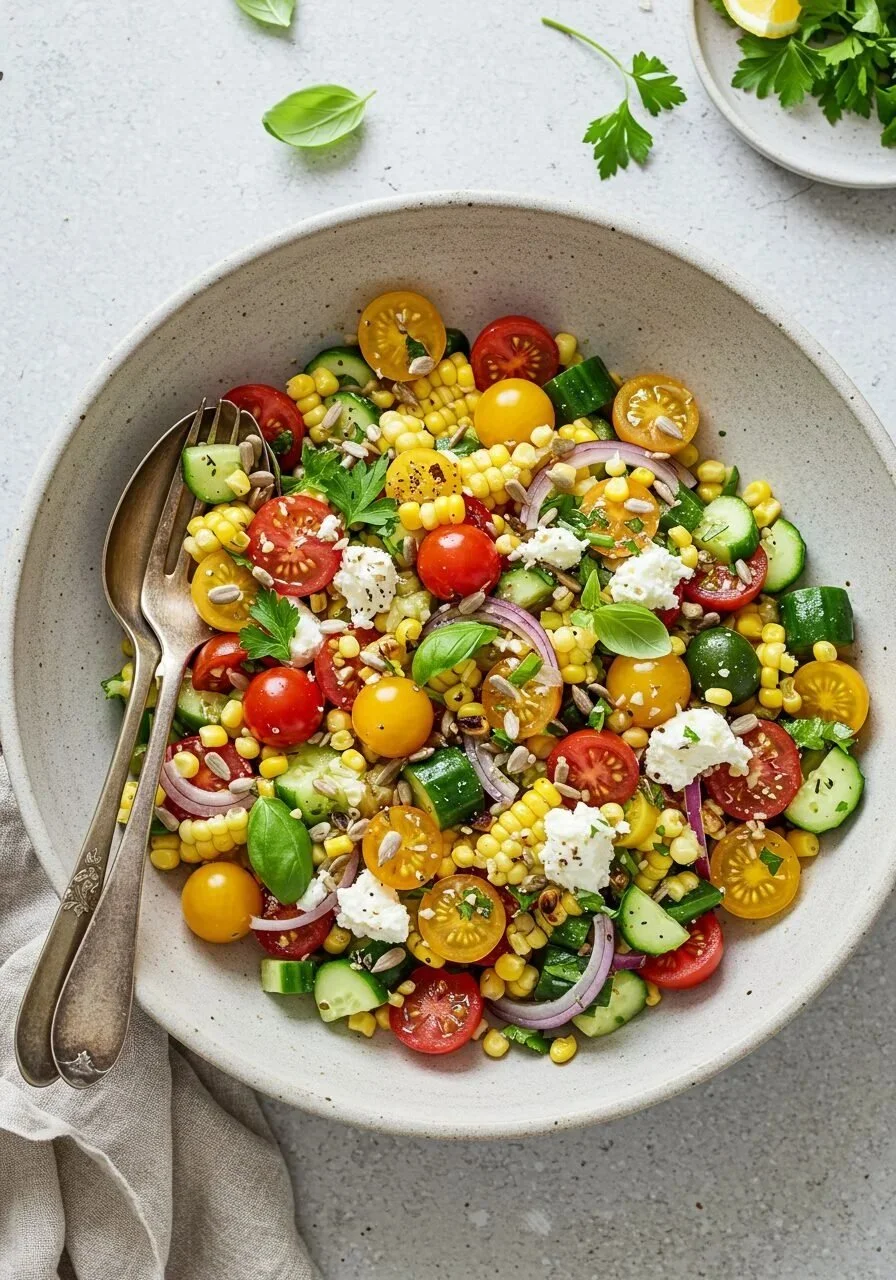
My Grandmother’s Trick
One thing I learned from my grandmother is that herbs can really bring a dish to life. For the Ultimate Summer Salad, I always add a generous handful of finely chopped fresh parsley or basil—about half a cup. The fresh herbiness comes alive when you mix it in just before serving.
Now let’s talk about the dressing, which is simple but key to bringing it all together. In a small bowl, whisk together three tablespoons of extra-virgin olive oil, three tablespoons of red wine vinegar, a clove of garlic finely minced, half a teaspoon of fine salt, and a quarter teaspoon of black pepper. If you’re feeling adventurous, a touch of red pepper flakes (about a quarter teaspoon) can introduce a slight kick.
When Things Don’t Go As Planned
I’ve had my share of kitchen mishaps while making this salad—like the time I accidentally used apple cider vinegar instead of red wine vinegar. While it’s best to follow the recipe, cooking is all about exploration as well! If you find the dressing tastes somewhat off, don’t be afraid to tweak it until it feels right.
Once everything’s prepped and ready, it’s time to bring it all together. In a large serving bowl, combine the halved cherry tomatoes, chopped cucumber, diced bell pepper, sliced snap peas, corn kernels, and sliced or diced red onion—about half of a small one should suffice. Gently fold the crumbled goat cheese and sunflower seeds into the mixture. It’s crucial to handle those delicate cheese pieces carefully so they maintain their fluffy texture.
The Best Part About This Dish
But the moment of truth comes right before you serve. Just pour the dressing over the salad, sprinkle in your chopped herbs, and toss it all together gently. You want just enough mingling to coat everything without turning the goat cheese into mush. Trust me; the creamy chunks are the best part.
Take a moment for the final taste check—feel free to adjust the seasoning with a bit more salt or pepper if needed. I usually serve it immediately because there’s something so refreshing about a bright summer salad straight after tossing. However, if you have any leftovers, they can be stored in the fridge for up to three days.
How to Make It Your Own
This is where the fun begins! You can personalize your Ultimate Summer Salad as much as you want. If you’re not a fan of goat cheese, feta or even cubes of avocado work well too. You can also add grilled chicken or chickpeas for added protein, making it a perfect main dish for lunch or dinner.
The possibilities are endless, and you can adjust to your preferences or what’s in season. The key is to keep it colorful and bright. I sometimes throw in some radishes for a peppery crunch, or even blue cheese for a bolder flavor profile.
Conclusion
In summary, this Ultimate Summer Salad is not only a feast for the eyes but also a canvas for your culinary creativity. The combination of juicy cherry tomatoes, crisp cucumbers, and creamy goat cheese creates a harmony of flavors and textures that will remind you of the best parts of summer.
If you’re itching to try out this salad recipe, I highly recommend checking out this detailed version, which might inspire some even more ideas! The next sunny day, gather your fresh ingredients, invite some friends over, and celebrate summer with this delicious dish.
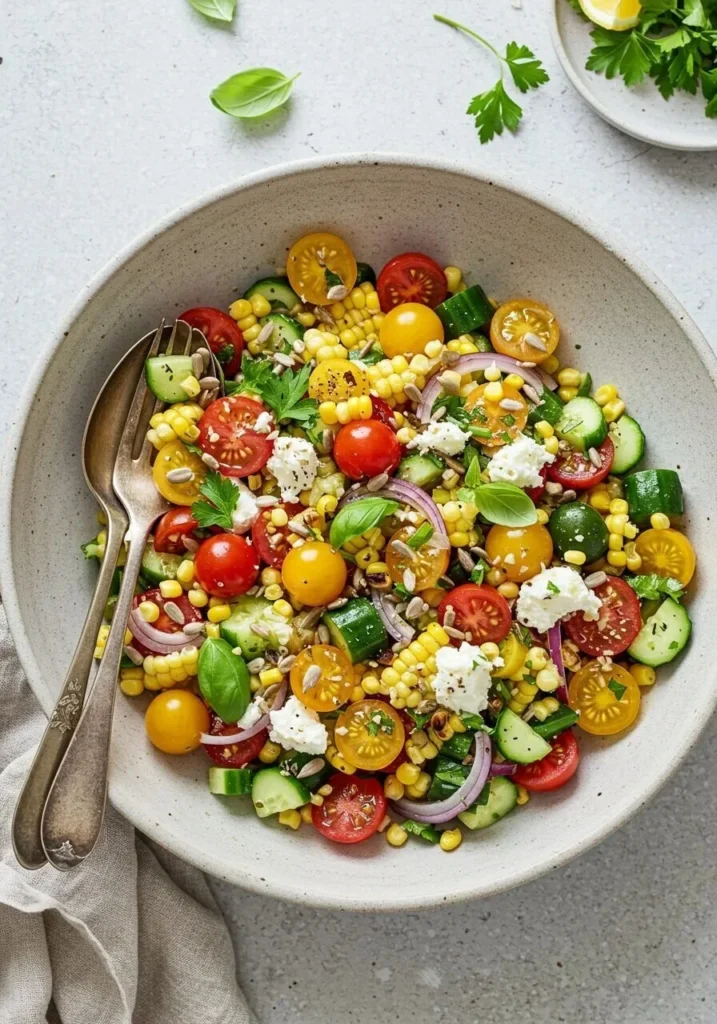
Ultimate Summer Salad
Ingredients
Method
-
In a large serving bowl, combine the halved cherry tomatoes, chopped cucumber, diced bell pepper, sliced snap peas, corn kernels, and sliced or diced red onion.
-
Gently fold in the crumbled goat cheese and sunflower seeds, handling the cheese delicately.
-
In a small bowl, whisk together all the dressing ingredients.
-
Pour the dressing over the salad just before serving.
-
Sprinkle in your chopped herbs and toss gently to combine.
-
Taste and adjust seasoning with more salt or pepper if needed.
-
Serve immediately for the freshest flavor.
Notes
2. Cinnamon Sugar Baked Peaches: Easy Summer Dessert Recipe
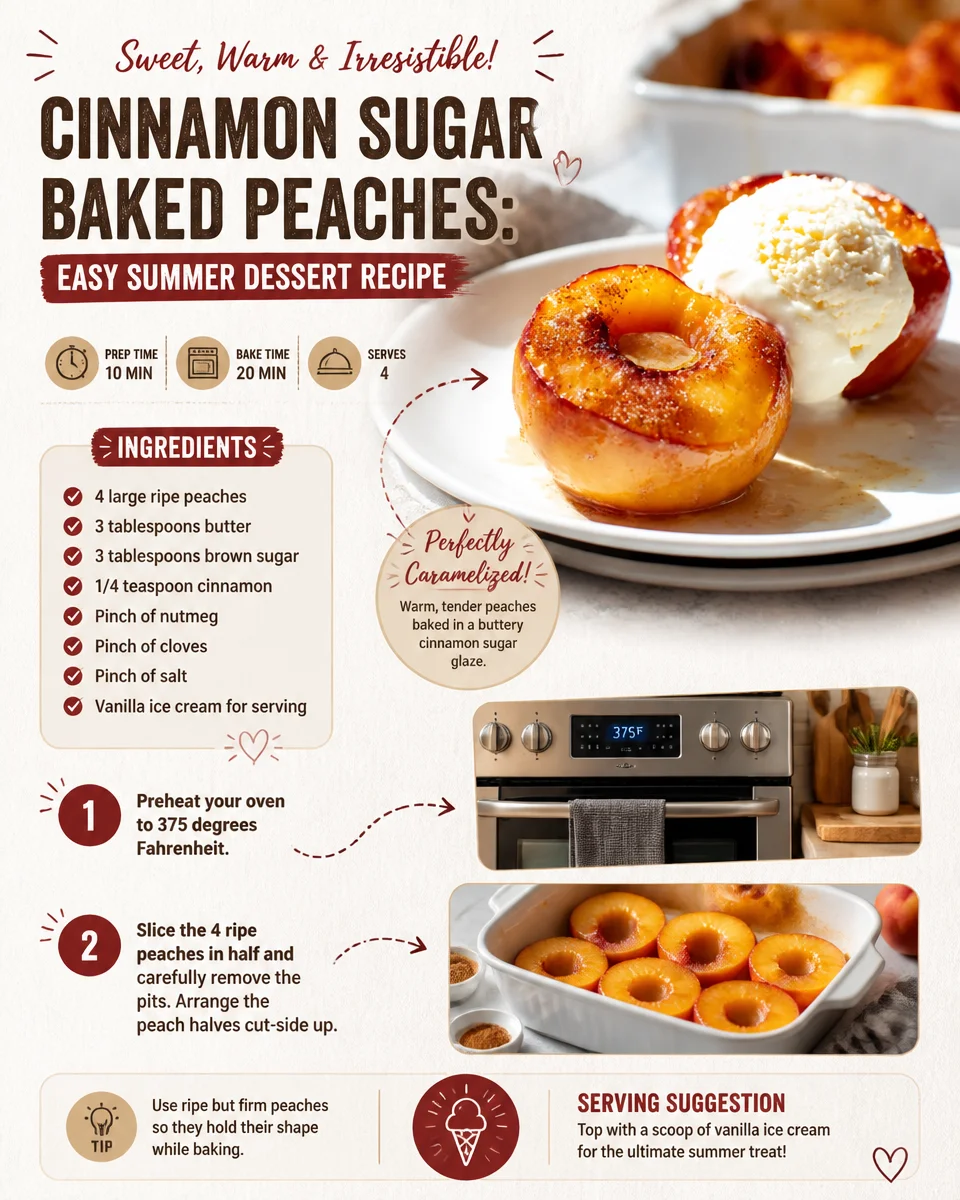
Discovering the Magic of Cinnamon Sugar Baked Peaches
There’s something undeniably enchanting about summer fruits, particularly peaches. When you bite into a perfectly ripe peach, the juicy sweetness bursts in your mouth, and the aroma is pure sunshine. I discovered a dessert that embodies this essence: Cinnamon Sugar Baked Peaches. This dish is simple yet stunning, a delightful way to celebrate summer and impress guests or simply indulge yourself after a long day.
The Ingredients That Make a Difference
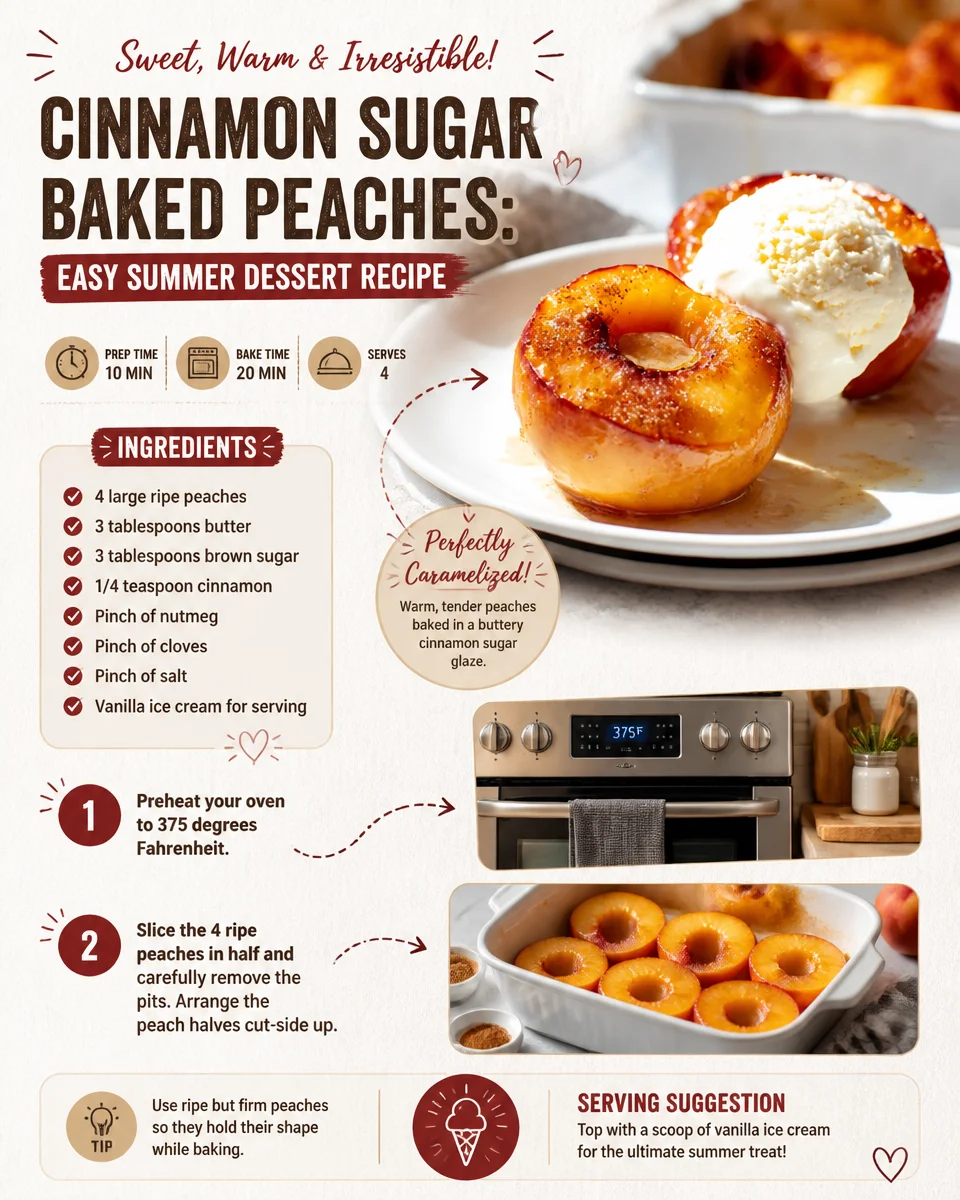
To whip up this dessert, you’ll need just a few ingredients, and most of them are pantry staples. You’ll want to grab four large ripe peaches—look for the ones that feel slightly soft to the touch; that means they’re ready to shine. Next, gather three tablespoons of butter, which adds richness and depth, along with three tablespoons of brown sugar for a caramel-like sweetness. You’ll also need a sprinkle of spices: 1/4 teaspoon of cinnamon, a pinch of nutmeg, cloves, and salt. These aromatic spices will elevate the flavors beautifully. And of course, the crowning glory: vanilla ice cream to serve alongside.
A Simple and Delicious Process
The first step is preheating your oven to 375 degrees Fahrenheit. While that’s warming up, get those peaches ready. I find slicing them in half and removing the pits a bit therapeutic. It’s like you’re opening up a little treasure chest of sweetness. Place the peach halves cut-side up on a large baking sheet, making sure they’re close but not touching.
Now the fun part—place about half a tablespoon of butter in the center of each peach half. I love watching the butter melt into the peach as it bakes, mingling with the natural juices and making everything richer.
In a small bowl, mix together the brown sugar, cinnamon, nutmeg, cloves, and salt. Just thinking about this concoction brings back summer memories of family gatherings where the scent of cinnamon drifted through the kitchen, swirling together with laughter and joy. Sprinkle this delightful mixture generously over the peaches; don’t be shy! It’s this sweetness that complements the tartness of the peaches perfectly.
Now, slide that baking sheet into your preheated oven! Bake the peaches for about 8 to 12 minutes. Pro tip: keep an eye on them towards the end of the baking time. You want them tender with a lovely golden brown top, but you don’t want to overdo it. It should feel like a soft hug when you poke them gently with a fork.
Knowing When It’s Done
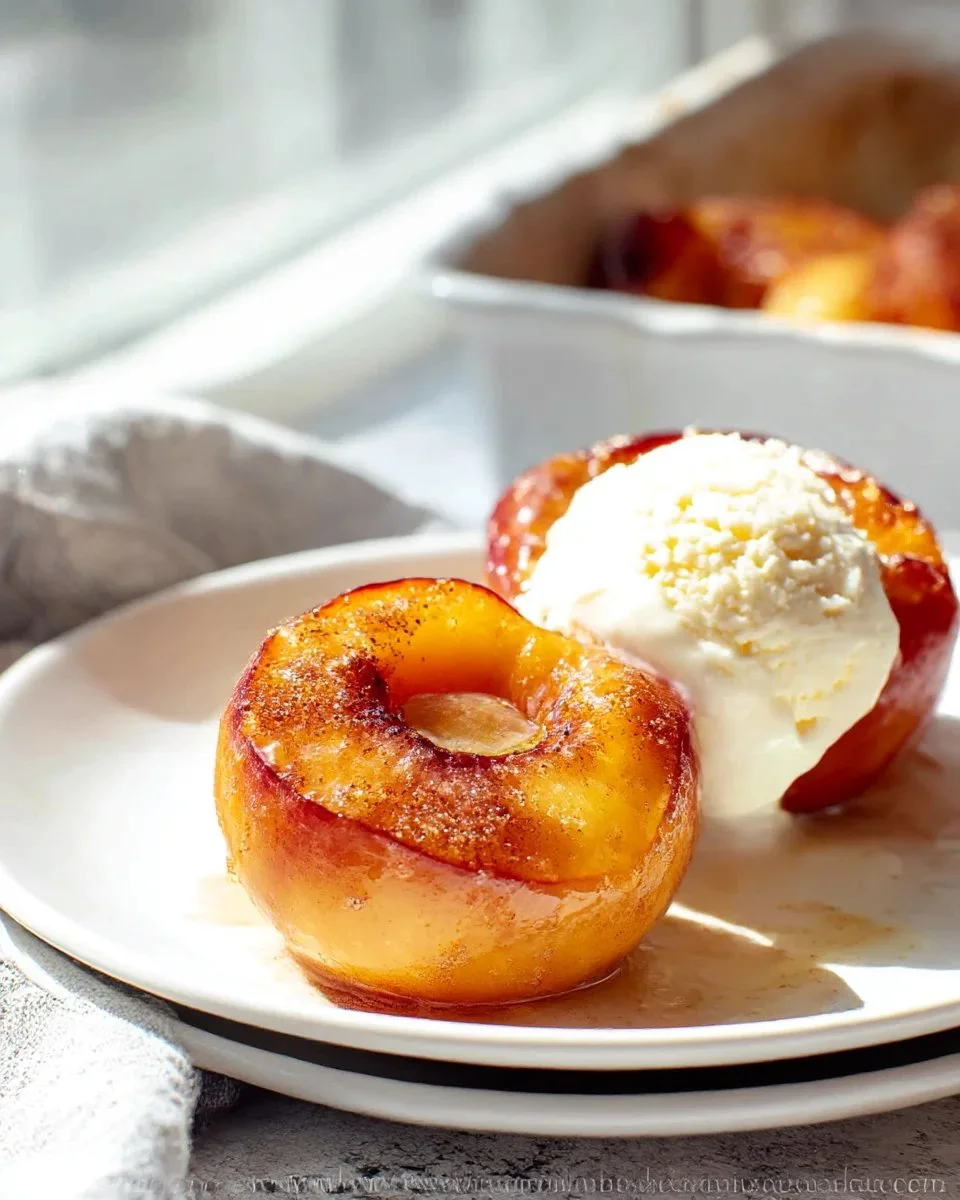
When the peaches are ready, take them out and let them cool for a couple of minutes. Don’t be tempted to dive in right away; those few moments of anticipation are worth it. If you’ve done it right, the peaches will be soft, the butter and sugars will have melded beautifully, and the aroma will fill your kitchen.
To serve, grab your favorite bowl and place a peach half or two in it. Then, top it off with a generous scoop of vanilla ice cream. You’ll want to let it melt slightly before taking the first spoonful. This combination of warm peaches and cold ice cream creates a symphony of flavors and textures that just screams summer!
What I Love About This Dessert
What makes this dessert so special is not just how easy it is, but also the memories it evokes. Growing up, my family often had baked desserts after dinner, and I remember watching my grandmother effortlessly prepare them. She always seemed to know the right touch for spices, and adding butter was her secret to making everything sing in the oven. This recipe takes me back to those nights, reminding me of love, warmth, and shared meals.
Personal Tips and Variations
While I adore this recipe as is, it’s also incredibly versatile. You can switch up the spices based on your preferences—try adding some cardamom for a richer flavor or a drizzle of honey for extra sweetness. If you’re feeling adventurous, toss in some chopped nuts like pecans or walnuts just before baking for a delightful crunch.
If you’re worried about leftovers (although they’ll likely be devoured quickly), store any extra baked peaches in an airtight container in the fridge. They taste great cold or reheated, and you could even use them in yogurt or over pancakes the next morning!
Enjoying Cinnamon Sugar Baked Peaches
This dish isn’t just a dessert. I often serve it at brunches with a side of granola, or as a light ending to a summer dinner with friends. Pair it with sparkling drinks, and you have a lovely evening ahead. Though I can hardly believe there’s ever any left, when that rare occasion arises, you can simply pop them in the fridge.
A Final Word
Creating Cinnamon Sugar Baked Peaches is more than following a recipe; it’s about cherishing the summer’s bounty and indulging in simple pleasures. Each bite takes me back to warm afternoons, family gatherings, and the simple joys of life. I encourage you to give it a try; trust me, once you taste those warm, buttery peaches, you’ll forever find them dancing in your dreams.
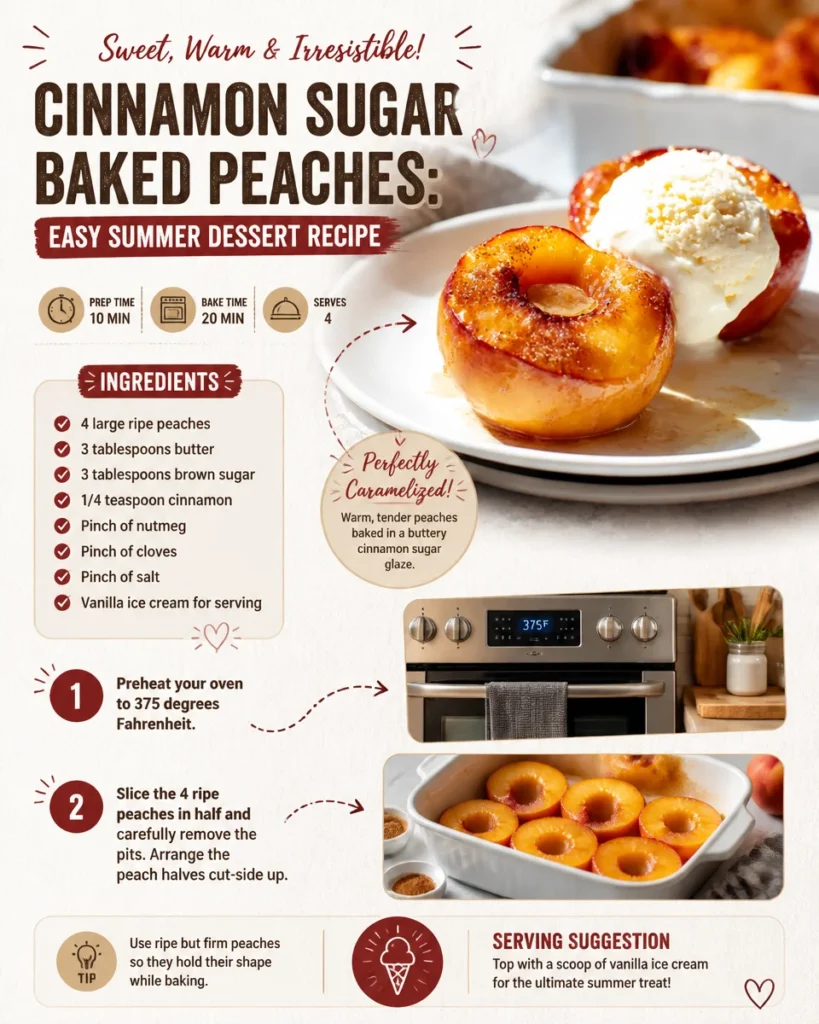
Cinnamon Sugar Baked Peaches
Ingredients
Method
-
Preheat your oven to 375°F (190°C).
-
Slice the peaches in half and remove the pits.
-
Place the peach halves cut-side up on a large baking sheet.
-
Place half a tablespoon of butter in the center of each peach half.
-
In a small bowl, mix together brown sugar, cinnamon, nutmeg, cloves, and salt.
-
Sprinkle the sugar mixture generously over the peaches.
-
Bake in the preheated oven for 8 to 12 minutes, watching closely towards the end.
-
Let the peaches cool for a couple of minutes before serving.
-
Serve warm peach halves with a scoop of vanilla ice cream.
Notes
3. Peach Bruschetta | Perfect Summer Appetizer or Sweet Breakfast Recipe
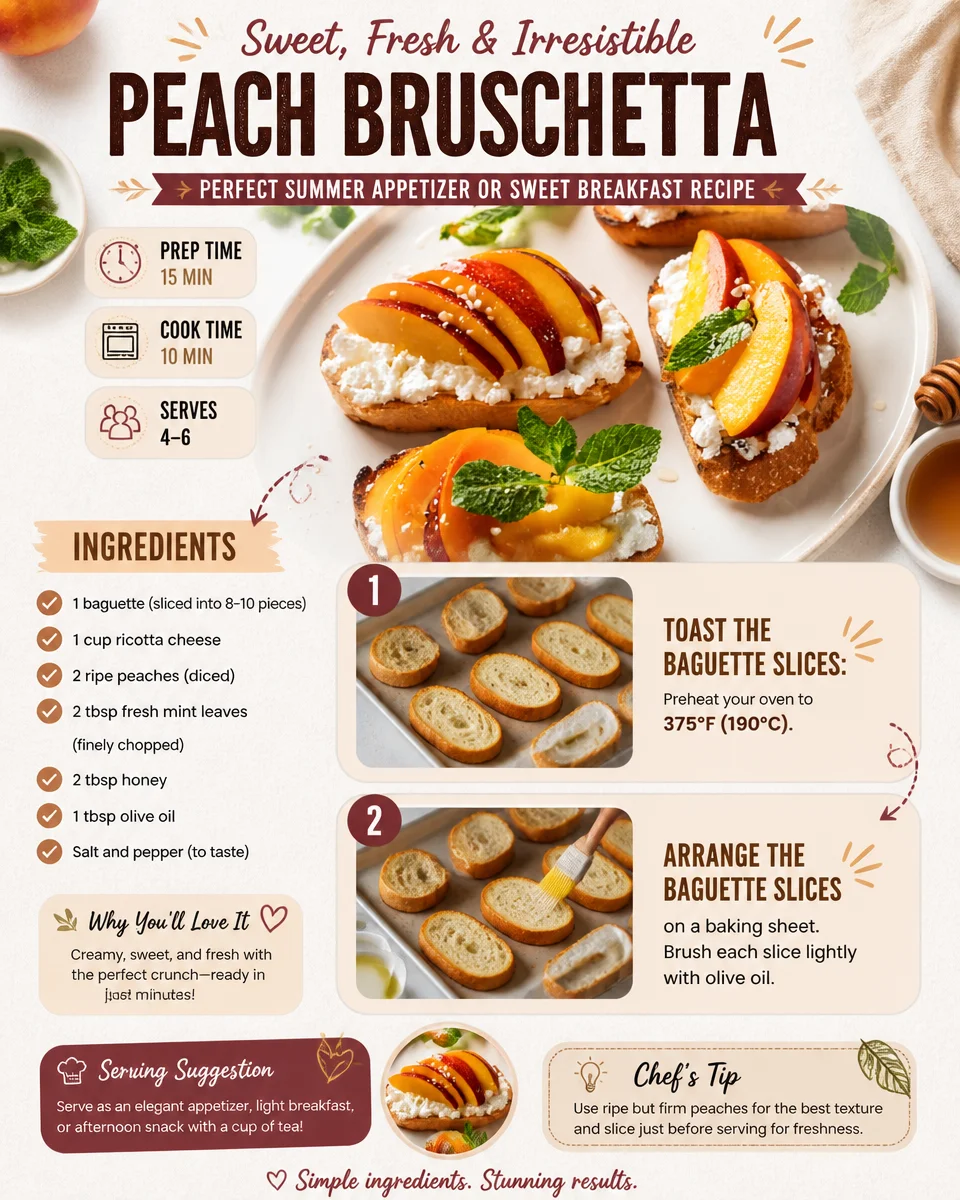
A Taste of Summer: Peach Bruschetta That Dazzles
There’s something magical about summer produce, isn’t there? When the weather gets warm, my thoughts turn toward fresh, vibrant flavors, and nothing captures that seasonal essence quite like peaches. Their sweet, juicy flesh makes them the perfect ingredient for a versatile dish that works as a light appetizer or a sweet breakfast treat. I stumbled upon this Peach Bruschetta recipe a couple of summers ago at a little food festival. I watched a local chef whip it up right before my eyes, and I knew I had to recreate it at home.
To bring this deliciousness into your kitchen, you’ll need a handful of simple ingredients: one baguette (you’ll slice it into about 8-10 pieces), a cup of creamy ricotta cheese, two ripe peaches (the riper, the better), fresh mint leaves, honey, olive oil, and just a pinch of salt and pepper. Sounds easy, right? Let’s dive into the process!
A Journey into Flavor
First things first, preheat your oven to 375°F (that’s 190°C for my friends across the pond). As the oven gets warm, slice your baguette into pieces about an inch thick. I love the crunchy exterior and the soft, airy interior that this bread offers; it’s like a little edible canvas for the peach topping.
Arrange those slices on a baking sheet, and here’s where I bring in my first little tip: brush each slice lightly with olive oil before they go into the oven. This not only helps them toast beautifully, but it adds that rich, earthy flavor we love. Now pop them in the oven for about 8 to 10 minutes—until they’re golden and crispy. There’s something incredibly satisfying about listening to them crackle and feel the aroma that starts to waft through your kitchen.
While They’re Toasting
Now, while you keep an eye on those baguette slices—because burnt bread is a tragedy in any kitchen—let’s turn our focus to the toppings. Grab those ripe peaches and start dicing them into small, bite-sized pieces. The color alone is spectacular; just looking at those hues of yellow and orange warms my heart.
Once you’ve got a cup of those diced peaches, toss them into a bowl with two tablespoons of finely chopped fresh mint leaves. If you’ve never tried this pairing, you’re in for a treat. Fresh mint transforms the dish, giving it a bright, refreshing kick. Season it all with a pinch of salt and pepper to enhance those natural flavors. It’s amazing how such little tweaks can elevate the taste profile of the whole dish.

Putting It All Together
With the baguette slices toasted and cooled slightly, begin assembling your bruschetta. Spread a generous layer of ricotta on each slice—the creaminess balances out the sweetness of the peaches beautifully. Now, top each piece with that delightful peach and mint mixture. Here’s where you can get a little creative: I love adding a drizzle of honey right over the top. It brings a gentle sweetness, contrasting perfectly with the savory notes of the cheese and the crunch of the bread.
As you plate these lovely little bites, you might want to think about how beautiful they look. A sprinkle of additional mint leaves can make them pop visually. Imagine serving these at a summer brunch or a picnic; they’re sure to impress.
Recreating the Magic
If you’ve got any leftovers (rare, but it can happen!), you can store them in an airtight container for a day or two. They may lose a bit of that crunchy texture, so it’s best to enjoy them fresh. However, if you have extra ricotta or peach topping, store them separately so you can whip them back together later.
Now, if you’re feeling a bit adventurous, there are also ways to mix things up. Swap the peaches for ripe strawberries or even figs, depending on what’s in season. Add a sprinkle of crumbled feta instead of ricotta for a tangy twist. The possibilities are endless, and that’s what makes this recipe so versatile!
My Little Tip for Perfection
Over the years, I’ve learned the shining secret to perfect bruschetta is all about timing. You want that baguette nice and crispy but remember to let it cool slightly before piling on the toppings. If it’s too hot, the ricotta will melt into a gooey mess, which isn’t what we’re after. Just give it a moment, and you’ll have a perfect base ready to be adorned with all those vibrant flavors.
The Best Parts About This Dish
What I love most about this Peach Bruschetta is it evokes memories of lazy summer days—those moments when everyone gathers around a table, sharing stories over delicious food. Each bite reminds me of sun-drenched afternoons and laughter mixed with the sounds of nature. Whether as an appetizer before a dinner party or as a sweet start to a leisurely breakfast, this dish brings that summertime joy to any occasion.
So the next time summer rolls around or if you find some gorgeous peaches at the market, I hope you give this recipe a try. It’s simple, packed with flavor, and a lovely way to celebrate the season. I promise, once you start making this, it will become a go-to favorite you’ll share with friends and family for years to come. And who knows, maybe it’ll inspire new traditions to cherish!
Peach Bruschetta
Ingredients
Method
-
Preheat your oven to 375°F (190°C).
-
Slice the baguette into pieces about an inch thick.
-
Brush each slice lightly with olive oil and arrange them on a baking sheet.
-
Toast in the oven for about 8 to 10 minutes, until golden and crispy.
-
Dice the ripe peaches into small, bite-sized pieces until you have about a cup.
-
In a bowl, toss the diced peaches with the chopped mint leaves, salt, and pepper.
-
Spread a generous layer of ricotta on each toasted baguette slice.
-
Top with the peach and mint mixture.
-
Drizzle with honey, and garnish with extra mint leaves if desired.
Notes
4. Juicy Steak Kebabs with Savory Marinade for Summer Grilling

Grilling Up Memories with Juicy Steak Kebabs
Summer always puts me in the mood for grilling. There’s something undeniably special about the scent of marinated steak sizzling over an open flame, the vibrant colors of fresh vegetables that pop on the skewers, and the laughter of friends gathered around the barbecue. These moments inspire me to whip up my favorite dish: Juicy Steak Kebabs with Savory Marinade for Summer Grilling. Let me share the love I have for this recipe and a few personal touches that make it stand out.
What I adore about this dish is its simplicity coupled with depth of flavor. You just can’t beat the marriage of juicy, tender steak with a savory marinade. Plus, kebabs come together so easily! When I’m entertaining and the sun is shining, this is my go-to recipe. It allows me to mingle with guests while my grill does all the heavy lifting.
The Secret Behind the Savory Marinade
The marinade is where the magic begins. Combining olive oil (or canola oil if that’s what you have) and soy sauce creates a rich base. Adding fresh lemon juice brightens the whole thing up, while red wine vinegar introduces a delightful acidity. I love to throw in Worcestershire sauce for that umami kick and a drizzle of honey for sweetness. It’s essential to balance these flavors!
Don’t forget the garlic! Two cloves of minced garlic bring in that aromatic touch. For added spice, I generally toss in freshly ground black pepper and a pinch of salt. You can really play with the acidity by using lime juice instead of lemon, or switching red wine vinegar for white wine vinegar or apple cider vinegar if that’s what you prefer.
Another tip—if you love that punchy flavor, consider adding more garlic or even a bit of Dijon mustard to the mix. It’s all about layering flavors, which is something I learned from my grandmother, who always said, “Seasoning is your best friend in cooking.”
Preparing the Steaks and Veggies
Now comes the fun part: selecting the perfect cut of beef. For these steak kebabs, I usually opt for 1.5 pounds of sirloin steak, which has a great balance of tenderness and flavor. Ribeye or flank steak could work just as wonderfully if you’re looking for alternatives. The key is to cut the steak into 1¼ inch pieces for even cooking—trust me, this matters.
As I prepare the skewers, I love to mix in a variety of colors for a beautiful presentation. I typically use about two cups of button or cremini mushrooms, halved or left whole if they’re small, alongside two cups of bell peppers. I often choose a mix of red, yellow, and green for that vibrant summer feel. Zucchini cubes or cherry tomatoes are excellent substitutes if you want to switch it up.
Don’t forget to include a large red onion, diced into similar-sized chunks! The caramelization of the onion when grilled adds a fantastic depth of flavor.
Marinating for Flavor Heaven
Once everything is prepped, it’s time for the marinade to work its magic. I suggest placing the steak pieces, veggies, and marinade in a large resealable bag or a bowl, giving everything a gentle toss to ensure everything is coated evenly. I usually let this sit for at least an hour. However, if you can manage to let it marinate for several hours or even overnight, you’ll be greatly rewarded with a much richer flavor profile.
While the skewer pieces soak up that savory goodness, soak your wooden skewers in water to prevent them from burning on the grill. It’s a small step that goes a long way in preserving your delicious kebabs.
Grilling to Perfection
When the time comes to grill, prepare your grill over medium-high heat—this is key for that seared flavor. Thread the marinated steak and veggies onto the skewers, alternating between the steak and the colorful vegetables. It’s a visual delight as much as it is a culinary one.
Place the skewers on the grill and cook them for about 10-15 minutes, turning occasionally, until the steak reaches your desired level of doneness. I prefer them medium-rare, which generally means an internal temperature of around 130-135°F. And nothing beats that satisfying sound of sizzling meat against the grill grates!
One thing I love to do is brush the skewers with any leftover marinade during the final minutes of grilling. It burns slightly, creating a sticky glaze that enhances the kebab experience. If you’re a fan of heat, now’s a good time to sprinkle a bit of red pepper flakes for that extra kick.
What to Serve it With
Despite the flavorful intensity of the kebabs, I usually complement them with something light, like a simple cucumber and tomato salad tossed with a bit of olive oil and vinegar. It balances the richness of the steak perfectly. If you’re feeling a bit more indulgent, a side of creamy garlic sauce can elevate the whole meal experience and bring a delightful creaminess alongside.
If you’re lucky enough to have leftovers (which rarely happens), you can store them in an airtight container in the fridge for a couple of days. They make for excellent additions to salads or wraps!
Making It Your Own
One of the best things about kebabs is how adaptable they are. If you want a vegetarian version, you can easily swap the steak for hearty mushrooms or even marinated tofu. You can also experiment with different spices; maybe you love Mediterranean flavors? Give a sprinkle of oregano and some feta cheese a try!
I remember one summer trying a teriyaki-inspired marinade, and it was an absolute hit. The kebabs were sweet and savory, and they disappeared before I could even grab a second helping!
Conclusion
These Juicy Steak Kebabs with Savory Marinade for Summer Grilling are not just a meal, they are a celebration of summer, friendship, and togetherness. They are my summertime staple, and each bite tells a story of laughter and good times. If you’re interested in learning how to craft the best marinade for your kebabs, I recommend checking out this amazing resource for more inspiration: Steak Kabob Marinade (Easy 10 Minute Prep!) – House of Nash Eats. So gather your friends, fire up the grill, and indulge in the flavors of summer!
Juicy Steak Kebabs
Ingredients
Method
-
In a large resealable bag or bowl, combine the ingredients for the marinade and mix well.
-
Add the sirloin pieces and veggies to the marinade, ensuring everything is coated evenly. Let it marinate for at least one hour, or ideally several hours or overnight in the fridge.
-
Soak wooden skewers in water to prevent burning during grilling.
-
Preheat the grill to medium-high heat.
-
Thread the marinated steak and veggies alternately onto the skewers.
-
Grill the skewers for about 10-15 minutes, turning occasionally, until steak reaches desired doneness.
-
Brush the skewers with leftover marinade during the last few minutes of grilling.
-
Optional: Sprinkle with red pepper flakes for added heat before serving.
Notes
5. Savory Garlic Parmesan Chicken Skewers for Effortless Summer Grilling
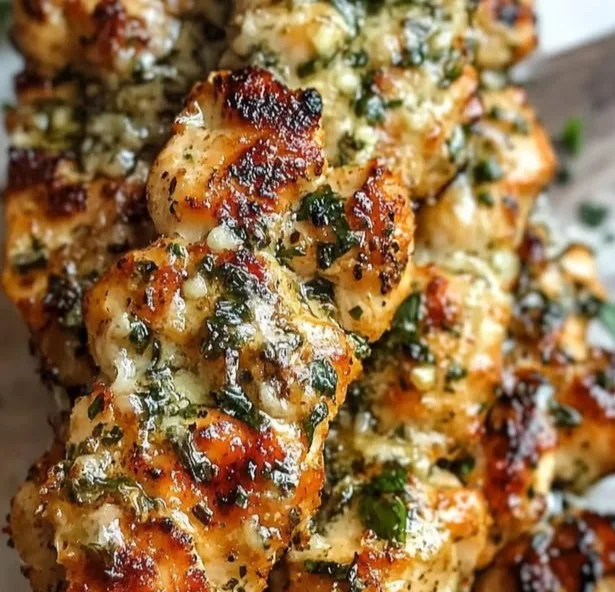
The Secret Behind Perfect Savory Garlic Parmesan Chicken Skewers for Effortless Summer Grilling
When the summer sun shines down and the evenings stretch long, there’s nothing quite like a backyard barbecue with friends and family. One dish I absolutely crave during those warm months is my Savory Garlic Parmesan Chicken Skewers. They’re not just easy to make; they pack a punch of flavor that makes you want to go back for seconds. So grab your skewers, some fresh ingredients, and let’s dive into why this recipe has earned a special place in my heart.
How I Discovered This Recipe
A few summers ago, during one of our family reunions, I first tasted something similar. My cousin had whipped up a batch of chicken skewers marinated in garlic, parsley, and that decadent twist of parmesan. I remember taking the first bite, feeling a delightful burst of savory goodness dance on my tongue. It was love at first taste! Since then, I’ve made a few tweaks to the recipe, and I’m excited to share my version with you.
The Ingredients That Make It Shine
To get started, you’ll need some chicken—around two pounds of tenders, thighs, or breasts work great for skewering. The chicken is blanketed in a heavenly marinade, which starts with olive oil to help the seasonings adhere. You’re going to need a stick of butter to create that rich, mouthwatering base along with eight to ten cloves of minced garlic because, let’s be honest, garlic is always a good idea. A tablespoon of hot sauce adds a subtle kick, while a sprinkle of red pepper flakes ensures your bites have just the right amount of heat.
Of course, what’s garlic without fresh herbs? I love adding a third of a cup of minced parsley for its vibrant color and freshness. To finish it off, we’ll have half a cup of grated parmesan cheese, which turns this dish into something truly unforgettable. Finally, a bit of paprika for smoky depth, garlic powder to amplify that delicious garlic flavor, onion powder for sweetness, and just a hint of salt and pepper round out the flavor profile perfectly.
When you gather these ingredients, take a moment to admire them—the fresh parsley, the bright chicken, the smell of garlic wafting through the air… it’s the promise of a fantastic meal.
The Process: Prepping Your Skewers
Now, let’s get into the fun part: preparation. Start by making the marinade. Melt the butter in a saucepan over low heat, then stir in the minced garlic, olive oil, hot sauce, red pepper flakes, paprika, garlic powder, onion powder, salt, and pepper. This combination creates a fragrant, rich concoction that will make your kitchen smell heavenly.
Once the butter-garlic mixture is ready, let it cool for just a moment before pouring it over the chicken in a large bowl. Toss the chicken well to ensure every piece is coated in that savory marinade. This step is crucial; you want every bite packed with flavor! After that, cover the bowl and let the chicken marinate in the refrigerator for at least an hour—if you can wait, I highly recommend letting it sit overnight. Trust me, it makes a difference.
Getting the Texture Just Right
When you’re ready to grill, soak your skewers in water for about thirty minutes to prevent them from burning on the grill. Now, onto skewering! Assemble the marinated chicken onto the skewers, leaving a little space between pieces to ensure even cooking. I like to sprinkle parmesan cheese on the skewers before they hit the grill. As they cook, the cheese melts and creates that irresistible crust that everyone loves.
Preheat your grill to medium-high heat, and once it’s ready, place those beautifully assembled skewers on the grates. The sizzling sound as they hit the grill is music to my ears! Cook the skewers for about 8-10 minutes per side, or until the chicken reaches an internal temperature of 165°F. The goal here is perfectly cooked chicken that’s juicy on the inside and slightly charred on the outside.
What to Serve It With
While the skewers are grilling, you can prepare some delicious sides. A fresh Greek salad complements the savory flavors beautifully. The crisp cucumbers, juicy tomatoes, and tangy feta create a perfect contrast to the rich chicken. And let’s not forget about some lovely pita bread or a side of grilled veggies, which would be a fantastic addition.
I’ve also found that serving these skewers with a zesty dipping sauce, such as a garlic aioli or even a cool tzatziki, takes things to the next level. It’s all about layering flavors and textures for an unforgettable meal.
Making It Work for Busy Weeknights
If you think about it, this dish isn’t just for summer barbecues. I often prep these skewers ahead of time when I know I’ll have a busy week. Once you marinate the chicken, just pop the skewers in the fridge, and when you’re ready to cook, it takes only minutes on the grill. Quick, easy, and nutritious—what more could you want?
The Best Part About This Dish
After the skewers are done cooking, the aroma that fills the air is simply mouthwatering. The first bite is always the best; it’s a satisfying mix of crispy, cheesy, and tender chicken that leaves you wanting more. Plus, they’re perfect for sharing! Whether it’s a backyard gathering or a quiet dinner at home, these chicken skewers are bound to impress.
And if you happen to have leftovers (which is rare), don’t you worry! You can store them in an airtight container in the fridge for up to three days. I’ve even repurposed leftover skewers into salads or wraps for a quick meal the next day.
Conclusion
As summer rolls in, there’s nothing more rewarding than a delicious plate of Savory Garlic Parmesan Chicken Skewers sizzling on the grill. It’s a recipe that captures all of my favorite summer memories and continues to be a staple in my culinary adventures. With just a handful of quality ingredients, you’ll create something that feels restaurant-worthy right from your backyard. For those of you looking for more garlic and parmesan inspiration, be sure to check out this amazing recipe for Lemon Pepper Parmesan Chicken Skewers with Garlic Herb Butter to add to your grilling repertoire! Happy grilling!
Savory Garlic Parmesan Chicken Skewers
Ingredients
Method
-
Melt the butter in a saucepan over low heat. Stir in the minced garlic, olive oil, hot sauce, red pepper flakes, paprika, garlic powder, onion powder, salt, and pepper.
-
Let the butter-garlic mixture cool slightly before pouring it over the chicken in a large bowl. Toss the chicken to ensure it is evenly coated.
-
Cover the bowl and let the chicken marinate in the refrigerator for at least 1 hour, preferably overnight.
-
Soak the skewers in water for about 30 minutes to prevent them from burning on the grill.
-
Assemble the marinated chicken onto the skewers, leaving a little space between pieces.
-
Sprinkle parmesan cheese over the skewers before grilling.
-
Preheat your grill to medium-high heat and grill the skewers for about 8-10 minutes per side, or until the chicken reaches an internal temperature of 165°F.
Notes
6. Summer Pasta Salad with Baby Greens
A Summer Delight
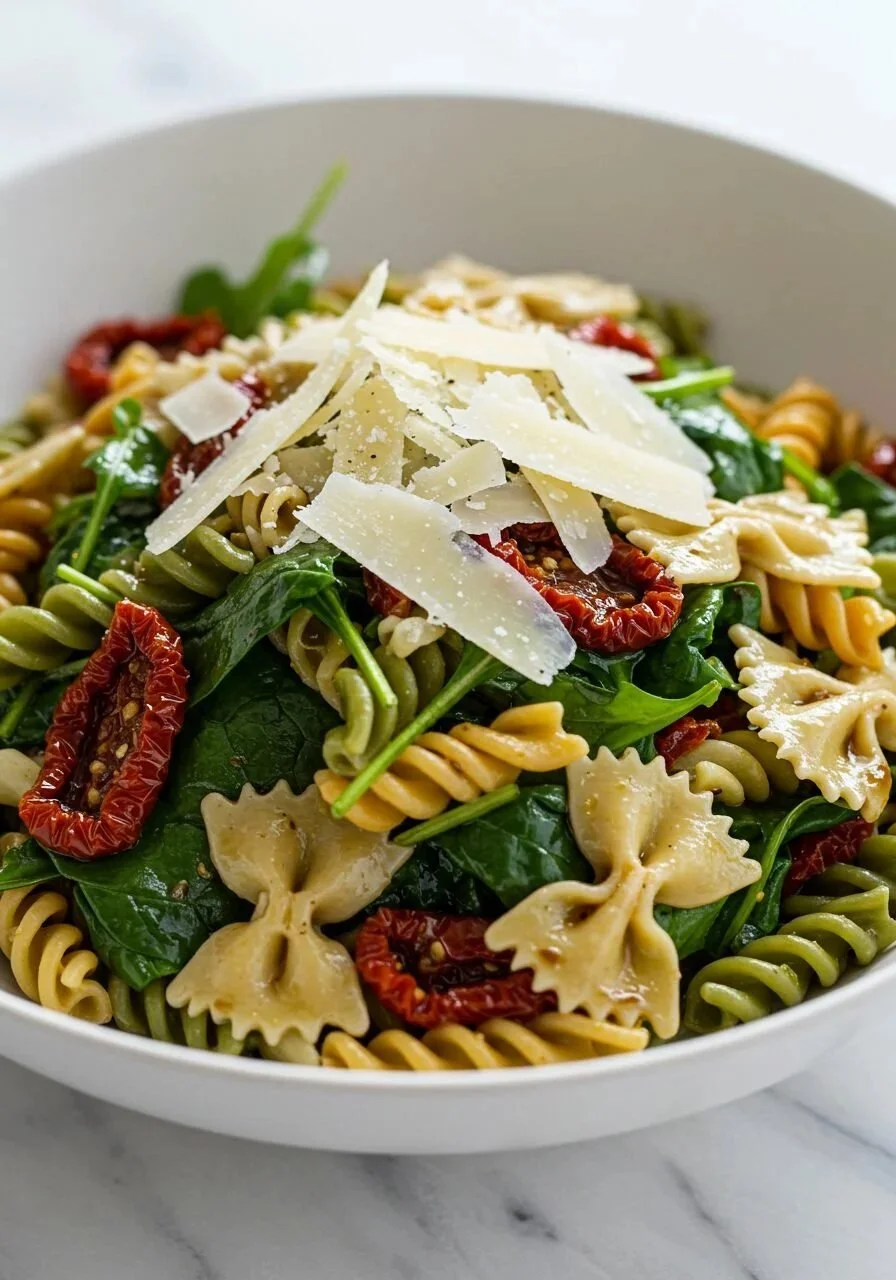
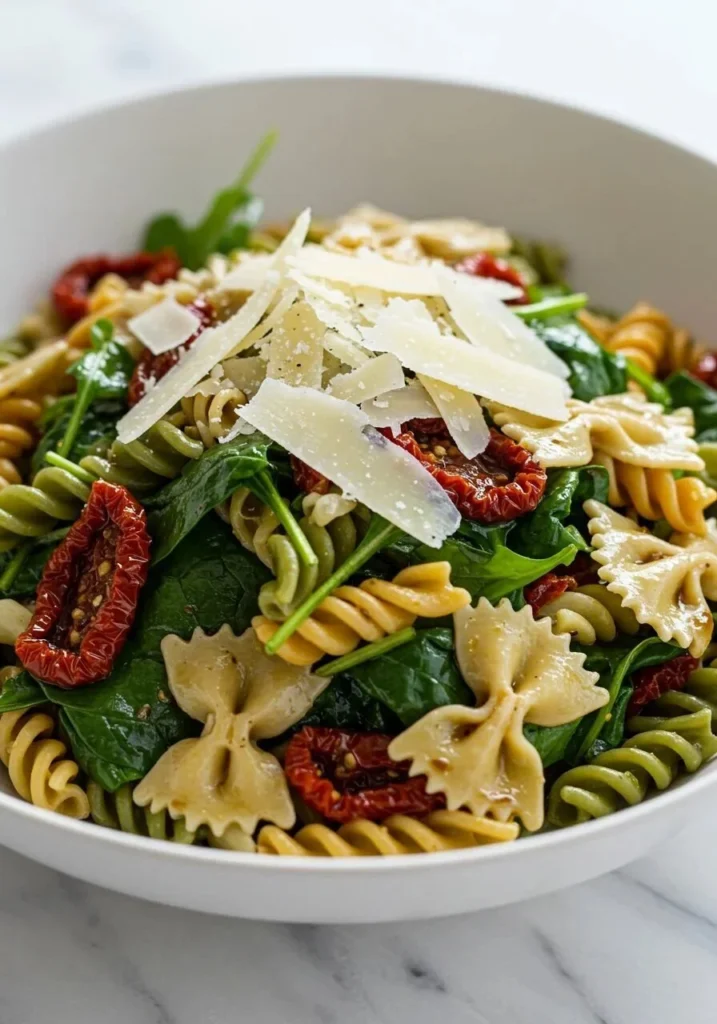
There’s something incredibly refreshing about a vibrant summer pasta salad that captures the essence of the season. With warm days and balmy evenings, I often find myself gravitating towards lighter, bright flavors that harmonize effortlessly. One recipe that never fails to excite my taste buds is Summer Pasta Salad with Baby Greens. It’s not just a salad; it’s a celebration of everything glorious about summer.
This pasta salad is perfect for those sunny picnics, lunchboxes, or simply for having a light dinner on the patio. Picture a generous bowl filled with a medley of colors and textures, and you’ll know just how satisfying it is.
The Ingredients You’ll Need
I remember the first time I made this salad; I was jolted by how simple yet delicious it turned out. For the base, you’ll need 5 ounces of your preferred gluten-free or wheat pasta. I usually opt for something with a little shape, like fusilli or farfalle, to hold the dressing and mix-in ingredients beautifully.
Next, I like to add 3 ounces of a baby arugula and baby spinach mix—roughly four cups—because who doesn’t love that peppery bite of arugula combined with the gentle sweetness of baby spinach? Then, to enhance the flavor, I incorporate about 1/3 cup of sun-dried tomatoes, cut thinly, followed by 2 tablespoons of capers that have been drained for a salty brininess.
Don’t forget the magic dressing—just 1.5 tablespoons of extra-virgin olive oil and 2 tablespoons of balsamic vinegar. A little salt and fresh pepper rounds things out, along with a finishing touch of 2 tablespoons of freshly shaved Parmigiano Reggiano. Seriously, that cheese is the pièce de résistance, elevating everything in the dish.
Cooking the Pasta
The first step in bringing this salad to life is to cook the pasta. I begin by bringing a large pot of salted water to a rolling boil. Once it’s bubbling, I toss in the pasta and let it cook until al dente. This usually takes just about 7 to 9 minutes, depending on the type you choose.
When it’s done, I drain it, but here’s a little tip: it’s essential to rinse the pasta under cold water right afterward. This not only cools it down quickly but also stops the cooking process, ensuring that the pasta doesn’t turn mushy. We want it firm and ready to embrace those delicious ingredients later.
Mixing It All Together
Now comes the equally exciting part—combining everything. In a large bowl, I start with the cooled pasta. Then, I introduce the glorious baby greens—arugula and spinach—sprinkling them gently over the pasta. The sun-dried tomatoes and capers then follow suit, clinging to the greens and pasta like best friends at a summer party.
Drizzling the olive oil and balsamic vinegar over everything feels like a small celebration—just the right amount to coat those greens without drowning them. Seasoning with salt and pepper is vital, and I always taste it as I go to ensure it’s just perfect. The key to this dish is the gentle tossing; it melds the flavors without breaking apart the delicate greens.
Finishing Touches and Serving
Just before serving, I take some freshly shaved Parmigiano Reggiano and sprinkle it generously on top. The sight of that lovely cheese against the greens is almost enchanting, and the creamy flavor it adds is frankly irresistible.
This dish is incredibly versatile! Sometimes, I throw in some grilled chicken or roasted chickpeas for extra protein. The sun-dried tomatoes could be swapped with roasted red peppers if you want to try a different take. And if you’re feeling adventurous, throwing in some fresh herbs like basil or even small chunks of mozzarella can give this salad a refreshing twist.
Storage and Leftover Goodness
If you’re like me and tend to make a generous batch, storing leftovers is easy. Simply transfer any uneaten salad to an airtight container and pop it in the fridge. The flavors continue to develop, making it even tastier the next day. Just a tip: the salad might need a little refreshing drizzle of olive oil or an extra dash of vinegar when serving it chilled again, so don’t forget that!
A Few Things I’ve Learned
Over the years, I have discovered a few things that definitely help make this dish shine. First, do not skimp on the quality of your olive oil or balsamic vinegar—they’re the stars of the dressing. If you can, seek out a high-quality extra-virgin olive oil that you enjoy drizzling on salads by itself.
Also, if time permits, let the salad sit for about 15 minutes before serving. This allows all those marvelous flavors to meld together beautifully. I love plopping this salad into the center of the table during summer gatherings; it’s colorful, inviting, and so delicious!
Conclusion
The Summer Pasta Salad with Baby Greens is such a stunning dish, not just for the palate but for the eye as well. I hope you give it a try during one of those sunny afternoons when cooking seems like too much effort, but something light and tasty is exactly what you need. Whether you’re enjoying it as a quick weeknight dinner or sharing it with friends at a picnic, it’s bound to impress.
If you’re interested in more variations or inspiration for pasta salads, you might also enjoy this Summer Pasta Salad with Baby Greens or this delightful Rotini Pasta Salad with Mixed Greens. Cooking is all about finding joy in simple moments, and this dish encapsulates just that!
Summer Pasta Salad with Baby Greens
Ingredients
Method
-
Bring a large pot of salted water to a rolling boil.
-
Add the pasta and cook until al dente, about 7 to 9 minutes.
-
Drain the pasta and rinse it under cold water to stop the cooking process.
-
In a large bowl, combine the cooled pasta with the baby greens.
-
Add the sun-dried tomatoes and capers.
-
Drizzle the olive oil and balsamic vinegar over the salad.
-
Season with salt and pepper, and toss gently to combine.
-
Sprinkle freshly shaved Parmigiano Reggiano on top just before serving.
Notes
7. Easy 20-Minute Summer Squash Pasta Skillet
A Quick and Delicious Summer Meal
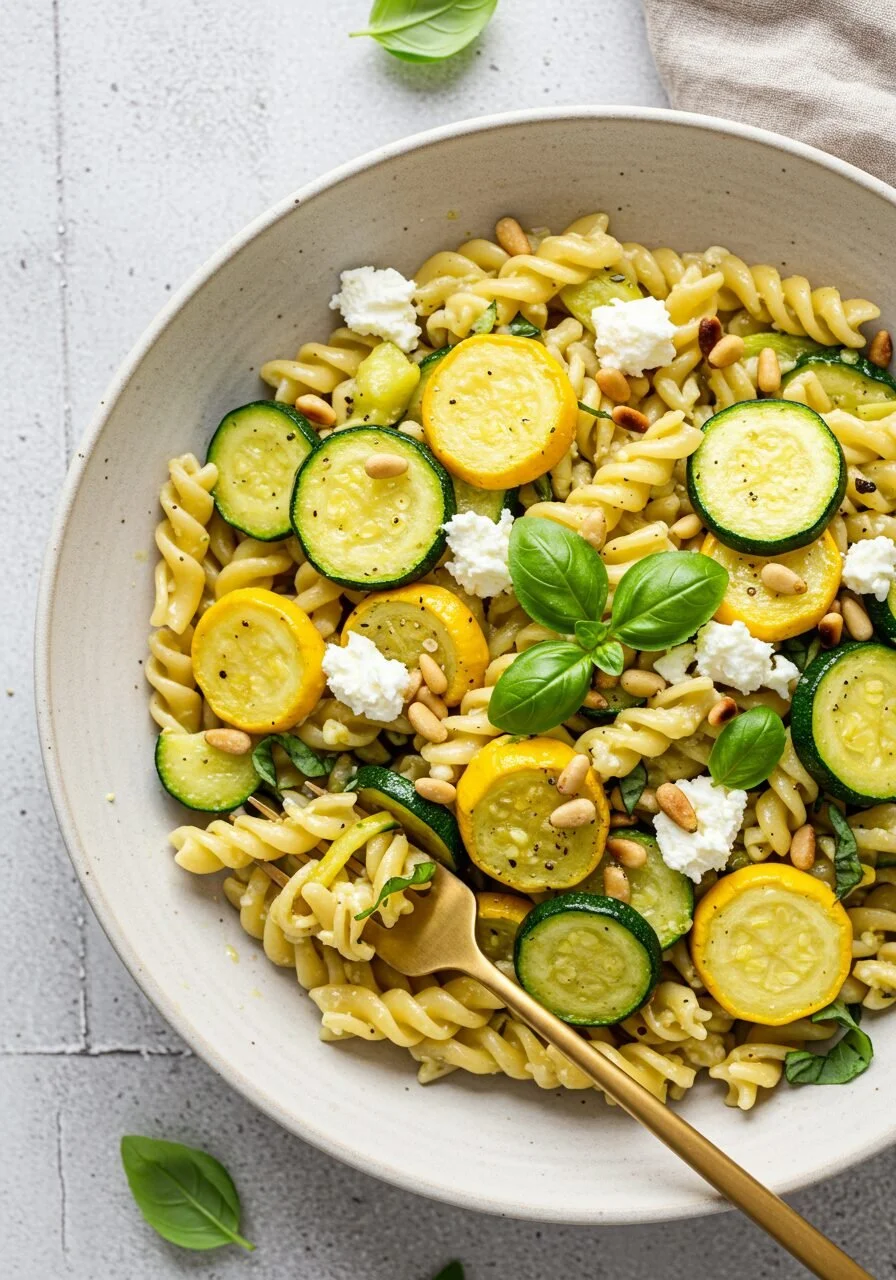
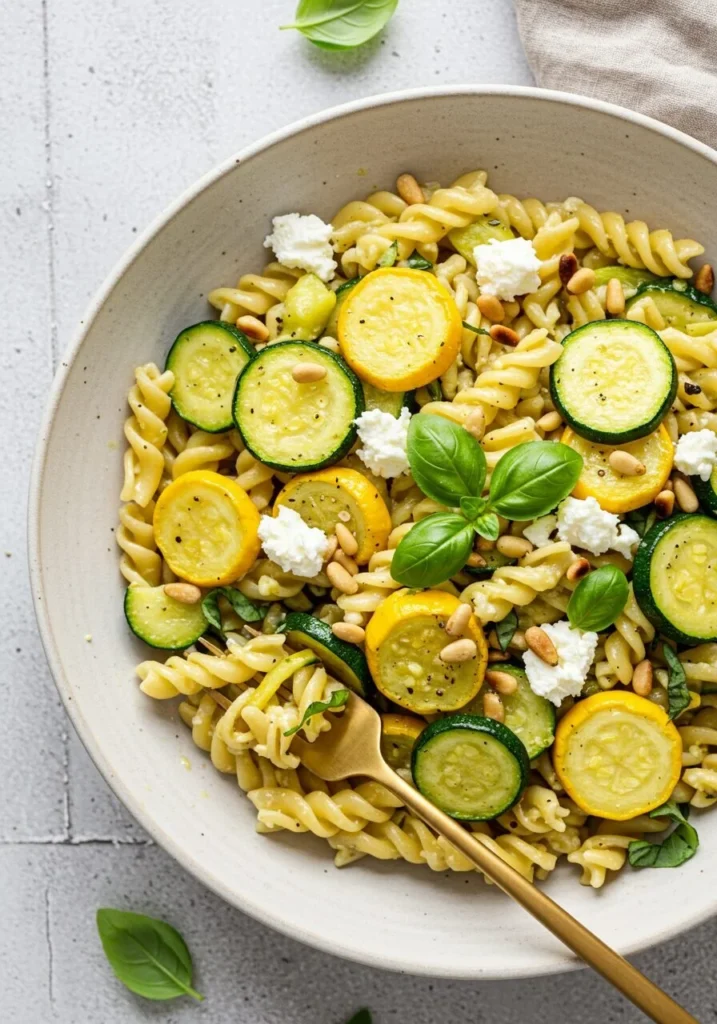
There’s something about summer that brings out the best in fresh produce, and one of my ultimate favorites is summer squash. Just the thought of slicing into a ripe zucchini or a bright yellow summer squash makes my mouth water. When the temperatures rise and cooking feels like a chore, I find myself constantly reaching for simple, flavorful dishes that can be prepped and on the table in no time. That’s why I’m excited to share with you my recipe for an Easy 20-Minute Summer Squash Pasta Skillet.
This dish has quickly become a go-to during those warm, busy evenings when you want something wholesome without spending hours in the kitchen. Let me walk you through how to make it, and maybe share a bit of my love for it along the way.
The Secret Behind Perfect Easy 20-Minute Summer Squash Pasta Skillet
To start, the star of the show here is the pasta. You can use about eight ounces of your favorite kind—whether that’s Trottole, Rotini, or even a classic Penne. I tend to lean toward Orecchiette; those little ear-shaped pieces hold onto just the right amount of sauce. While you’re waiting for your pasta to cook in some salted boiling water, take a moment to gather the rest of the ingredients that make this dish sing.
You’ll also need a quarter cup of pine nuts for that nutty crunch, five tablespoons of unsalted butter, and two garlic cloves, minced to release their fragrant magic. Then there are the squashes; I like to use one small zucchini and one small yellow summer squash, sliced into rounds. Don’t forget to have some kosher salt and freshly cracked black pepper handy for seasoning. And at the end, we’ll crumble in about four ounces of goat cheese (Chèvre), which adds a creamy tang, and toss some fresh basil leaves for that garden-fresh aroma.
Building Flavors in a Few Easy Steps
Once your pasta is al dente, remember to reserve half a cup of that starchy pasta water before draining it. Trust me, that water will become your best friend in achieving a perfectly saucy finish.
While the pasta is cooking, grab a small dry skillet and toss in those pine nuts. Toast them over medium-low heat for about five to six minutes, stirring frequently until they’re golden and fragrant. This step amplifies their flavor beautifully, giving your dish that little extra oomph.
Next, in a larger skillet, heat your butter over medium heat. Don’t rush this part! Whisk it constantly until it turns golden and starts to form those lovely brown bits. That nutty flavor is exactly what we want. Once the butter is ready, add in your minced garlic and squash rounds. Cook for about five minutes, just until the zucchini softens up and everything starts to smell heavenly. Season this mixture with salt and pepper, letting those flavors meld together.
Bring It All Together
When the pasta is ready, add it to the skillet with the squash. Lower the heat to a nice simmer and toss everything together until the pasta is well coated with that buttery goodness. This brings such a warmth and comfort to the dish.
Now for the magic touch: crumble in your goat cheese. As you toss everything together, the cheese should start to melt slightly, creating a creamy coating over the pasta and vegetables. If it seems a little dry at this point, just add some reserved pasta water, one tablespoon at a time, to get your desired sauciness. Trust me, this step is crucial because it turns the dish from good to utterly divine.
Before serving, don’t forget to stir in those toasted pine nuts and fresh basil leaves. The contrast of textures and the burst of fresh flavor from the basil takes this simple skillet meal over the top.
When Things Don’t Go As Planned
It happens to all of us, right? Maybe your pasta is a bit too mushy, or you’ve miscalculated the cooking times. If your squash is slightly overcooked, don’t stress. The beauty of this dish is its adaptability. You can always add extra veggies or a quick splash of fresh lemon juice for bright acidity. You could even swap in different cheeses if goat cheese isn’t your thing—feta or ricotta can work nicely too.
Making It Your Own
This recipe is incredibly flexible, which is part of what I love about it. Want to throw in some cherry tomatoes? Go for it! Perhaps you have spinach or kale to toss in at the end for some greens. This dish can easily accommodate whatever you have on hand. And for those busy weeknights, consider prepping your ingredients ahead of time. Slice your squash and toast your pine nuts earlier in the day so when dinner rolls around, all you need to do is cook the pasta and combine.
By the way, if you find yourself with leftovers, just store them in the fridge in an airtight container. They should keep for about three days. Reheat gently, adding a splash of olive oil or some reserved pasta water to bring it back to life.
Wrapping Up
As I sit down to enjoy this Easy 20-Minute Summer Squash Pasta Skillet, I can’t help but feel that summer essence in each bite. It’s quick, it’s flavorful, and it’s the perfect dish to celebrate all the beautiful bounty the season brings. I hope you enjoy making this dish as much as I do!
Conclusion
If you’re looking for more ways to incorporate fresh squash into your meals, try checking out 20 Minute Summer Squash Pasta with Brown Butter & Goat Cheese. Another great resource for summer squash recipes is Summer Squash Pasta – Southern Plate, where you’ll find delicious variations to keep your dinners exciting all season long. Happy cooking!
Easy 20-Minute Summer Squash Pasta Skillet
Ingredients
Method
-
Boil water in a large pot and cook the pasta according to package instructions until al dente. Reserve ½ cup of the starchy pasta water before draining.
-
While the pasta cooks, toast the pine nuts in a small dry skillet over medium-low heat for 5-6 minutes, stirring frequently until golden.
-
In a larger skillet, melt the butter over medium heat, whisking constantly until golden with brown bits formed.
-
Add minced garlic and sliced squash to the skillet. Cook for about 5 minutes until the zucchini is tender, seasoning with salt and pepper.
-
Combine the cooked pasta in the skillet with the squash, lowering the heat to a simmer. Toss until the pasta is coated with the buttery mixture.
-
Crumble the goat cheese into the skillet, mixing until melted and creating a creamy texture. If dry, add reserved pasta water, one tablespoon at a time.
-
Stir in the toasted pine nuts and fresh basil leaves before serving.
Notes
8. Ultimate Summer Salad
How I Discovered This Salad
One sweaty July afternoon, I came home from the farmer’s market with a bag so heavy my shoulders complained. I had a pint of cherry tomatoes that smelled like sunshine, a plump cucumber, and a bell pepper that was the exact shade of a summer sunset. I wanted something fresh and quick, not the heavy roast-and-simmer dinner my neighbors were cooking. That scramble turned into what I now call the Ultimate Summer Salad, and it has followed me to picnics, potlucks, and lazy weeknight dinners ever since. If you ever need a salad that feels like a celebration without much fuss, try pairing it with a grain salad or a grilled protein like in my favorite grilled chicken orzo salad for a complete meal.
The Ingredient Lineup (but a little chatty)
I am picky about simple things, and this salad lives or dies by the quality of its veggies. The cast of characters is: a pint of cherry tomatoes, halved, one medium cucumber chopped, one bell pepper diced, a cup of snap peas sliced, a cup of corn kernels whether fresh or canned or frozen and thawed, half a small red onion sliced or diced, three quarters of a cup of crumbled soft goat cheese, half a cup of roasted sunflower seeds, and half a cup of finely chopped fresh parsley or basil. For the dressing I use three tablespoons of extra-virgin olive oil, three tablespoons of red wine vinegar, one clove of garlic finely minced, half a teaspoon of fine salt plus more to taste, a quarter teaspoon of black pepper plus more to taste, and a quarter teaspoon of red pepper flakes if I want a tiny kick.
Those flavors sing together: the pop of tomatoes, the crisp cucumber, the sweet corn, and that tangy, creamy goat cheese. The roasted sunflower seeds add a quiet crunch that keeps this from sliding into mushiness even if you let it sit for a little while.
Making It — the way I do it
When I actually make it, I don’t lay things out like a lab experiment. I start by tossing everything into a big bowl. In a large serving bowl, combine the halved cherry tomatoes, chopped cucumber, diced bell pepper, sliced snap peas, corn kernels, sliced red onion, crumbled goat cheese, and sunflower seeds. I like to break the goat cheese up with my fingers so there are soft clouds of it throughout the salad.
To make the dressing, I use either a small bowl and whisk or a jar with a lid that I can shake. In a small bowl or jar with a lid, whisk or shake together the olive oil, red wine vinegar, minced garlic, salt, pepper, and optional red pepper flakes until emulsified. Sometimes I make that dressing ahead and keep it in the fridge for a day, but I almost always wait to dress the salad until the last minute. Just before serving, pour the dressing over the salad ingredients. Add the finely chopped parsley or basil. Toss gently to combine well; the goat cheese will create a creamy texture. Taste and adjust seasoning with more salt and pepper if needed. Serve immediately. Leftovers can be stored refrigerated for up to 3 days.
A small tip I learned the hard way is to always hold back a bit of the dressing if you think people might be grazing over time. The salad is happiest when the dressing is bright and just evenly coating the vegetables, not soaking them.
Getting the Texture and Flavor Right
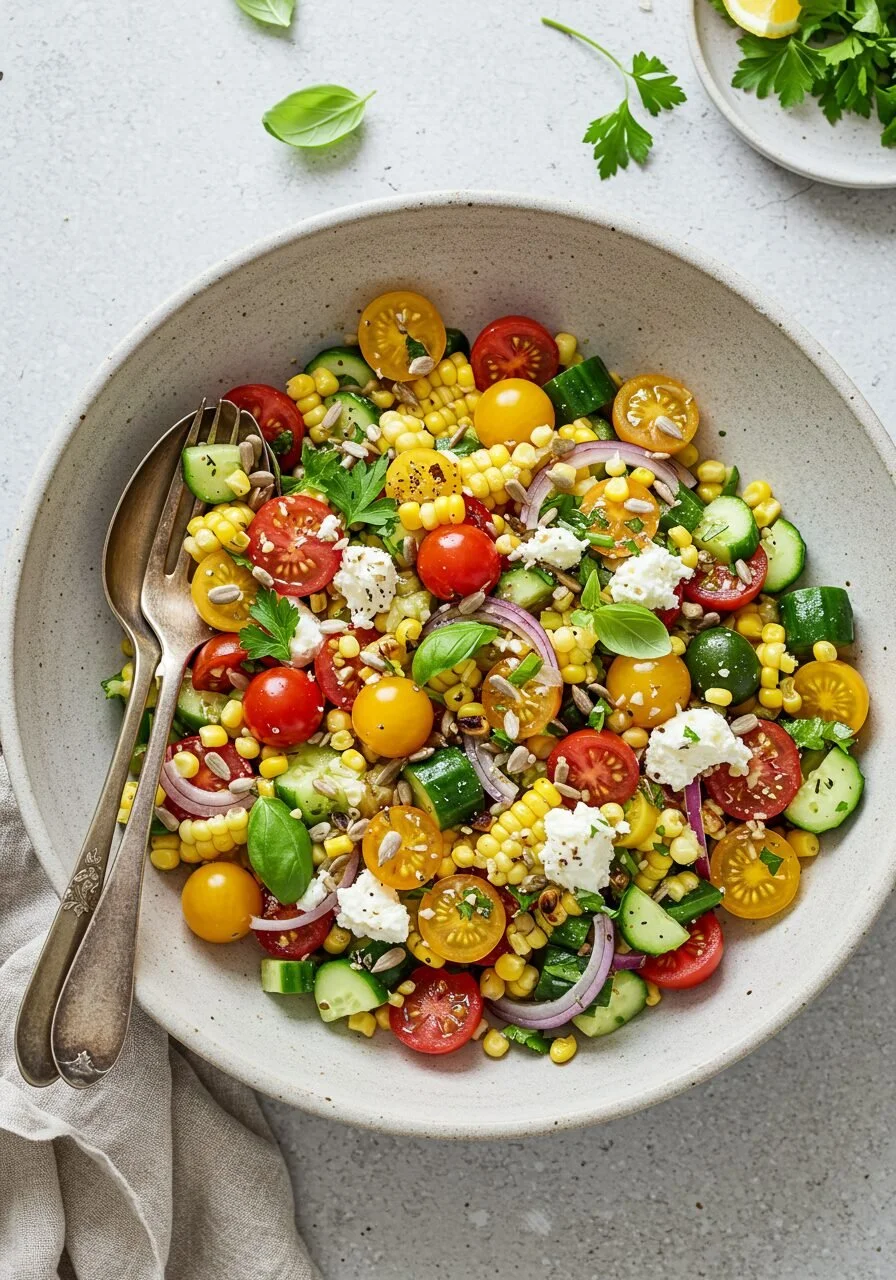
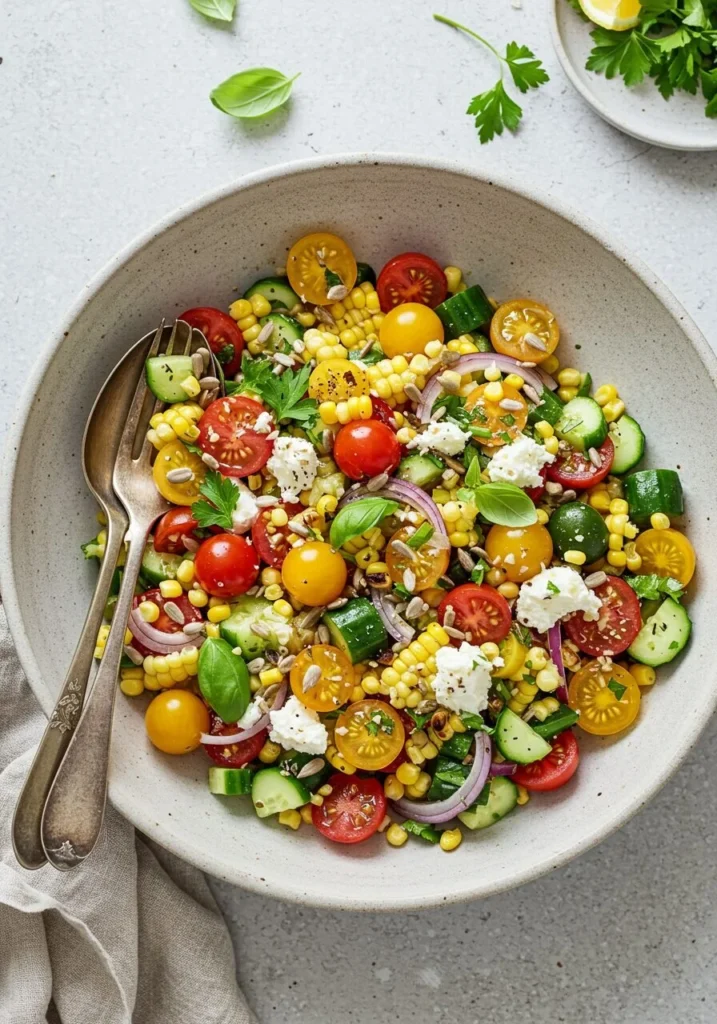
You know it is done right when the salad looks like a little festival in a bowl: glossy cherry tomato halves, bright green snap peas and parsley, flecks of red onion, and creamy white pockets of goat cheese. When you toss it, you should hear the corn and snap peas and see the oil shimmering. The goat cheese should not be fully liquefied into the dressing; those soft pieces are what make each bite feel indulgent without being heavy.
Here are a few things I do every time: I slice the snap peas thin so they aren’t too chewy, I cut the cucumber into bite-sized pieces so it doesn’t dominate the texture, and I always taste the dressing by itself before pouring it in — if the garlic is too assertive, a little extra olive oil calms it down. If the salt and pepper need a nudge after tossing, add it in small increments and taste. Seasoning is a conversation, not a command.
Ways I Change It Up (and a couple of memories)
Sometimes I add avocado for creaminess or swap goat cheese for feta if I am serving people who prefer a tangier bite. If I want it heartier, I stir in cooked farro or some shredded rotisserie chicken. Once, for a Fourth of July barbecue, I kept everything the same but charred the corn on the grill first; the sweet smokiness made everyone ask for the recipe.
If you want a couple of specific variations: try adding diced avocado and a squeeze of lime for a creamy, citrusy version, or toss in cooked quinoa and double the sunflower seeds for an extra nutty texture that turns it into a main-dish salad. Another time-saver variation is to use frozen and thawed corn; it’s a convenient shortcut that still tastes summery.
A memory that keeps this recipe close: my grandmother would put a bowl of something like this on the table and say, "Eat the color," and we did. Eating this salad is like that — bright, quick, and utterly inviting.
A Few Practical Notes and Friendly Tips
If you are prepping ahead, keep the dressing separate and chop everything right before you want to serve so the cucumbers and tomatoes stay lively. Leftovers can be stored refrigerated for up to 3 days, though the texture is best the first day. When I pack it for a picnic, I put the dressing in a little jar and pour it on at the picnic spot so nothing gets soggy.
Tip one: warm the bowl slightly before serving if your kitchen is chilly; it makes the dressing smell more fragrant. Tip two: always taste after tossing and remember that goat cheese and sunflower seeds both add saltiness and texture, so you may not need as much salt as you think. Tip three: if you are feeding someone with a garlic sensitivity, mince the garlic and let it sit in the vinegar for a few minutes before mixing with the oil; it mellows out.
What to serve it with? This is where the salad shines — alongside grilled fish, barbecued chicken, or a slice of crusty bread. It also plays nicely with creamy soups or as part of a buffet of summer sides.
Conclusion
If you want a reliable, bright salad to make all summer long, this Ultimate Summer Salad is it, and it’s forgiving enough to adapt to whatever’s in your crisper drawer. For another take on the same joyful idea and a few more presentation tips, check out this detailed version of The Ultimate Summer Salad from The Kitchn at The Ultimate Summer Salad | The Kitchn.
Ultimate Summer Salad
Ingredients
Method
-
In a large serving bowl, combine the halved cherry tomatoes, chopped cucumber, diced bell pepper, sliced snap peas, corn kernels, sliced red onion, crumbled goat cheese, and sunflower seeds.
-
For the dressing, whisk together the olive oil, red wine vinegar, minced garlic, salt, pepper, and optional red pepper flakes until emulsified in a small bowl or jar.
-
Just before serving, pour the dressing over the salad ingredients and add the finely chopped parsley or basil.
-
Toss gently to combine, ensuring the goat cheese remains in soft pieces throughout.
-
Taste and adjust seasoning with more salt and pepper as needed. Serve immediately.
Notes
9. Vietnamese Summer Rolls with Chicken

The First Time I Made Vietnamese Summer Rolls with Chicken
The very first time I tried making Vietnamese Summer Rolls with Chicken, it felt like assembling little edible bouquets. I remember the bright snap of julienned carrots and cucumber, the herb-sweet perfume of mint and cilantro, and the soft chew of rice noodles pooling on the cutting board. If you like experimenting with fillings, I once adapted a version from bang bang chicken rice paper rolls and learned that a confident roll is worth the practice.
The Ingredient That Changes Everything
What I always tell friends is to respect the building blocks: rice paper wrappers, cooked chicken breast sliced thin, rice noodles cooked and cooled, lettuce leaves for structure, fresh herbs like mint, cilantro, and basil for brightness, carrots julienned for sweetness and crunch, cucumber julienned for that cool finish, and a good dipping sauce—peanut sauce or hoisin sauce will both work depending on whether you want nutty or savory. Each of those ingredients plays a role in texture and flavor. The chicken shouldn’t be dry, so I poach or roast a breast and slice it while it is still warm enough to be tender but cool enough to handle. The rice noodles should be slippery but not clumped; a drizzle of sesame oil while they cool helps.
Rolling and Rhythm
Making these rolls is a rhythm more than a recipe: 1. Prepare all the ingredients and have them ready. Lay everything out so you can assemble without hunting for scissors or herbs. 2. Dip a rice paper wrapper in warm water for about 10-15 seconds until soft. I say warm not hot—you want pliable paper that isn’t sticky. 3. Lay the wrapper on a clean surface. I usually use a damp wooden board or a clean tea towel over the counter. 4. Place a few slices of chicken, a small amount of rice noodles, lettuce, herbs, carrots, and cucumber in the center of the wrapper. Less is more; if you overstuff it, you’ll tear the wrapper or end up with a loose roll. 5. Fold the sides over the filling and roll tightly from the bottom up. The first fold tucks everything in, the second fold secures, and the final roll should feel snug. 6. Repeat with remaining ingredients. I like to work in batches of four at a time so things stay fresh and tidy. 7. Serve with your choice of dipping sauce. I usually set out a bowl of creamy peanut sauce and a smaller bowl of hoisin with chili oil so people can choose.
When I teach someone the technique, I tell them to think of the rice paper like a soft tortilla that shrinks a bit as it dries; if you roll too loosely the filling will fall out, and if you drag the wrapper on the counter it can stick. A useful trick is to give each wrapper just a shallow dip, then lay it on a slightly damp towel to keep it workable while you assemble the rest.
Getting the Texture Just Right
There’s a satisfying contrast when a roll is done well: the crisp lettuce against the silky rice noodles and the soft, meaty chicken, all wrapped in that almost-transparent skin. You know it’s done right when the rice paper is firm enough to hold the roll without tearing but supple enough that you don’t have to coax it into shape. The herbs should be fragrant but not overpowering; a little mint goes a long way, and tearing basil leaves releases more aroma than chopping.
A couple of practical pointers I’ve picked up: if your rice papers keep sticking to everything, dip them just a touch less; if the rolls feel flimsy, tuck a small leaf of lettuce directly under the filling to create a structural base. Also, keeping your herbs dry on paper towels prevents the rolls from becoming soggy.
If you need a heartier or different style, I sometimes borrow ideas from other dishes—if you want to turn the filling into something more bowl-friendly before rolling, I refer to this burrito bowl with ground chicken for seasoning ideas that translate surprisingly well.
The Best Ways to Serve and When to Make This
These rolls are at their best the day you make them because rice paper gradually softens. I love serving them at a casual gathering, letting people dunk their own in peanut sauce or hoisin. They pair wonderfully with a light, crisp beer or a jasmine tea. If I’m pulling together a weeknight dinner, I sometimes add a steaming bowl of chicken fried rice on the side for anyone who prefers something warm; it complements the fresh rolls nicely and makes the meal more filling. If you want that recipe, I often turn to chicken fried rice with vegetables as a quick accompaniment.
Making these for company is fun because assembly becomes social: someone dips wrappers, another piles fillings, and the conversation flows as freely as the soy sauce.
A Few Things I’ve Learned and Delicious Twists
I love this recipe because it’s fast, colorful, and forgiving. You can strip or add ingredients based on what’s in the fridge and still end up with something terrific. For storage, if you must make rolls ahead, I put them in a single layer in an airtight container with a slightly damp paper towel on top to keep them from drying out; they’re best within 24 hours. If they soften too much, serve them sliced and chilled like a salad instead of whole.
For variations, try swapping the chicken for tofu and marinating it in soy-lime for a vegetarian version, or use cooked shrimp for a more classic summer roll. Another fun twist is to add thin slices of ripe mango for sweetness that contrasts nicely with mint. If you like a little texture, crispy panko-coated chicken strips inspired by a crunchy sandwich idea can be included; I once borrowed inspiration from a Cajun crispy chicken sandwich to make a spicier, crunchier roll that was a hit with teenagers.
Three small personal tips: first, don’t overfill; the rolls are prettier and hold better when you resist the urge to heap. Second, arrange your herbs so each bite has one or two leaves instead of a clump. Third, if you’re worried about tearing, lay the wrapper on a damp towel rather than a dry surface.
Conclusion
If you want another take with a fragrant lemongrass twist, this Lemongrass Chicken Rice Paper Rolls – RecipeTin Eats has great technique for infusing the chicken. For a garlicky alternative that still keeps the handheld charm, check out this Healthy Garlic Chicken Spring Rolls – White On Rice Couple for ideas you can meld into your own version.
Making Vietnamese Summer Rolls with Chicken is one of those recipes that keeps rewarding you: more confidence rolling, better herb combinations, and the satisfaction of handing someone a fresh roll they devour in two bites. Try it once as an experiment and I bet it becomes a regular around your table too.

Vietnamese Summer Rolls with Chicken
Ingredients
Method
-
Prepare all ingredients: slice chicken, julienne carrots and cucumber, and cook and cool rice noodles.
-
Lay out all ingredients for easy assembly.
-
Dip a rice paper wrapper in warm water for 10-15 seconds until soft.
-
Lay the wrapper on a clean, damp surface.
-
Place a few slices of chicken, a small amount of rice noodles, lettuce, herbs, carrots, and cucumber in the center of the wrapper.
-
Fold the sides over the filling and roll tightly from the bottom up.
-
Repeat with remaining ingredients.
-
Serve rolls with peanut sauce and hoisin sauce on the side.
Notes
10. Garlic Butter Steak Bites: A 15-Minute Miracle Dinner
Garlic Butter Steak Bites: A 15-Minute Miracle Dinner
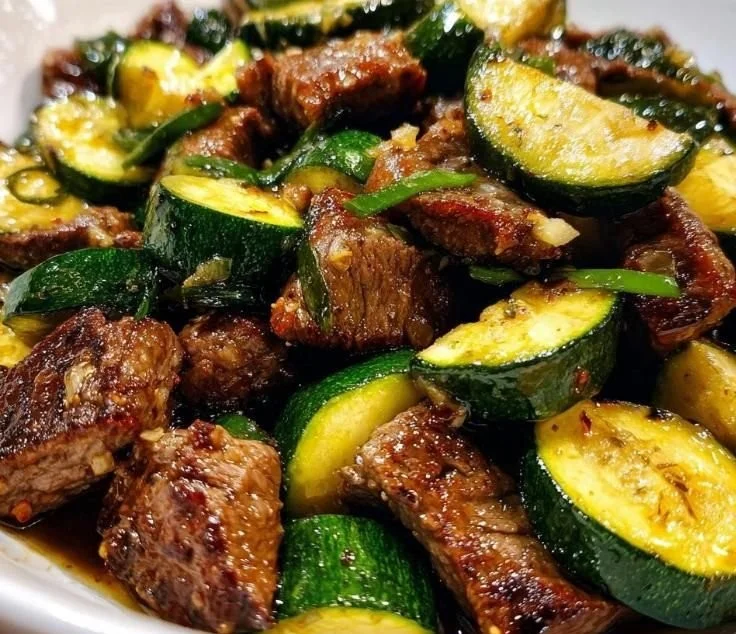
I still remember the first time I made this: late, hungry, and pretending I had all evening to cook when really I had just 20 minutes before a movie started. The smell of brown butter and garlic filling the kitchen, that crackle when the steak hit the hot pan, and the bright, tender zucchini cutting through the richness — it felt like cheating. That night I scribbled down the steps and now it’s my go-to. If you ever want a quicker spin, there’s even an air fryer steak bites version I checked once when I was feeling experimental, but for most evenings I stick with the skillet.
The Secret Behind Garlic Butter Steak Bites: A 15-Minute Miracle Dinner
What makes this dish a miracle is how few moving parts actually do the heavy lifting. You need 1 lb steak (sirloin, ribeye, or New York strip), cut into 1-inch cubes, 1 medium zucchini, cut into half-moons, 3 tablespoons butter, 3 cloves garlic, minced, 1 tablespoon olive oil, 1/2 teaspoon salt, 1/4 teaspoon black pepper, Optional: Fresh parsley, chopped, for garnish — that’s it. The method is straightforward and forgiving, and the contrast between the seared meat and the bright zucchini keeps it feeling light instead of stodgy.
Pat the steak bites dry with paper towels. Season them with salt and pepper. Heat olive oil in a large skillet over medium-high heat. Add steak bites to the hot skillet in a single layer. Sear for 1-2 minutes per side until browned. Remove steak from skillet and set aside. Add butter to the same skillet. Once melted, add minced garlic and cook for about 30 seconds until fragrant. Add the zucchini to the skillet. Cook for 3-5 minutes, stirring occasionally, until tender-crisp. Return the steak bites to the skillet. Toss everything together to coat with the garlic butter. Cook for another 1-2 minutes until the steak is heated through. Garnish with fresh parsley if desired. Serve immediately.
I like to say the skillet does the talking: that initial sear is the voice, the butter and garlic are the melody, and the zucchini is the punctuation. A trick I use is to get the pan really hot before adding the steak so you get that satisfying sizzle. If the steak doesn’t sizzle, wait another 30 seconds.
A Few Things I’ve Learned
One of the best practical tips is to dry the steak thoroughly. Moisture is the enemy of a good sear, so patting the steak bites dry with paper towels will give you that deep brown crust quickly. I also only season right before they hit the pan — salt draws moisture out over time, and you want that moisture to stay inside until the sear forms. While the steak is resting off to the side, I add the butter to the same skillet; it picks up the fond — those tasty browned bits left in the pan — and that’s where all the flavor hides.
Another small habit that pays off: mince the garlic finely and add it only after the butter melts. Garlic can burn in a flash and turn bitter, so cooking it for about 30 seconds until fragrant is all you need. When you add the zucchini, keep an ear out for a tender-crisp sound; it should be slightly yielding but still bright green after 3-5 minutes. If you want a different texture or a twist, I’ve sometimes swapped the zucchini for thin-sliced mushrooms or stirred in baby spinach at the end.
Getting the Texture Just Right
Knowing when this is done comes down to a few sensory cues. The steak should be brown and slightly crusted on the outside but still tender inside — if you press a cube gently it should spring back a little. Searing for 1-2 minutes per side gives a great medium-rare to medium edge depending on your steak’s thickness. When the garlic hits the butter you’ll smell a warm, toasty sweetness almost immediately; that aroma is your green light to add the zucchini. The zucchini should be tender-crisp after 3-5 minutes, with a little caramelization on the cut sides. Return the steak bites to the skillet, toss to coat with the garlic butter, and cook for another 1-2 minutes until heated through.
If you’re curious about slightly different preparations, I sometimes look at a grilled approach when the weather’s nice; there’s a lovely grilled steak and shrimp pairing I bookmarked that uses similar flavors and feels festive for summer.
Making It Work for Weeknights (and Leftovers)
This is the dish I bring out when I need dinner fast but decent. You can have it from fridge to table in about 15 minutes. I often double the zucchini if I want a greener plate without adding carbs, or toss the finished bites over buttery mashed potatoes or a heap of steamed rice. It pairs beautifully with a simple side salad dressed in lemon vinaigrette — the acid cuts through the richness.
Leftovers reheat surprisingly well. Store them in an airtight container and refrigerate for up to three days. Reheat briefly in a hot skillet with a small knob of butter so the steak warms without drying out, or microwave gently if you’re in a hurry. If you want to prepare ahead, you can cut the steak into 1-inch cubes the night before and keep them in the fridge; they will sear faster and you’ll shave off a couple minutes on a busy night. For a closer reference to a classic approach, I often compare notes with the classic steak bites recipe I saved months ago.
A few more personal tips: don’t overcrowd the pan or the steaks will steam instead of sear; use a sturdy skillet so heat distributes evenly; and if you like a little herb brightness, fold in chopped parsley at the end. If you’re cooking for company, serve these on warm plates so the butter doesn’t congeal too quickly.
The Flavor Twist and Other Variations
If you want to play with the flavors, there are two variations I reach for often. One is a lemon-garlic version where I finish with a squeeze of fresh lemon right off the heat to brighten the butter. The other is a spicy twist: sprinkle in a pinch of red pepper flakes with the garlic for a gentle heat that doesn’t overpower the beef. For a surf-and-turf vibe, toss in seared shrimp at the end — something I tried after seeing a recipe online and loved the contrast.
This dish also scales well. For a crowd, multiply ingredients and cook in batches so each piece gets the attention it needs. I’ve brought this to potlucks where it disappears within minutes — people always ask how it can taste so rich yet be so simple.
Conclusion
If you want to see how other home cooks put their stamp on garlic butter steak bites, I like checking out Jamie Cooks It Up’s family recipes for inspiration. For a keto-friendly take and tips on keeping it low-carb, this Easy Garlic Butter Steak Bites page has some neat ideas. And if you want another opinion on timing and presentation, this 15-minute family favorite is a nice reference. Try it once and you’ll see why it became my 15-minute miracle.
Garlic Butter Steak Bites
Ingredients
Method
-
Pat the steak bites dry with paper towels. Season them with salt and pepper.
-
Heat olive oil in a large skillet over medium-high heat.
-
Add steak bites to the hot skillet in a single layer. Sear for 1-2 minutes per side until browned.
-
Remove steak from skillet and set aside.
-
Add butter to the same skillet, then add minced garlic and cook for about 30 seconds until fragrant.
-
Add the zucchini to the skillet and cook for 3-5 minutes, stirring occasionally, until tender-crisp.
-
Return the steak bites to the skillet and toss everything together to coat with the garlic butter. Cook for another 1-2 minutes until the steak is heated through.
-
Garnish with fresh parsley if desired and serve immediately.