Beef and Cheese Chimichangas
Discovering the Delight of Beef and Cheese Chimichangas There’s something magical about a warm, crispy chimichanga filled with savory goodness, and the combination of beef and cheese is an all-time favorite. I remember the first time I tried making Beef and Cheese Chimichangas; the comforting aroma wafted through my kitchen, instantly turning my home into…
Discovering the Delight of Beef and Cheese Chimichangas
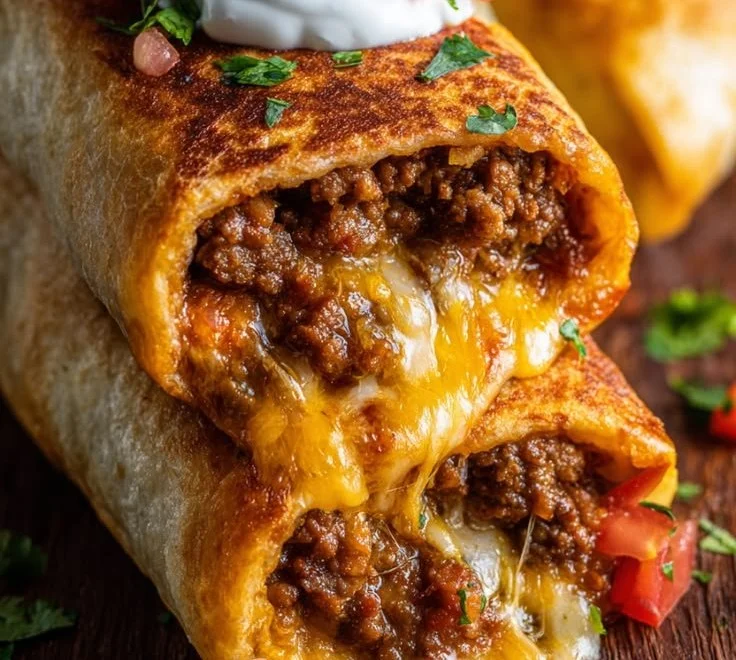
There’s something magical about a warm, crispy chimichanga filled with savory goodness, and the combination of beef and cheese is an all-time favorite. I remember the first time I tried making Beef and Cheese Chimichangas; the comforting aroma wafted through my kitchen, instantly turning my home into a cozy Mexican cantina. The pleasure of biting into that crispy tortilla, knowing that great flavors waited within, was unforgettable. If you’re looking for a dish that’s satisfying, hearty, and oh-so-delicious, this recipe will not disappoint! You may also find Beef And Cheese Chimichangas 2 useful.
As you prepare for this culinary adventure, you’ll need a variety of ingredients, but don’t worry—they’re all easy to find. You’ll want one pound of ground beef to serve as the base, paired with a finely diced small onion and two cloves of minced garlic for that aromatic kick. A packet of taco seasoning (or homemade, if you’re feeling adventurous) adds the necessary spice, while half a cup of salsa ensures your filling is moist and packed with flavor. Additionally, we’ll be using one cup of refried beans and one and a half cups of shredded cheddar cheese, which will melt beautifully inside the chimichangas. Finally, six large flour tortillas and two tablespoons of vegetable oil are needed for frying or brushing. You can find a complete rundown of these ingredients in other tasty variations, like this recipe.
The Perfect Filling
To start off, heat a large skillet over medium heat and add the ground beef with the diced onion. As the beef cooks, it will begin to release its savory juices, and the onions will soften, filling your kitchen with a tantalizing aroma. Remember to drain any excess grease; we want our chimichangas to be tasty but not overly greasy. Afterward, stir in the minced garlic, taco seasoning, and salsa, allowing the mixture to simmer for a few minutes. The longer you let it cook, the more the flavors will meld—around three to four minutes should do the trick.
While the beef mixture cools slightly, we can prepare the tortillas. A spoonful of refried beans spread down the center serves as a lovely base, giving extra flavor and creaminess. Then, top it off with that hearty beef mixture and a generous helping of cheese. Now comes the fun part: fold the sides of the tortilla and roll it up tight like a burrito. This ensures that no filling escapes during cooking!
Choosing the Right Cooking Method
When it comes to cooking chimichangas, you have two delightful options. If you’re looking for a healthier approach, preheat your oven to 400°F (200°C). Place the chimichangas seam-side down on a baking sheet, give them a quick brush with vegetable oil, and bake them for about 18 to 20 minutes. Flipping them once during baking will ensure they turn golden and crispy.
For those who prefer fried chimichangas, heat 2 to 3 tablespoons of oil in a skillet over medium heat. Carefully place your rolled chimichangas seam-side down and fry them for 2 to 3 minutes per side, until they reach that desired golden-brown perfection. The sizzling sound and delicious smell will let you know they’re nearly ready!
The Final Touches
Once cooked, remove the chimichangas from heat and let them rest for a couple of minutes. This will allow the filling to settle slightly, making for easier slicing. After that, the fun really begins—garnishing! I love adding a dollop of sour cream, a sprinkle of fresh guacamole, or a drizzle of salsa. These additional flavors elevate the entire dish, creating a rich and satisfying meal.
If you’re after more quick dinner options, consider exploring 15-minute meals like the Korean Beef and Rice Bowl. It’s another dish that packs a punch in flavor without requiring hours in the kitchen.
Variations Galore
What I love most about chimichangas is their versatility. Want to spice things up a bit more? Consider adding jalapeños to your filling for an extra kick. You can also swap out the beef for shredded chicken or even veggies for a lighter option. And if you’re a cheese lover like I am, try mixing in some pepper jack cheese for added flavor.
Storing Leftovers
If you happen to have leftovers, which is rare in my house but worth mentioning, they can be stored in an airtight container in the fridge. Just ensure they are cooled before placing them in to keep the texture intact. Reheating in the oven instead of the microwave will help maintain that crispiness for future meals.
Conclusion
Cooking Beef and Cheese Chimichangas is not just about enjoying a great meal; it’s about sharing joy with family and friends. Whether you’re gathering around the dinner table or hosting a casual get-together, these chimichangas will definitely impress. For more variations on this delightful recipe, check out Razzle Dazzle Life and Sweet Pea’s Kitchen. Enjoy your cooking adventure!
Beef and Cheese Chimichangas
Ingredients
Method
- Heat a large skillet over medium heat and add the ground beef and diced onion.
- Cook until the beef is browned and the onions are softened; drain any excess grease.
- Stir in the minced garlic, taco seasoning, and salsa, then let simmer for 3-4 minutes.
- Spread a spoonful of refried beans down the center of each tortilla.
- Top with the beef mixture and a generous amount of cheese.
- Fold the sides of the tortilla in and roll it up tight like a burrito.
- For baked chimichangas, preheat the oven to 400°F (200°C), brush with oil, and bake seam-side down on a baking sheet for 18-20 minutes, flipping once.
- For fried chimichangas, heat oil in a skillet and fry the chimichangas seam-side down for 2-3 minutes per side until golden brown.
- Let the chimichangas rest for a couple of minutes before slicing.
- Garnish with sour cream, guacamole, or salsa as desired.