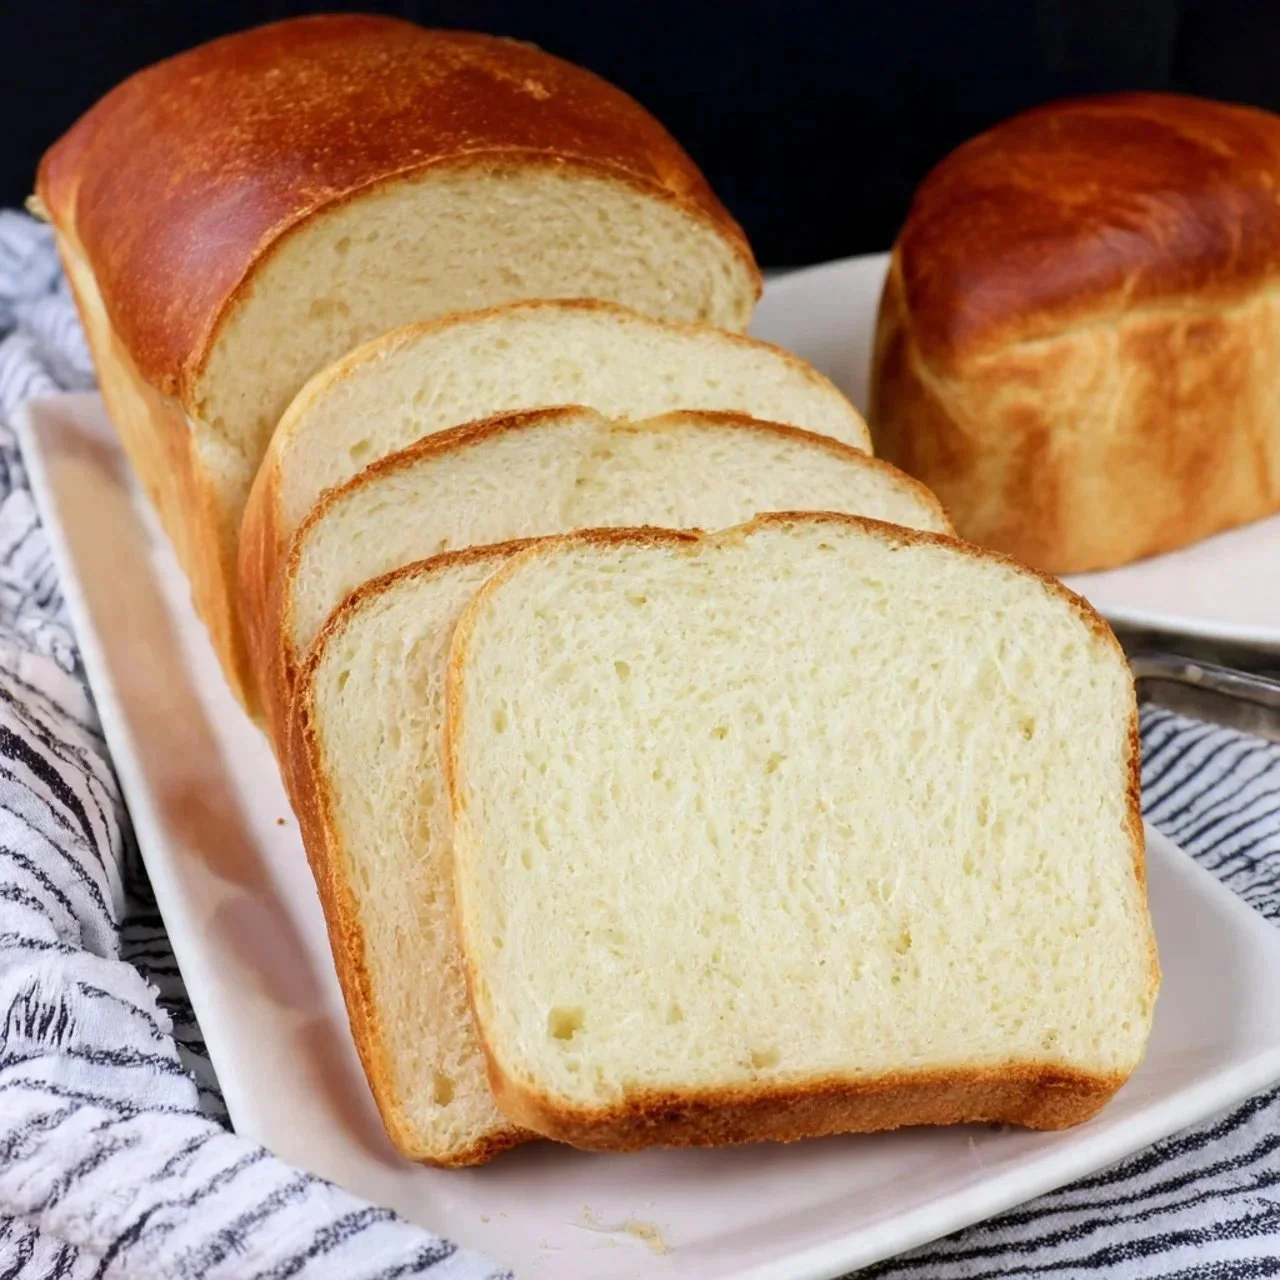
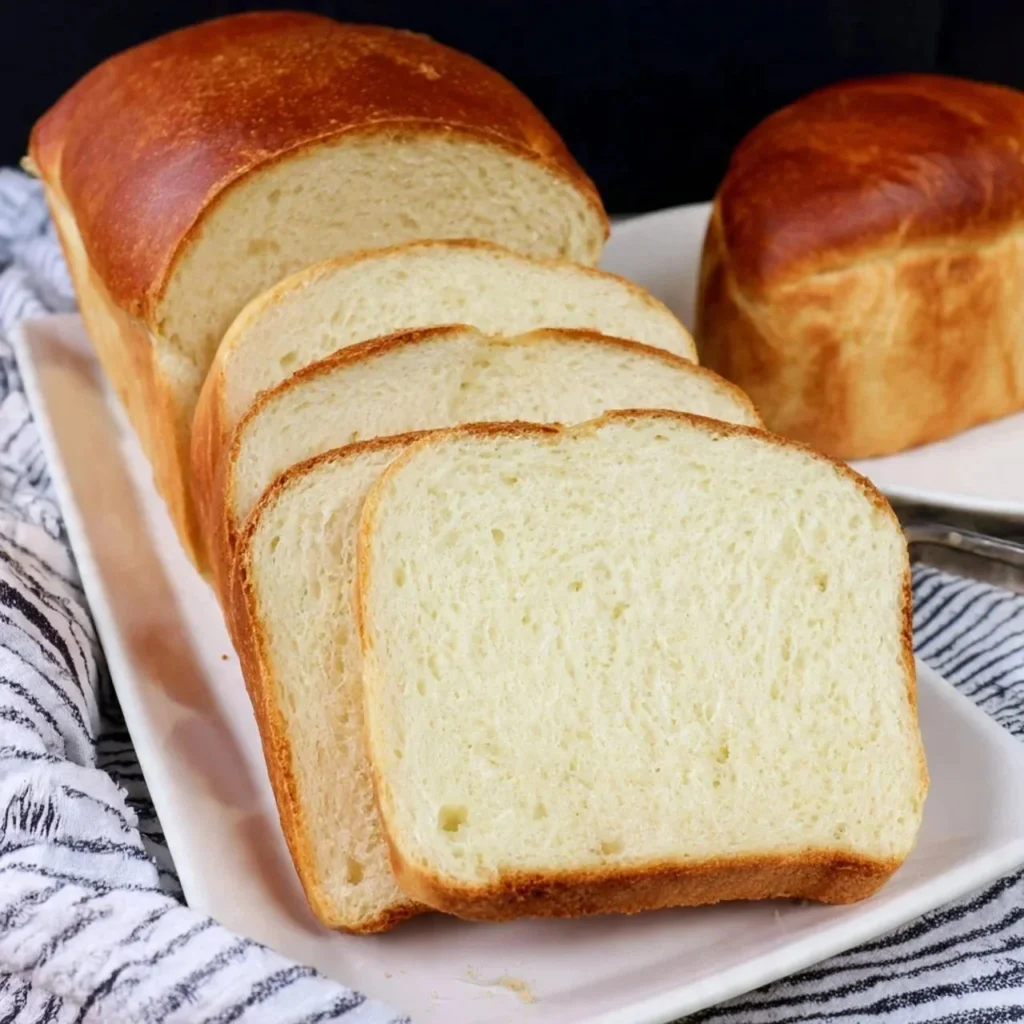
Homemade Amish White Bread
Discovering the Joy of Homemade Amish White Bread There’s something incredibly comforting about the smell of freshly baked bread wafting through the house. It takes me back to my grandmother’s kitchen, where the warm aroma of bread met me at the door, making my heart feel at home. I first learned to make this Homemade…
Discovering the Joy of Homemade Amish White Bread
There’s something incredibly comforting about the smell of freshly baked bread wafting through the house. It takes me back to my grandmother’s kitchen, where the warm aroma of bread met me at the door, making my heart feel at home. I first learned to make this Homemade Amish White Bread from her, and every time I knead the dough, it feels like I’m connecting with her all over again. This recipe is simple and perfect for anyone, whether you’ve been baking your whole life or are just stepping into the kitchen for the first time.
The Ingredients that Create Magic
To start your journey into homemade bread, gather a few straightforward ingredients that you likely already have on hand. You’ll need 4 cups of all-purpose flour to give your bread that classic structure. Next, bring in 2 1/4 teaspoons of active dry yeast, which will make your loaf rise and become fluffy. For moisture, we’ll use 1 1/2 cups of warm water, complemented by 1/4 cup of granulated sugar to help feed the yeast. You’ll also need 1/4 cup of vegetable oil to add richness and tenderness, and don’t forget 1 teaspoon of salt to bring out all those flavors!
The Secret Behind Perfect Homemade Amish White Bread
To kick off this bread-making adventure, start by dissolving that sugar in the warm water, then sprinkle the yeast on top. Let it sit for about 5 minutes until it gets all frothy and happy; this is how you know the yeast is alive and ready to work its magic. While you wait, it’s the perfect time to daydream about how lovely your kitchen will smell in just a couple of hours.
Once the yeast is all bubbly, stir in your vegetable oil and salt. Now, slowly start adding the flour while mixing it all together. This part is a little messy, and I love getting my hands in there! It’s so satisfying to feel the dough form. You want it to come together into a shaggy mass before you start kneading.
Getting the Texture Just Right
Now comes the fun part—kneading! Dust your countertop with a bit of flour and turn that dough out. Knead it for about 10 minutes until it’s smooth and elastic. You’ll develop quite the workout doing this, but trust me, the effort is absolutely worth it. Feel free to sprinkle some additional flour as you go, but don’t go overboard; you want a slightly tacky dough that will yield a tender loaf.
After your arms are ready for a break, place the dough in a greased bowl and cover it. Now, let it rise in a warm, cozy spot until it has doubled in size—this usually takes about 1 to 1.5 hours. I like to set mine near a sunny window or in a warm corner of the kitchen. Watching it puff up is one of my favorite parts, especially as it reminds me of how much life is buzzing in that little ball of dough!
Punch It Down and Shape It Up
Once the dough has risen to its fluffy potential, it’s time to give it a gentle punch-down to release all that air. It’s incredibly satisfying! Then, turn it out onto your floured surface once again and shape it into a loaf. Place it in a greased loaf pan, cover it up, and let it rise again—this time for about 30 to 45 minutes—until it’s nice and airy.
Right before the dough is finished rising, it’s the perfect opportunity to preheat your oven to 350°F (175°C). When that second rise is finally complete, pop it in the oven for about 30 to 35 minutes. The heavenly smell will start to fill your kitchen, and you’ll know it’s almost time. The bread should turn a deep golden brown and sound hollow when tapped. This is the moment of truth!
The Best Part About This Dish
When it’s out of the oven, resist the urge to dig right in! Allow the bread to cool on a wire rack. If you slice it too soon, you risk a gummy mess, and nobody wants that! Once it’s cool, you can slice into it and enjoy its warm, fluffy heart. It’s fantastic with butter, of course, but I also love to make sandwiches, toast, or simply enjoy it with some homemade jam.
A Few Things I’ve Learned
Baking bread isn’t just about the final product; it’s the whole experience. You can make this bread ahead of time and store it in a plastic bag at room temperature for a few days. If you somehow have leftovers (which, let’s be honest, is unlikely when it’s this good), it freezes beautifully. Just wrap it tightly in plastic wrap and then in aluminum foil. When you’re ready to enjoy it again, let it thaw at room temperature, then pop it in the oven for a few minutes to refresh.
Making It Your Own
There are also endless ways to adapt this recipe! You might want to throw in some herbs for a savory touch or replace some of the all-purpose flour with whole wheat flour for extra nutrition. If you’re feeling adventurous, you could even add in some cinnamon and raisins for a delightful twist. The beauty of this bread is that it can be whatever you want it to be!
Conclusion
Homemade Amish White Bread is more than just a recipe—it’s a way to connect with memories and create new ones in the kitchen. Whether you’re making a simple sandwich or gathering friends for a meal, this bread will surely delight. If you’re looking for alternative instructions or inspirations, check out the Amish White Bread Recipe or try the detailed method from Homemade Amish White Bread Recipe – Gluesticks Blog. Trust me, once you start baking, your home will feel like the warm embrace of nostalgia, and your taste buds will thank you!
Homemade Amish White Bread
Ingredients
Method
- Dissolve the sugar in warm water and sprinkle the yeast on top. Let it sit for about 5 minutes until frothy.
- Stir in the vegetable oil and salt. Gradually add flour while mixing until a shaggy mass forms.
- Dust the countertop with flour and knead the dough for about 10 minutes until smooth and elastic.
- Place the dough in a greased bowl, cover it, and let it rise in a warm place until doubled in size, about 1 to 1.5 hours.
- Once risen, gently punch down the dough and turn it onto a floured surface. Shape it into a loaf and place it in a greased loaf pan.
- Cover and let it rise again for 30 to 45 minutes until airy.
- Preheat your oven to 350°F (175°C). When the second rise is done, bake the bread for 30 to 35 minutes until deep golden brown.
- The bread should sound hollow when tapped. Cool on a wire rack before slicing.