Homemade Jello Popsicles
Summertime Delights: Homemade Jello Popsicles As the sun blazes hotter each day, nothing quite beats the delight of a refreshing popsicle on a warm afternoon. If you’re like me, summer instantly calls to mind childhood memories of running outside, with sticky hands grasping a colorful popsicle. Today, I want to share my secret to crafting…
Summertime Delights: Homemade Jello Popsicles
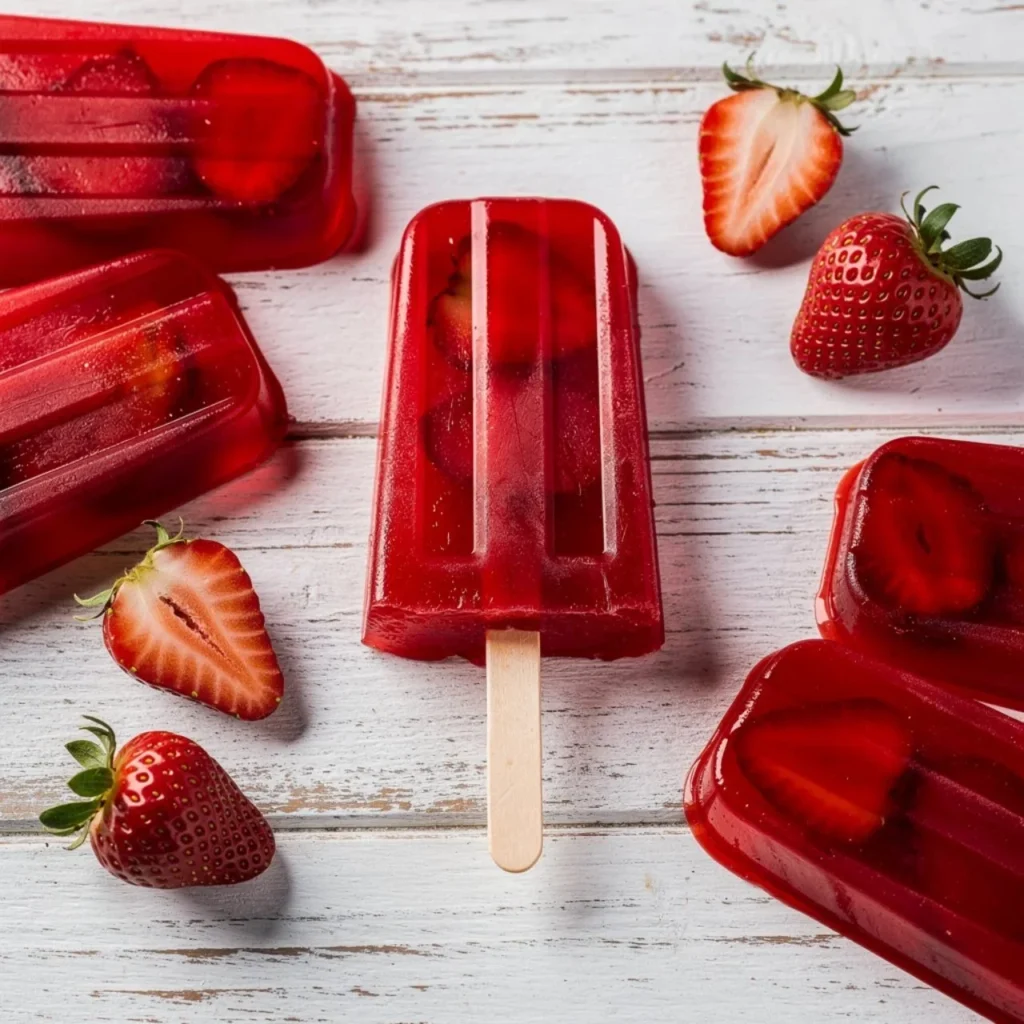
As the sun blazes hotter each day, nothing quite beats the delight of a refreshing popsicle on a warm afternoon. If you’re like me, summer instantly calls to mind childhood memories of running outside, with sticky hands grasping a colorful popsicle. Today, I want to share my secret to crafting these perfect treats at home: Homemade Jello Popsicles. Not only are they simple to make, but they also burst with flavor, making them a favorite for kids and adults alike.
To get started, you’ll need just a few ingredients that are probably already in your kitchen: 1 cup of Jello (pick any flavor that tickles your taste buds), 2 cups of water (one boiling and one cold), a cup of fresh fruit like strawberries or blueberries, popsicle molds, and 6 popsicle sticks. This recipe is one of my go-tos when I want to impress friends at summer gatherings or have a sweet treat on hand for the kids.
The Secret Behind Perfect Homemade Jello Popsicles
The first step is exhilarating – you get to play with colors and flavors! Begin by dissolving the Jello in one cup of boiling water. Stir it well until it’s completely dissolved, because there’s nothing worse than chunky popsicles. As the vibrant liquid cools, mix in a cup of cold water to help bring the temperature down.
While that’s happening, it’s a great time to chop up your fruit. Fresh berries work wonderfully, but you can substitute with anything you like. Imagine biting into your popsicle and discovering sweet, juicy strawberries nestled inside! If you’re looking for even more fruity inspiration, you might want to check out this recipe for homemade snack cups which showcases the versatility of Jello with fruit.
Filling Your Molds with Goodness
Now comes the fun part: layering goodness into the molds! Start by placing the chopped fruit into each popsicle mold. Make sure to fill them up nicely, leaving a little room at the top. If you pour too high, the mixture could overflow as it freezes. Once the molds are fruit-packed, gently pour the Jello mixture in, ensuring it seeps around the fruit expertly.
When you’re all set, insert the popsicle sticks into the molds, ensuring they stand straight. Pop them into the freezer for at least 4 to 6 hours. This waiting period is like the suspense before a great reveal – you won’t want to rush it!
A Few Things I’ve Learned
Over the years of making these popsicles, I’ve learned a few handy tricks that might make your experience even better. For instance, if you’re preparing these popsicles for younger children, consider blending the fruit into the Jello mixture for a smooth texture. This way, they can enjoy the refreshing flavor without any hazards of whole fruit pieces.
One thing to watch out for is over-freezing. If they sit in the freezer for too long, it could make the popsicles icy rather than smooth and chewy. To release your frozen treats, simply run warm water over the mold for a few seconds. This technique works every time and makes it easy to pop the Jello pops out seamlessly.
Variations to Jazz Up Your Popsicles
I’m a firm believer that variety is the spice of life, especially in the kitchen. The best part about these popsicles? You can easily change them up! Try coconut milk mixed with tropical fruit Jello for a creamy version that transports you to the beach. Or, why not create a layered effect by using different colors of Jello? Start with one flavor, let it freeze halfway, and then add a different color for a visually stunning treat.
If you are in the mood for something a little different, you might find inspiration in these shamrock homemade gummies that combine fun shapes with delicious flavors, perfect for holiday celebrations or any gathering.
Storing Your Popsicles for Later
If by some miracle you make a batch and have leftover popsicles, storing them is a breeze. Wrap them individually in plastic wrap or place them in a freezer-safe bag. This will prevent them from absorbing any unwanted freezer smells and help maintain their delightful flavors.
In conclusion, making Homemade Jello Popsicles is not just a nostalgic throwback; it’s a joyful experience that encourages creativity in the kitchen. Whether you enjoy them by the pool with family or as a fun snack on a road trip, these popsicles are sure to brighten your day.
Conclusion
So as we dive deeper into summer, I hope you take a moment to whip up a batch of these delicious Homemade Jello Popsicles. For additional refreshing ideas, check out Easy Jell-O Popsicles on Eating on a Dime, where you’ll find even more ways to enjoy this classic treat. Happy freezing!
Homemade Jello Popsicles
Ingredients
Method
- Dissolve the Jello in one cup of boiling water, stirring until completely dissolved.
- Mix in one cup of cold water to cool the mixture.
- Chop the fresh fruit into small pieces.
- Place the chopped fruit into each popsicle mold, leaving a little room at the top.
- Pour the Jello mixture into the molds over the fruit.
- Insert the popsicle sticks straight into the molds.
- Freeze for at least 4 to 6 hours.
- To release the popsicles, run warm water over the mold for a few seconds.