Red Velvet Cake
The Magic of Red Velvet Cake There’s something about the rich, luscious red velvet cake that puts a smile on my face every time I think about it. It’s not just the striking color; it’s the way it feels when you take a bite — soft, moist, and just the right amount of sweetness, layered…
The Magic of Red Velvet Cake
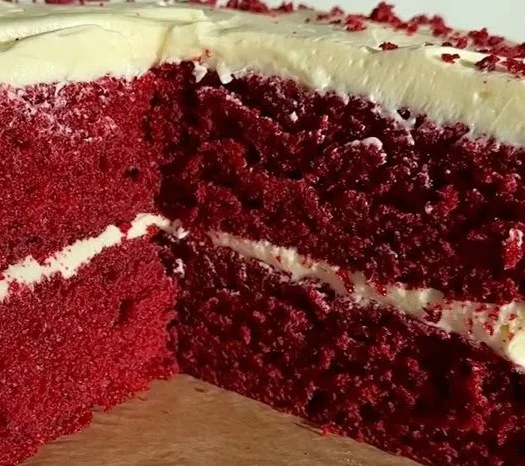
There’s something about the rich, luscious red velvet cake that puts a smile on my face every time I think about it. It’s not just the striking color; it’s the way it feels when you take a bite — soft, moist, and just the right amount of sweetness, layered with creamy frosting. I can vividly remember the first time I tried a slice at a friend’s birthday party. The tantalizing cream cheese frosting and that light cocoa flavor, it was a moment that had me hooked for life.
Now, let me share my go-to recipe for red velvet cake with you. Trust me; this will become your favorite too.
Gathering Ingredients
To start, you’ll need to gather a handful of simple yet essential ingredients. You won’t be overwhelmed, I promise. Here’s what you need:
- 2 ½ cups of all-purpose flour
- 1 ½ cups of sugar
- 1 teaspoon of baking powder
- 1 teaspoon of baking soda
- 1 teaspoon of salt
- 1 tablespoon of cocoa powder
- 1 cup of vegetable oil
- 1 cup of buttermilk (make sure it’s at room temperature)
- 2 large eggs
- 2 tablespoons of red food coloring
- 1 teaspoon of vanilla extract
- 1 teaspoon of white vinegar
- 8 ounces of cream cheese (softened)
- ½ cup of unsalted butter (softened)
- 4 cups of powdered sugar
- Another teaspoon of vanilla extract for the frosting
Once you’ve assembled everything, you’re ready to create this masterpiece.
Getting Started
First things first, preheat your oven to a lovely 350°F (175°C). Oh, and don’t forget to grease and flour two 9-inch round cake pans. I usually line the bottoms with parchment paper for good measure since it helps in popping out the cakes effortlessly. We want to keep that beautiful shape intact when it’s time to reveal our creation!
In a large bowl, you’ll want to sift together the flour, sugar, baking powder, baking soda, salt, and a touch of cocoa powder. The cocoa is just there for a hint of flavor, mixing effortlessly into the cake’s overall sweetness.
Now, in a separate bowl, it’s time for some magic. Whisk together the vegetable oil, buttermilk, eggs, red food coloring, and that dash of vanilla extract, along with the white vinegar. If you’ve never used vinegar in baking, don’t worry; it works wonders here, giving the cake a perfect lift. Mix it all until it’s nice and uniform.
Here’s a little tip from my kitchen adventures: Don’t overmix! When you combine the wet and dry ingredients, just mix until everything is barely combined. This ensures that your cake stays tender and fluffy.
Baking the Cake
Now, pour the batter evenly into your prepared pans, smoothing the tops. I like to give the pans a gentle tap on the counter to release any air bubbles that might have formed. Then, it’s time to slide them into the oven and let the magic happen!
Let these beauties bake for about 25-30 minutes or until a toothpick inserted into the center comes out clean. The aroma that fills your kitchen during this time is simply divine. You’ll know it’s close when the edges start to pull away from the sides of the pans.
Once baked, give them a cool-down period in the pans for about 10 minutes. After that, delicately turn them out onto wire racks to cool completely. This waiting game can feel like the longest part, but it’s entirely worth it.
Crafting the Frosting
Now let’s not forget about the star of the show: the cream cheese frosting that brings everything together. Using a mixer, beat the softened cream cheese with the butter until it’s beautifully smooth. Gradually add in the powdered sugar and that second dose of vanilla extract, mixing until it’s well combined. The frosting should be luscious and creamy, perfect for slathering.
When the cakes have cooled, it’s time to assemble! Place one layer on a serving plate, generously spread frosting on top, and then add the second layer. Don’t hold back here! Frost the top and sides until the cake is beautifully blanketed in cream cheese goodness.
My Grandma’s Trick
I remember my grandmother would always say that the best cakes are the ones that sit for a while. If you can bear to wait, let the frosted cake chill in the refrigerator for about an hour before serving. This helps the flavors meld beautifully, and I can assure you it enhances the experience.
Speaking of experiences, this cake pairs wonderfully with a cup of freshly brewed coffee or even a glass of cold milk if you’re feeling nostalgic.
Variations and Fun Twists
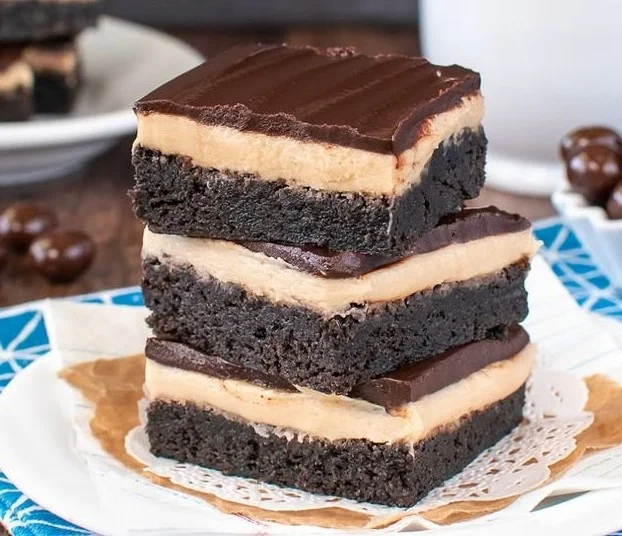
While traditional red velvet cake is timeless, it’s also fun to play around with flavors. Occasionally, I like to mix in some chopped nuts for a little crunch. You could even take things a step further by turning the cake into delightful red velvet brownies or decadent cake truffles. Each variation adds a fresh twist while staying true to that classic red velvet essence.
Storing the Leftovers
If, by some chance, you have leftovers (which I doubt you will!), store them in an airtight container in the fridge. The cake actually gets better as it sits, so don’t be surprised if it tastes amazing the next day too.
Conclusion
Red velvet cake is a beloved treat that combines beauty and flavor in every slice. It’s perfect for special occasions, gatherings, or simply when you want to indulge in something sweet. So gather those ingredients, embrace the kitchen magic, and enjoy a slice of this delightful cake. For further inspiration, you can check out this fantastic red velvet cake with cream cheese frosting recipe. Happy baking!
Red Velvet Cake
Ingredients
Method
- Preheat your oven to 350°F (175°C) and grease and flour two 9-inch round cake pans.
- Sift together the flour, sugar, baking powder, baking soda, salt, and cocoa powder in a large bowl.
- In a separate bowl, whisk together the vegetable oil, buttermilk, eggs, red food coloring, vanilla extract, and white vinegar.
- Combine the wet and dry ingredients, mixing until just combined to keep the cake tender.
- Pour the batter evenly into the prepared pans and smooth the tops.
- Bake for 25-30 minutes or until a toothpick inserted comes out clean.
- Allow cakes to cool in the pans for 10 minutes, then turn out onto wire racks to cool completely.
- Beat the softened cream cheese and butter together until smooth.
- Gradually add in the powdered sugar and remaining vanilla extract until well combined.
- Frost the cooled cakes, layering and coating completely with frosting.
- Let the frosted cake chill in the refrigerator for about an hour before serving.