The Ultimate Chocolate Peanut Butter Cookies (Magic Middles!)
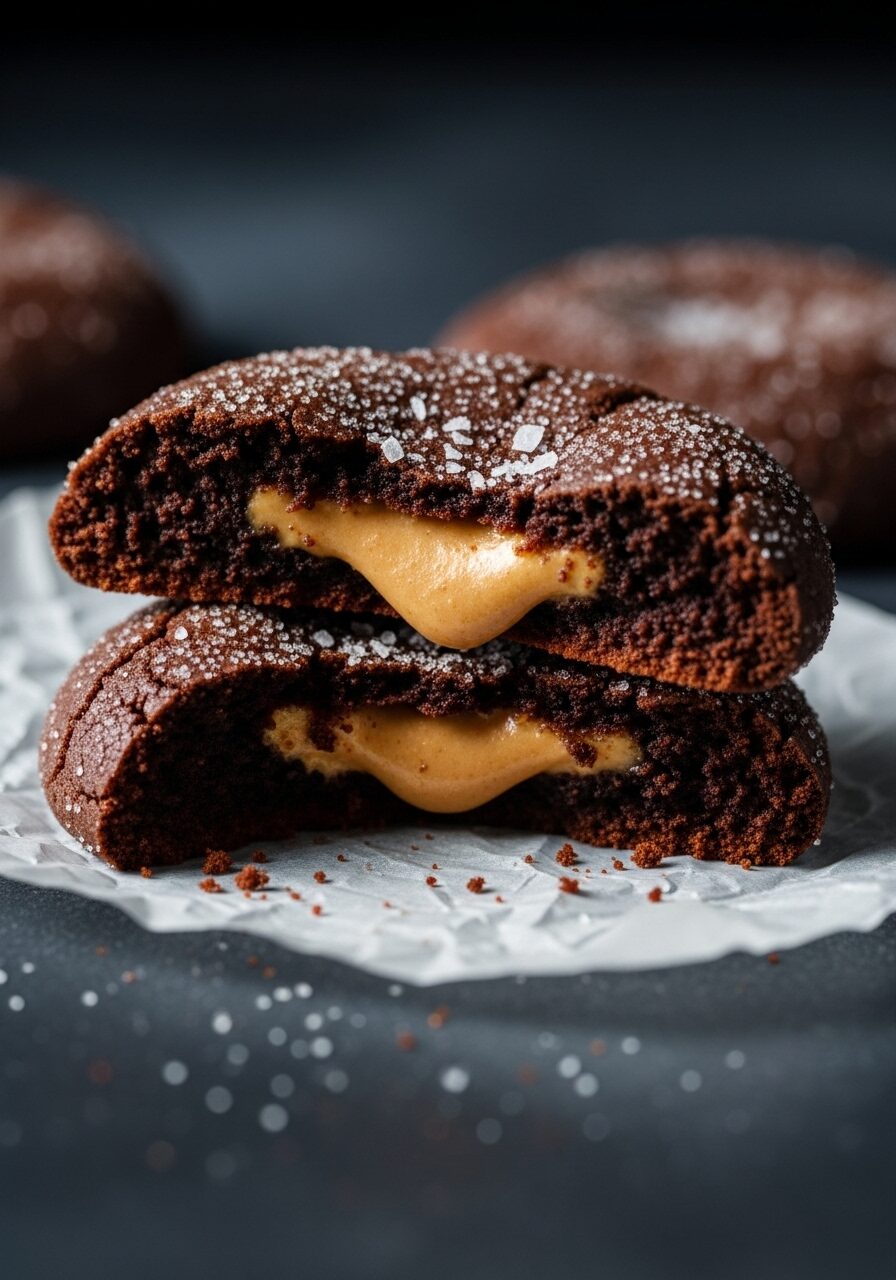
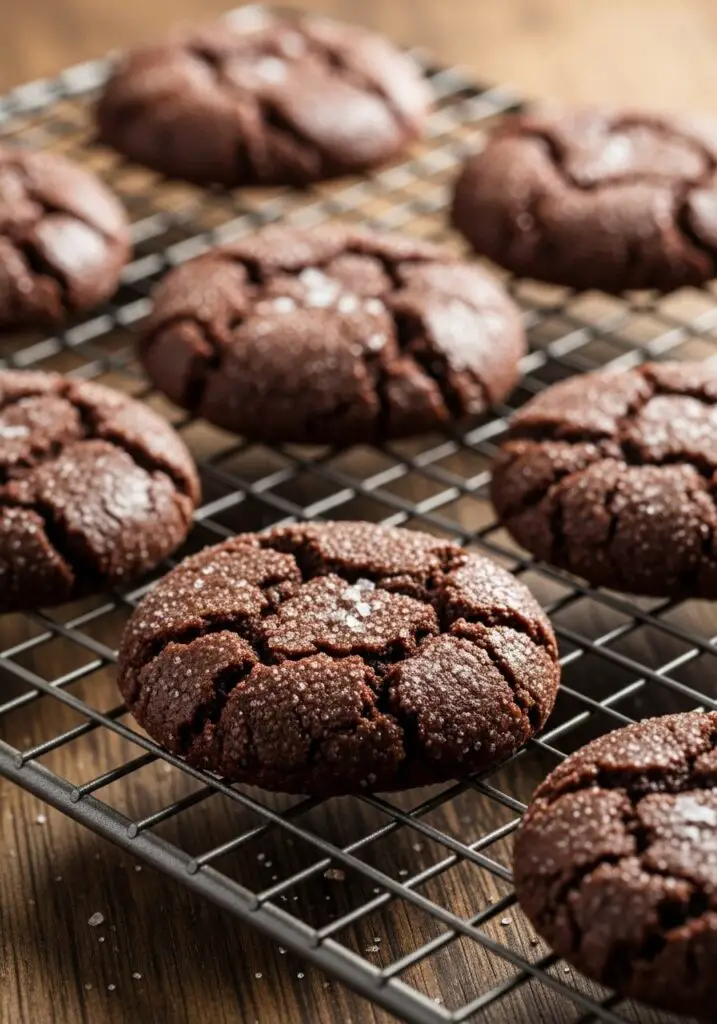
Imagine biting into what looks like a classic, rich chocolate cookie, sparkling with sugar, only to discover a secret, molten-lava-like center of creamy, dreamy peanut butter. That, my friends, is the pure, unadulterated delight of these Chocolate Peanut Butter Cookies, a nostalgic treat many of us remember as “Magic Middles.” This recipe takes me straight…
Imagine biting into what looks like a classic, rich chocolate cookie, sparkling with sugar, only to discover a secret, molten-lava-like center of creamy, dreamy peanut butter. That, my friends, is the pure, unadulterated delight of these Chocolate Peanut Butter Cookies, a nostalgic treat many of us remember as “Magic Middles.”
This recipe takes me straight back to my childhood, to the sheer wonder of a surprise-inside dessert. I was determined to recreate that magic at home, and after a lot of delicious “research,” I landed on this foolproof method. The secret isn’t one single ingredient; it’s the fun, hands-on process of wrapping a soft, fudgy chocolate dough around a perfect little ball of peanut butter filling. It’s an edible magic trick!
I promise you, these cookies are a true show-stopper. The rich, dark chocolate cookie is the perfect vessel for that salty-sweet, ultra-creamy peanut butter center. They’re a fun baking project that looks incredibly impressive but is surprisingly simple to master. They are, without a doubt, the ultimate treat for any true chocolate and peanut butter lover.
Get ready to master the art of the surprise-inside cookie and create a batch of the most talked-about treats on the block.

Why These “Magic Middle” Cookies Are Pure Bliss!
You are going to be absolutely obsessed with these cookies. They are a legend for a reason! Here’s why this recipe is a must-bake:
- The Ultimate Surprise Inside: The moment someone bites into one of these and discovers the creamy peanut butter center is pure joy. It’s a guaranteed “wow” moment!
- The Perfect Flavor Combination: The rich, slightly bitter chocolate cookie and the salty-sweet peanut butter filling are a match made in dessert heaven. It’s perfectly balanced.
- Incredibly Soft & Chewy Texture: The dough bakes up into a wonderfully soft, fudgy cookie that stays that way for days.
- A Fun Baking Project: Assembling these cookies is a fun, hands-on process. Wrapping the dough around the filling is so satisfying! It’s a great recipe to make on a cozy afternoon.
- They Look as Good as They Taste: Rolled in sparkling sugar with a final sprinkle of flaky salt, these cookies look incredibly special and gourmet.
Recipe Snapshot
| Prep Time | 45 minutes |
| Cook Time | 10 minutes |
| Total Time | 55 minutes |
| Servings | 28 cookies |
| Calories | Not Provided |
| Course | Dessert |
| Cuisine | American |
| Difficulty/Method | Intermediate / Baking |
Your Shopping List for This Magical Treat
This recipe is broken down into two simple, delicious components: the creamy filling and the rich chocolate cookie dough.
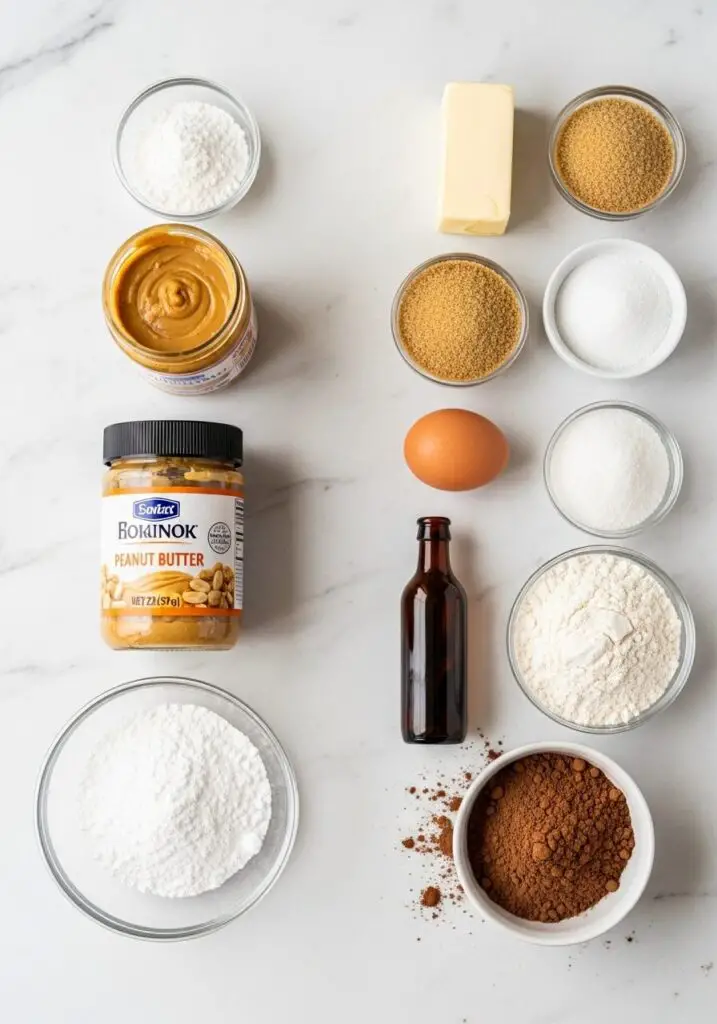
→ For the Peanut Butter Filling
- 3/4 cup unsweetened, salted peanut butter → A classic, creamy style (like Jif or Skippy) works best here, as it’s already firm.
- 3/4 cup powdered sugar → This sweetens the filling and gives it the perfect, smooth consistency.
→ For the Rich Chocolate Cookies
- 1/2 cup (1 stick) unsalted butter, room temperature → The key to a tender, flavorful cookie.
- 1/4 cup unsweetened, salted peanut butter → A little bit in the dough itself enhances the overall flavor.
- 1/2 cup granulated sugar & 1/2 cup light brown sugar → The combination provides sweetness and a soft, chewy texture.
- 1 large egg → Our binder!
- 1 teaspoon vanilla extract → A must for deep flavor.
- 3/4 teaspoon kosher salt & 1/2 teaspoon baking soda → For flavor and a little lift.
- 1/2 cup cocoa powder → Use a good quality, unsweetened cocoa for the richest chocolate flavor.
- 1 cup plus 5 tablespoons all-purpose flour → The perfect amount for a soft, workable dough.
- A pinch of flaky sea salt → The perfect, professional finishing touch!
- Extra granulated sugar → For that beautiful, sparkling coating.
Let’s Bake Some Magic! Your Step-by-Step Guide
Ready to create a truly special cookie? This process is so much fun. Let’s break it down.
Part 1: The Magic Peanut Butter Filling
- Prep the Peanut Butter: If you’re using a natural peanut butter where the oil separates, give it a very good stir and pop it in the freezer for about 15 minutes to firm up.
- Make the Filling: In the bowl of a stand mixer with the paddle attachment, combine the 3/4 cup of peanut butter and the powdered sugar. Mix on low speed, then increase to medium-high until it’s completely smooth and combined.
- Roll and Chill: Scoop out the filling into little 1-heaping-teaspoon-sized portions and roll them into 28 small balls. Place them on a parchment-lined plate or small baking sheet and pop them in the fridge to firm up while you make the cookie dough. This is a crucial step!
Part 2: The Rich Chocolate Cookie Dough
- Cream the Fats and Sugars: In the same mixer bowl (no need to clean it!), beat the softened butter, the 1/4 cup of peanut butter, and both sugars until the mixture is light and fluffy.
- Add Wet Ingredients: Add the egg and vanilla and continue to beat until everything is fluffy and well combined, scraping down the sides of the bowl as needed.
- Mix in the Dry: Add the salt, baking soda, and cocoa powder and mix until just incorporated. Finally, add the flour and mix on low speed until the flour is completely mixed in and a soft dough forms.
Part 3: Assemble, Bake, and Enjoy!
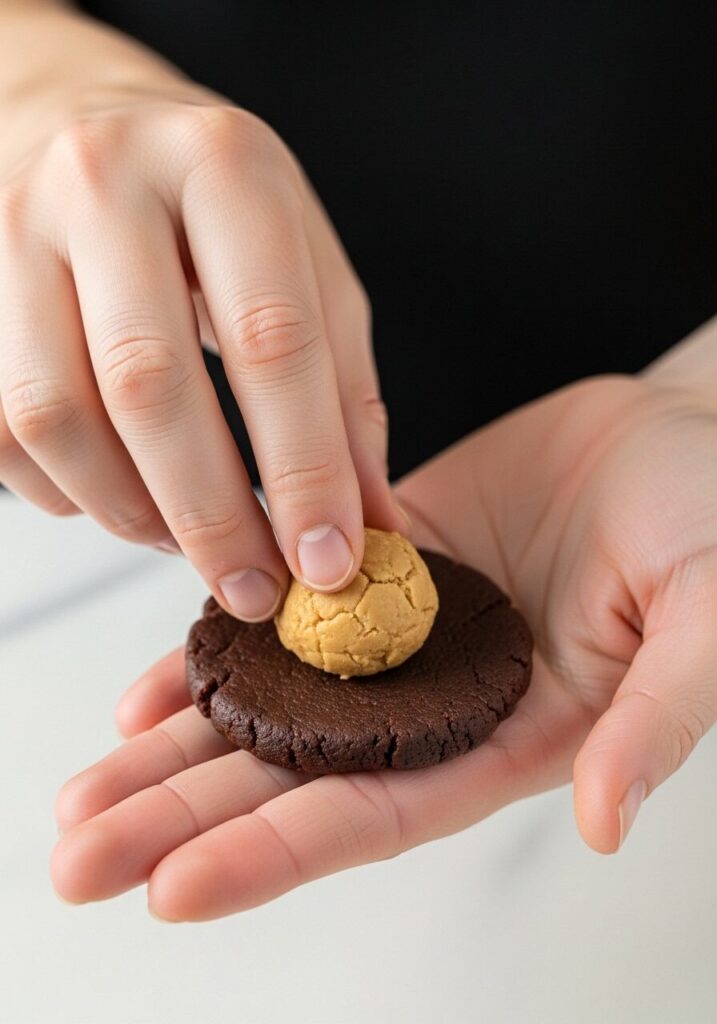
- Assemble the Cookies: Use a cookie scoop to portion out 1 tablespoon of the chocolate dough. Flatten it into a thin patty in your palm. Place one of the chilled peanut butter balls in the center. Now, gently wrap the chocolate dough up and around the peanut butter ball, pinching the seams to seal it completely. Roll it between your palms to smooth it out.
- Sugar Coat and Press: Roll the entire chocolate ball in a small bowl of granulated sugar until it’s coated. Place it on a plate or baking sheet. Repeat with all the dough and filling.
- Press and Bake: Preheat your oven to 350°F (180°C). Arrange the sugar-coated balls on a baking sheet a few inches apart. Using the flat bottom of a water glass, gently press each ball down until it’s a thick disc, about 1/4 inch thick. Sprinkle the tops with a tiny pinch of flaky sea salt and press it in gently.
- Bake to Perfection: Bake for 8 to 9 minutes, rotating the pan halfway through. The cookies will puff up but shouldn’t crack much. Let them cool on the baking sheet for a few minutes before transferring them to a wire rack to cool completely. They are delicate when warm!
WiseRecipes’ Top Tips for “Magic Middle” Mastery
These cookies have a few key steps. Follow these secrets and they’ll come out perfectly every time.
- Chilling the Filling is NOT Optional. This is the most important step! The peanut butter balls must be cold and firm. This makes them easy to handle and prevents them from melting and oozing out of the cookie as you try to wrap the dough around them.
- Don’t Be Afraid to Use Your Hands. The best way to wrap the dough around the filling is with your hands. The warmth from your palms will help the dough become pliable and seal perfectly around the peanut butter ball.
- The Glass Press is Key. These cookies don’t spread much on their own, so pressing them with a glass is essential to get that classic cookie shape and a nice, even thickness.
- Watch Them Like a Hawk. The visual cues for these cookies are subtle. You want to pull them out when they look puffed and set, but not necessarily dry or cracked. An extra minute can take them from perfectly soft to hard, so stay close to your oven!
- The Flaky Salt Finish. Don’t skip this! A tiny sprinkle of flaky sea salt on top of the rich, sweet cookie before baking is a pro-level move. It cuts the sweetness and makes the chocolate and peanut butter flavors sing.
Creative Twists: Delicious Ways to Customize the Magic
Once you’ve mastered the technique, you can stuff these cookies with all sorts of things!
- The “Reverse” Cookie: Make a peanut butter cookie dough and fill it with a chocolate ganache or a mini Hershey’s Kiss.
- Nutella-Stuffed: Swap the peanut butter filling for a frozen ball of Nutella. A truly decadent treat!
- Add Espresso Powder: A teaspoon of instant espresso powder in the chocolate cookie dough will make the chocolate flavor even deeper and more intense.
- Different Nut Butters: The filling would be amazing with almond butter or cashew butter.
- Add a Little Crunch: Mix some crispy rice cereal into the peanut butter filling for a crunchy center.
- Make it Spicy: Add a pinch of cayenne pepper to the chocolate cookie dough for a Mexican hot chocolate vibe.
- Holiday Version: Roll the cookies in red and green sparkling sugar for a festive Christmas treat.
- Make Cookie Bars: Press half the chocolate dough into an 8×8 pan, spread the peanut butter filling over it (leaving a border), and top with the remaining chocolate dough. Bake and slice into bars.
Keep Them Fresh! Storing Your Surprise-Inside Cookies
These cookies stay wonderfully soft for days, making them a great make-ahead treat.
- Room Temperature: Store the cooled cookies in an airtight container at room temperature. They will stay soft and delicious for up to a week.
- Freezing: These cookies freeze beautifully! You can freeze the baked cookies in a freezer-safe bag for up to 3 months. Even better, you can freeze the unbaked, fully assembled cookie balls. Just place them on a baking sheet to flash-freeze, then transfer to a bag. You can bake them straight from frozen—just add 1-2 minutes to the bake time.
Chocolate Peanut Butter ‘Magic Middle’ Cookies
Ingredients
Method
- In a mixer, combine 3/4 cup peanut butter and the powdered sugar until smooth.
- Form the mixture into 28 small balls (about 1 heaping teaspoon each). Place on a parchment-lined plate and refrigerate until firm while you make the cookie dough.
- In the same mixer bowl, cream the butter, 1/4 cup peanut butter, and both sugars until light and fluffy.
- Add the egg and vanilla and continue creaming until fluffy. Add the salt and baking soda, and mix. Add the cocoa powder and mix until just incorporated. Finally, add the flour and mix until a soft dough forms.
- Scoop 1 tablespoon of chocolate dough and flatten it in your palm. Place a chilled peanut butter ball in the center and wrap the chocolate dough around it, sealing it completely. Roll into a smooth ball.
- Roll the entire ball in granulated sugar. Repeat for all cookies.
- Preheat oven to 350°F (180°C). Place balls on a cookie sheet a few inches apart. Gently press each ball with the flat bottom of a glass until it’s a 1/4-inch thick disc.
- Sprinkle with flaky salt. Bake for 8 to 9 minutes, rotating the pan halfway through. The cookies will puff up but should not crack much.
- Let cool on the baking sheet for a few minutes before transferring to a wire rack to cool completely.
Notes
FAQs: Your “Magic Middle” Questions, Answered!
Help! My peanut butter filling is oozing out of the cookies!
Ah, the dreaded leakage! This almost always means one of two things: either your peanut butter filling wasn’t chilled and firm enough when you wrapped it, or you didn’t get a complete seal with the chocolate dough. Make sure the filling is very cold, and really take a moment to pinch the seams of the chocolate dough together before you roll it smooth.
Can I use natural, oily peanut butter?
For the filling, a more processed, firm peanut butter (like Jif or Skippy) is much easier to work with because it doesn’t separate. If you only have natural peanut butter, you MUST stir it extremely well and then chill or even freeze it until it’s very firm before making your filling balls.
My chocolate dough is really sticky. What should I do?
This is a soft dough by design! If it’s truly unmanageable, you can chill the dough for about 30 minutes to help it firm up. A little bit of flour on your hands can also help when you’re wrapping the balls, but try to use as little as possible to keep the cookies tender.
Do I have to press them with a glass?
Yes, I highly recommend it. These cookies don’t have a lot of spread, so if you bake them as balls, they will stay as thick, round domes. Pressing them flat with a glass gives them that classic cookie shape and ensures they bake evenly.
My Final Thoughts: The Best Kind of Magic
These Chocolate Peanut Butter “Magic Middle” Cookies are more than just a dessert; they are a delightful surprise and a fun project all in one. They are a delicious reminder that a little bit of hidden effort can create a truly magical result. I hope this recipe brings a little bit of that nostalgic joy and wonder into your kitchen!