The Ultimate White Chocolate Peppermint Macarons (Foolproof Guide!)
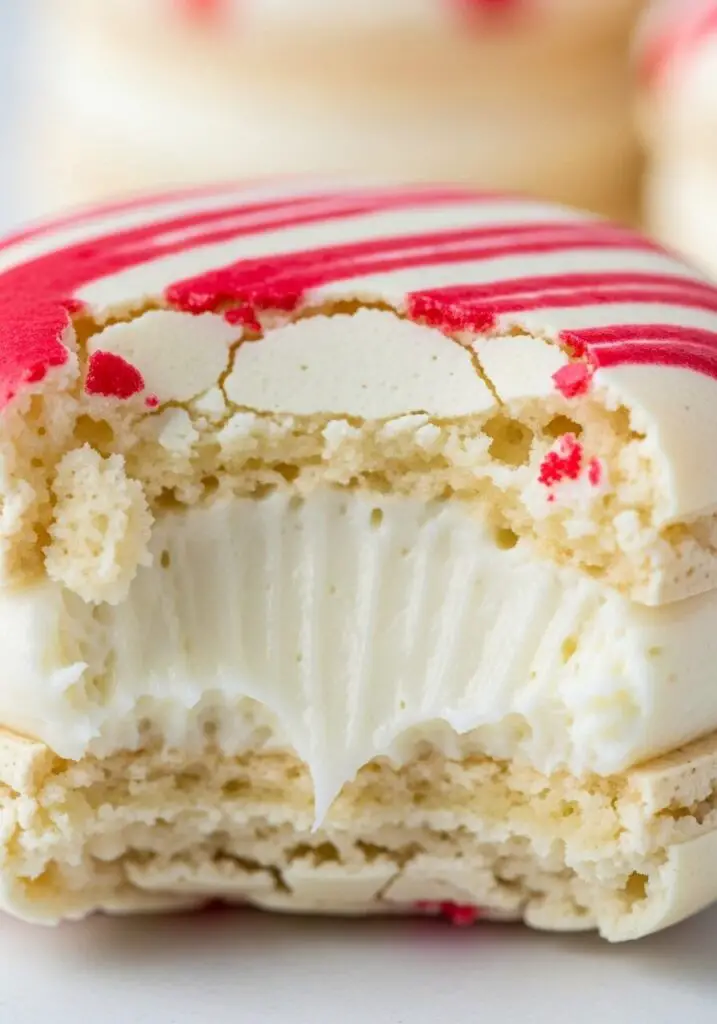
Imagine a delicate, crisp meringue shell that gives way to a perfectly chewy center, all sandwiching a rich, creamy white chocolate ganache infused with a bright, cool burst of peppermint. That, my friends, is the elegant magic of a perfect French macaron, and today, we’re giving it a festive, holiday makeover. These are, without a…
Imagine a delicate, crisp meringue shell that gives way to a perfectly chewy center, all sandwiching a rich, creamy white chocolate ganache infused with a bright, cool burst of peppermint. That, my friends, is the elegant magic of a perfect French macaron, and today, we’re giving it a festive, holiday makeover. These are, without a doubt, the most beautiful and delicious cookies you will make all season.
Here’s the thing about macarons: they have a reputation for being fussy and difficult. I used to be so intimidated by them! But after a lot of (delicious) trial and error, I’ve learned that it’s not about being a professional pastry chef; it’s about following a few key, non-negotiable steps. This recipe is my foolproof guide, breaking down the process into simple, manageable stages that will lead you to macaron success.
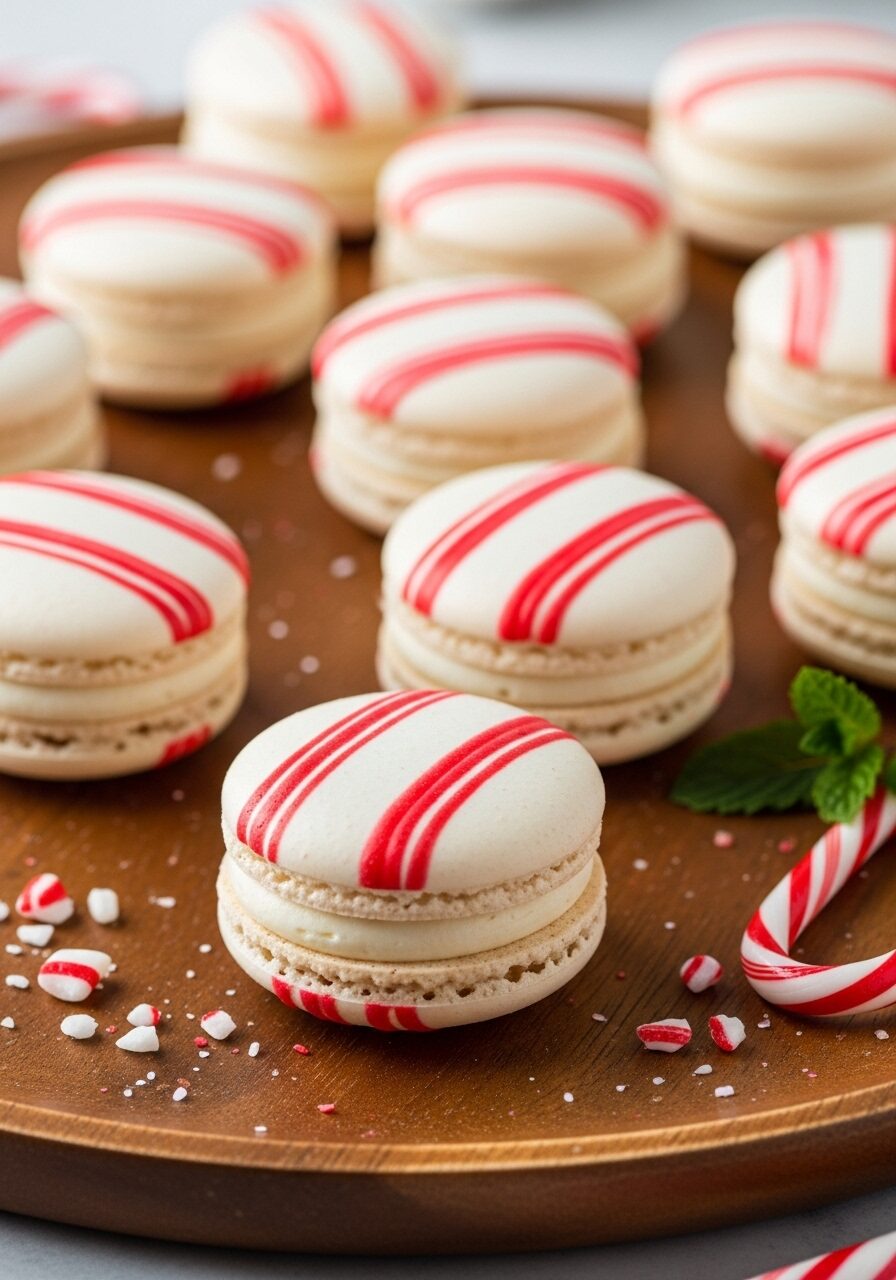
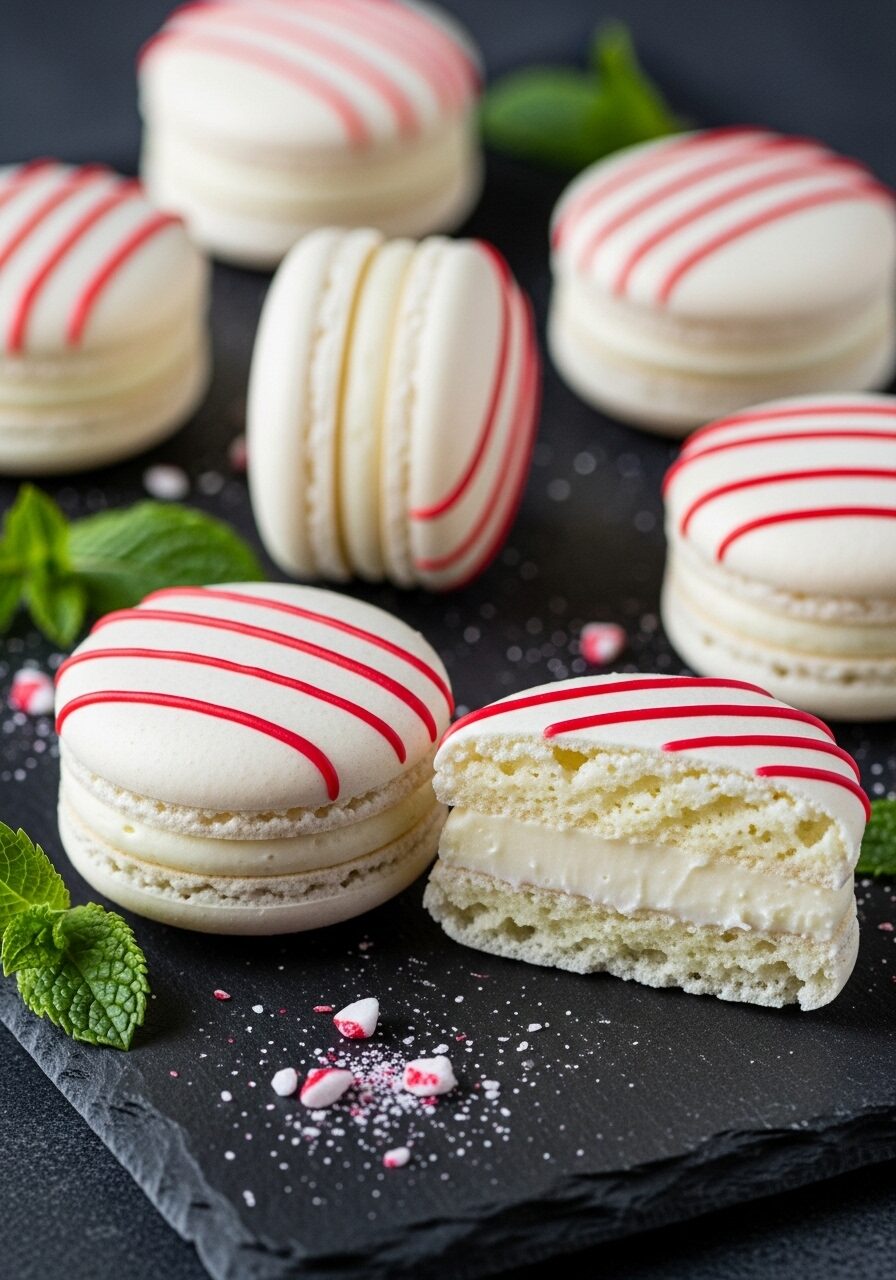
I promise you, there is no greater baking triumph than pulling a tray of perfect, smooth-topped macarons with those beautiful “feet” from your oven. The delicate peppermint-striped shells and the luscious white chocolate ganache are a match made in holiday heaven. They are a true show-stopper for any party, cookie exchange, or special gift.
Get ready to demystify the macaron and create a batch of stunning, professional-looking cookies that will have everyone convinced you’re a pastry genius.

Why You Absolutely Can (and Should!) Make These Macarons!
You are going to be so incredibly proud of these cookies. They are a true labor of love that is worth every single step. Here’s why this recipe is the one to try:
- A Step-by-Step Foolproof Guide: We’re breaking down the notoriously tricky macaron process into clear, easy-to-follow steps with all the visual cues you need for success.
- The Perfect Holiday Flavor: The combination of creamy white chocolate and cool, bright peppermint is a classic, elegant flavor pairing that’s perfect for the festive season.
- Stunningly Beautiful Results: The simple trick of painting stripes in the piping bag creates beautiful, candy-cane-striped shells that look incredibly professional and festive.
- The Ultimate Make-Ahead Treat: Macarons require an overnight “maturing” period in the fridge, which makes them the perfect dessert to prepare in advance of a party or event.
- That Incredible Texture: There’s nothing quite like the texture of a perfect macaron—that delicate, crisp outer shell, the chewy almond meringue, and the smooth, creamy filling. It’s a true delight!
Recipe Snapshot
| Prep Time | 30 minutes |
| Cook Time | 26 minutes |
| Rest & Mature Time | 12 hours 40 minutes |
| Total Time | 13 hours 36 minutes |
| Servings | 15-16 macarons |
| Calories | 189 kcal per macaron |
| Course | Dessert |
| Cuisine | French |
| Difficulty/Method | Advanced / Baking |
Your Shopping List for These Elegant Cookies
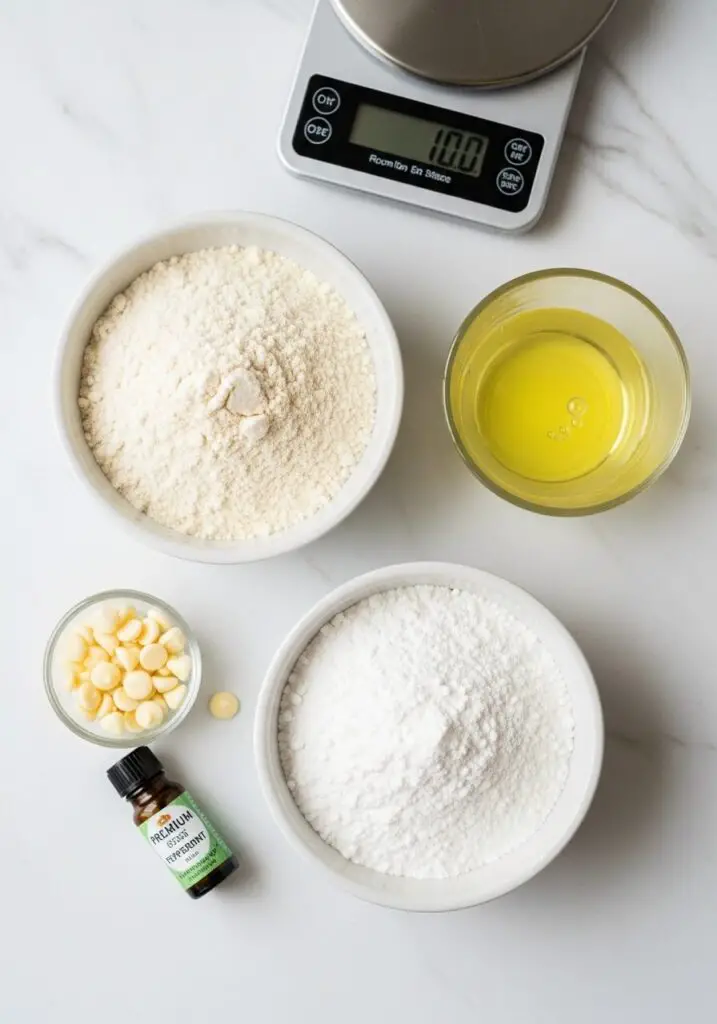
Macarons use a very specific set of ingredients. Precision is key, so a kitchen scale is your best friend here!
→ For the White Chocolate Peppermint Ganache
- ½ cup heavy cream → The rich base for our smooth filling.
- 1 ½ cups white chocolate chips → Use a good quality brand for the best melting and flavor.
- 1 to 2 drops peppermint extract → A little goes a long way!
→ For the Macaron Shells
- 1 ¼ cups (100g) blanched almond meal or super-fine almond flour → It must be blanched (skins removed) for smooth, perfect shells.
- ¾ cup (80g) powdered sugar → Also known as confectioners’ or icing sugar.
- 2 or 3 (80g) large egg whites → They MUST be at room temperature. This is non-negotiable!
- ¼ teaspoon cream of tartar → Helps to stabilize the egg whites for a strong meringue.
- ⅓ cup (80g) granulated sugar → For building a stable, glossy meringue.
- Distilled white vinegar → Not for the recipe, but for wiping down the bowl to ensure a fat-free environment for the meringue.
- Red food coloring → A gel-based coloring works best for painting the stripes.
Let’s Get Baking! Your Step-by-Step Macaron Guide
Ready to tackle the Mount Everest of cookies? Don’t worry, we’re going to break it down. Read through all the steps first, take a deep breath, and let’s go!
Part 1: The Luscious Ganache Filling
- Heat the Cream: In a small pot, heat the heavy cream over medium-high heat just until it comes to a gentle boil. Watch it closely!
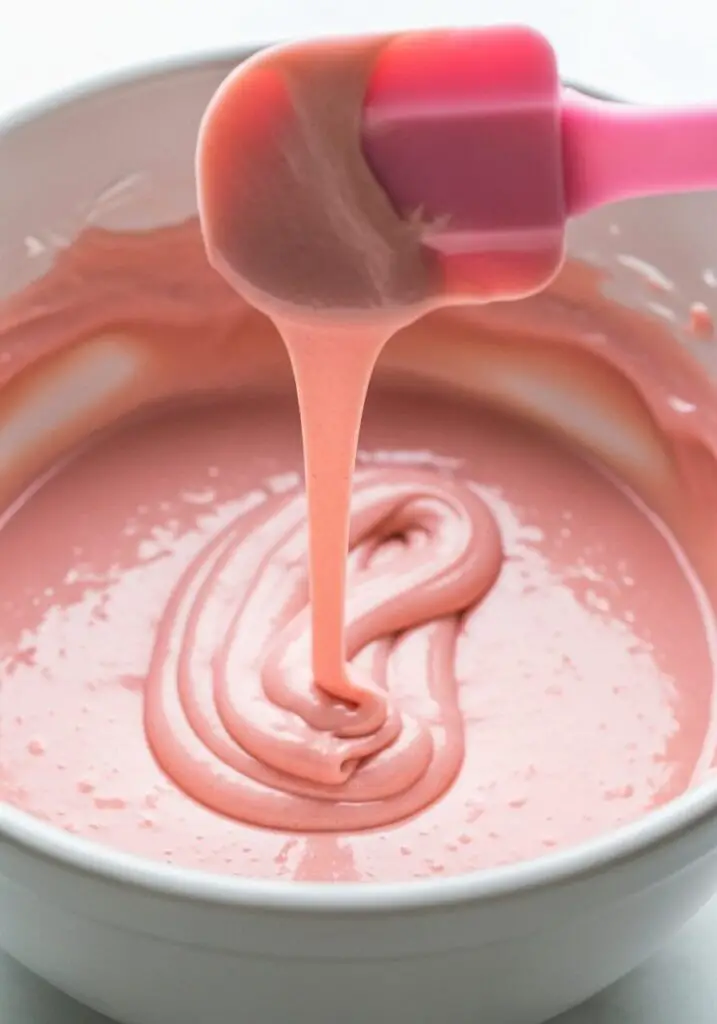
- Melt the Chocolate: Place your white chocolate chips in a heatproof bowl. Pour the hot cream directly over the chocolate and let it sit, untouched, for one full minute. Then, whisk until the ganache is completely smooth and glossy.
- Flavor and Set Aside: Stir in the peppermint extract. Set the finished ganache aside on the counter to cool and thicken while you make the shells. Do NOT put it in the fridge!
Part 2: The Perfect French Meringue
- Sift, Sift, Sift!: This is a crucial step! In a large bowl, sift the almond meal and powdered sugar together through a fine-mesh strainer. This aerates the mixture and removes any lumps, which is the secret to a smooth macaron top. Discard any large almond pieces left in the sifter.
- Prep Your Bowl: Dampen a paper towel with a little white vinegar and wipe down the inside of your mixing bowl and the whisk attachment. This removes any trace of fat, which is the mortal enemy of a stable meringue.
- Whip the Egg Whites: Add your room-temperature egg whites to the clean bowl. Using an electric mixer on a medium-low speed, whip for about 3 minutes until they are foamy but not holding any peaks.
- Build the Meringue: Add the cream of tartar and continue whisking for another 3 minutes. Then, with the mixer still running, slowly sprinkle in the granulated sugar, one tablespoon at a time. Once all the sugar is in, increase the speed to medium and whip for about 5 more minutes until the meringue is thick, white, and very glossy. You’re looking for stiff peaks that hold their shape but have a slight bend at the very tip when you lift the whisk.
Part 3: The “Macaronage” (The Make-or-Break Step)
- Fold in the Dry Ingredients: Add one-third of your sifted almond/sugar mixture to the meringue. Using a rubber spatula, gently fold it in. Repeat twice more with the remaining dry ingredients until everything is just combined.
- The “Smear”: Now, this is the key part, known as the “macaronage.” Take your spatula and press the batter against the side of the bowl, then scoop it up from the bottom and fold it over. Repeat this smearing and folding motion to gently deflate some of the air.
- Test for the “Lava Flow”: After about 5-6 folds, test the batter. Lift your spatula and let the batter drizzle off. It should fall in a continuous, thick ribbon, like slow-moving lava or honey. You should be able to draw a figure 8 with the ribbon without it breaking. The ribbon should sink back into the main batter within about 10-20 seconds. If it’s too stiff, do a few more folds and test again. This is the most important step!
Part 4: Pipe, Rest, and Bake!
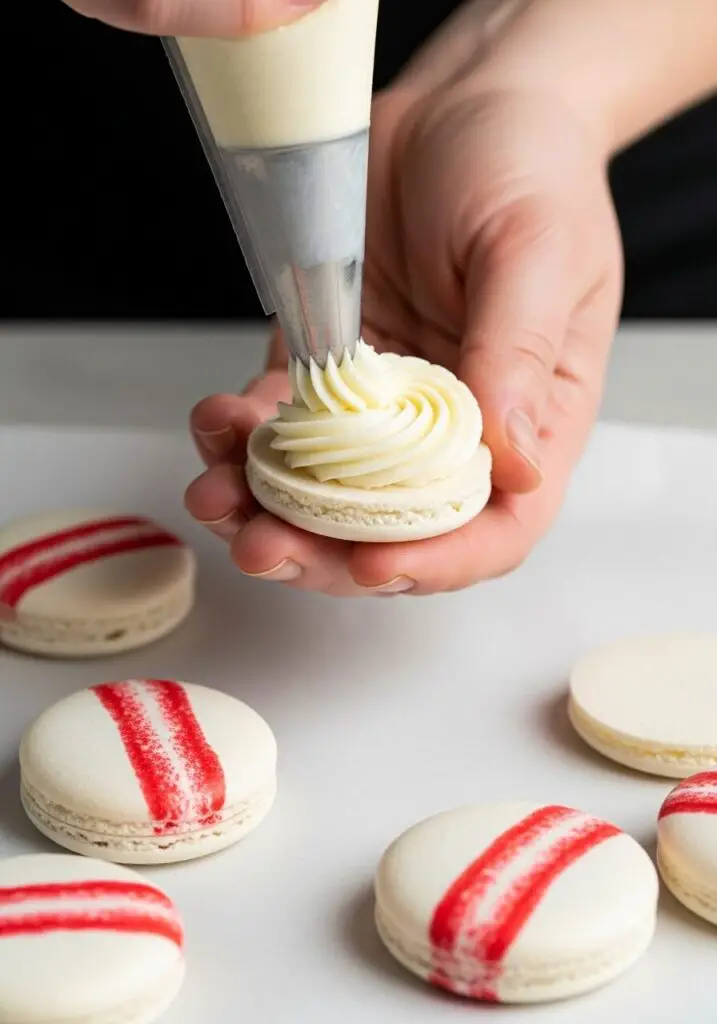
- Prep Your Piping Bag: Fit a large pastry bag with a small round tip (#12 is perfect). To create the stripes, use a small, clean paintbrush to paint 3 or 4 stripes of red gel food coloring on the inside of the bag, from the tip upwards. Gently fill the bag with your macaron batter.
- Pipe the Shells: On a baking sheet lined with parchment paper or a silicone mat, pipe 1 to 1.5-inch circles, holding the bag straight up and down.
- Tap and Rest: Firmly tap the baking sheet on the counter a few times to release any air bubbles. Let the piped shells rest at room temperature for 30-40 minutes (or up to an hour if it’s humid). This is another CRUCIAL step. They are ready to bake when they’ve formed a dry “skin” and you can gently touch one without any batter sticking to your finger.
- Bake!: Bake one sheet at a time in a preheated 300°F (150°C) oven for about 13 minutes. They are done when the tops don’t wiggle from the “feet” (the frilly bottom part) when you gently nudge one.
- Cool Completely: Let the shells cool completely on the baking sheet before you even think about trying to remove them.
Part 5: Assemble and Mature
- Fill and Sandwich: Match up your cooled shells into similar-sized pairs. Pipe a small dollop of the peppermint ganache onto the flat side of one shell and gently sandwich it with its partner.
- Mature!: This is the final secret to the perfect macaron texture. Place the filled macarons in an airtight container in the refrigerator for at least 12 hours (ideally 24). This allows the filling to soften the inside of the shell, creating that signature crisp-then-chewy texture. Let them sit at room temperature for about 20 minutes before serving.
WiseRecipes’ Top Tips for Macaron Mastery
I have made many, many failed batches so you don’t have to. These are the non-negotiable rules for success.
- Use a Kitchen Scale. I cannot stress this enough. Macarons are a science, and baking is all about ratios. Measuring your almond flour, sugars, and egg whites by weight is the single most important thing you can do to ensure consistent results.
- Room Temperature Egg Whites are a MUST. Cold egg whites will not whip up properly into a stable meringue. Separate your eggs and let the whites sit on the counter for at least 30 minutes before you begin.
- Do NOT Skip Sifting. Sifting the almond flour and powdered sugar together is what gives you those coveted, perfectly smooth macaron tops. Any lumps or large almond pieces will ruin the finish.
- The “Resting” Period is Crucial. Letting the piped shells rest and form a dry skin before baking is what helps them rise upwards and develop their signature “feet.” If you skip this, they will likely crack and spread.
- The Final “Maturing” Step is Magic. I know you’ll want to eat them right away, but that overnight rest in the fridge is what transforms them from two separate crisp cookies with filling into one cohesive, perfectly textured macaron. It’s so worth the wait.
Keep Them Fresh! Storing Your Beautiful Macarons
Macarons are divas, and they need to be stored properly to maintain their perfect texture.
- Refrigerator: The finished, matured macarons must be stored in an airtight container in the refrigerator. They are at their absolute best on days 2 and 3 and will keep for up to 5 days.
- Serving: For the best texture and flavor, take the macarons out of the refrigerator about 20-30 minutes before you plan to serve them to let them come to room temperature.
- Freezing: Macarons freeze beautifully! You can freeze the filled macarons in an airtight container for up to 1 month. Let them thaw in the refrigerator for a few hours before bringing them to room temperature to serve.
White Chocolate Peppermint French Macarons
Ingredients
Equipment
Method
- In a small pot, bring the heavy cream to a gentle boil. Pour the hot cream over the white chocolate chips in a heatproof bowl. Let sit for 1 minute, then whisk until smooth.
- Stir in the peppermint extract. Set aside at room temperature to cool and thicken.
- Preheat oven to 300°F (150°C). Sift the almond meal and powdered sugar together into a large bowl.
- Wipe your mixing bowl and whisk with a paper towel dampened with vinegar. Add the room temperature egg whites and whip on medium-low until foamy (about 3 mins).
- Add the cream of tartar and whisk for 3 minutes. Slowly sprinkle in the granulated sugar. Increase speed to medium and whisk for about 5 minutes, until the meringue is glossy and holds stiff peaks with a slight bend at the tip.
- Fold the dry ingredients into the meringue in three additions. After it is combined, use a spatula to press and scrape the batter against the side of the bowl 5-6 times to deflate some air (the macaronage). The batter should flow off the spatula like slow-moving lava.
- Prepare a piping bag with a #12 tip. Paint red food coloring stripes inside the bag. Fill with batter.
- Pipe 1 to 1.5-inch circles onto parchment-lined baking sheets. Tap the sheets firmly on the counter to release air bubbles.
- Let the shells rest at room temperature for 30-40 minutes, until a dry skin forms and they are not sticky to the touch.
- Bake one sheet at a time for 13 minutes, until the tops do not wiggle from the ‘feet’. Let cool completely on the baking sheet before removing.
- Pipe a dollop of the ganache onto the flat side of one shell and sandwich with another. Repeat with all shells.
- Place the filled macarons in an airtight container in the refrigerator for at least 12 hours to mature. Bring to room temperature for 20 minutes before serving.
Notes
FAQs: Your Macaron Questions, Answered!
Why did my macaron shells crack?
Cracked tops are the arch-nemesis of the macaron baker! It’s usually caused by one of three things: not resting the shells long enough to form a proper skin, having too much air left in the batter (you need to tap the trays firmly!), or an oven that is too hot.
My macarons don’t have “feet”! What happened?
The lack of those signature frilly “feet” is most often due to the batter being too wet or undermixed during the macaronage stage. It could also happen if you didn’t let the shells rest long enough to form a skin, which forces them to spread out instead of up.
Can I make these on a rainy or humid day?
You can, but you need to be aware that humidity is the enemy of meringue! On a humid day, your piped shells will take much longer to rest and form their skin (sometimes over an hour), and your meringue might be a little softer. If you’re a beginner, I highly recommend trying them for the first time on a dry day.
Can I use a different filling?
Absolutely! This is a great base recipe. You could fill these shells with a simple peppermint buttercream, a dark chocolate ganache, or your favorite jam. Just make sure the filling isn’t too wet, as that can make the shells soggy.
My Final Thoughts: Your Sweetest Baking Victory
There is no feeling quite like achieving a batch of perfect, beautiful French Macarons. They are a true labor of love, and this festive white chocolate peppermint version is one of the most rewarding bakes you’ll undertake. I hope this guide gives you the confidence to tackle this incredible project and create some truly stunning and delicious holiday memories!